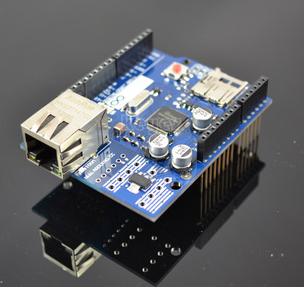
Ethernet Shield is based on WIZnet’s W5100 TCP/IP Chip. It supports 4 TCP socket connections simultaneously. It is compatible with Arduino Mega 2560 /Uno R3 and includes micro-SD socket connectors to save the files from network. As it uses SPI bus, you can control it only with 4 signals.

“Arduino communicates with the shield using the SPI bus. This is on digital pins 11, 12, and 13 on the Uno and pins 50, 51, and 52 on the Mega. On both boards, pin 10 is used as SS. On the Mega, the hardware SS pin, 53, is not used to select the W5100, but it must be kept as an output or the SPI interface won’t work.”
In this posting, we are going to use Arduino Uno as a platform board, and Ethernet library example provided by IDE.


If you open WebServer example, you can see below codes.
#include <SPI.h>
#include <Ethernet.h>
// Enter a MAC address and IP address for your controller below.
// The IP address will be dependent on your local network:
byte mac[] = {
0xDE, 0xAD, 0xBE, 0xEF, 0xFE, 0xED };
IPAddress ip(192,168,10,177);
// Initialize the Ethernet server library
// with the IP address and port you want to use
// (port 80 is default for HTTP):
EthernetServer server(80);
void setup() {
// Open serial communications and wait for port to open:
Serial.begin(9600);
// start the Ethernet connection and the server:
Ethernet.begin(mac, ip);
server.begin();
Serial.print(“server is at “);
Serial.println(Ethernet.localIP());
}
void loop() {
// listen for incoming clients
EthernetClient client = server.available();
if (client) {
Serial.println(“new client”);
// an http request ends with a blank line
boolean currentLineIsBlank = true;
while (client.connected()) {
if (client.available()) {
char c = client.read();
Serial.write(c);
// if you’ve gotten to the end of the line (received a newline
// character) and the line is blank, the http request has ended,
// so you can send a reply
if (c == ‘n’ && currentLineIsBlank) {
// send a standard http response header
client.println(“HTTP/1.1 200 OK”);
client.println(“Content-Type: text/html”);
client.println(“Connection: close”); // the connection will be closed after completion of the response
client.println(“Refresh: 5″); // refresh the page automatically every 5 sec
client.println();
client.println(“<!DOCTYPE HTML>”);
client.println(“<html>”);
// output the value of each analog input pin
for (int analogChannel = 0; analogChannel < 6; analogChannel++) {
int sensorReading = analogRead(analogChannel);
client.print(“analog input “);
client.print(analogChannel);
client.print(” is “);
client.print(sensorReading);
client.println(“<br />”);
}
client.println(“</html>”);
break;
}
if (c == ‘n’) {
// you’re starting a new line
currentLineIsBlank = true;
}
else if (c != ‘r’) {
// you’ve gotten a character on the current line
currentLineIsBlank = false;
}
}
}
// give the web browser time to receive the data
delay(1);
// close the connection:
client.stop();
Serial.println(“client disonnected”);
}
}
If you use this code, the Ethernet shield will operate as a web server. You can check 6 analog port values on the web page.
#include <SPI.h>
#include <Ethernet.h>
As Ethernet shield is controlled by SPI bus, you need to add the SPI library & Ethernet library.
IPAddress ip(192,168,10,177);
Input the IP address you will assign to the Shield.

If the ping reply is normally received, the physical connection is correctly established.
EthernetServer server(80);
It initializes the Ethernet server library and set the http default port as 80.
Ethernet.begin(mac, ip);
server.begin();
It starts the Ethernet & server connection.
EthernetClient client = server.available();
It checks ‘incoming’ from the client. If there is an ‘incoming’ from a client, it creates the connection with a client. As you see below, if the connection is correctly established, below message is displayed in the serial terminal.

Input IP address at the Internet explorer.

You can check the value of the analog port.
client.println(“Refresh: 5″); // refresh the page automatically every 5 sec
The refresh period is set as 5 seconds. You can change the period.
COMMENTS