Control relays over the Internet with Arduino in chapter forty-seven of a series originally titled “Getting Started/Moving Forward with Arduino!” by John Boxall

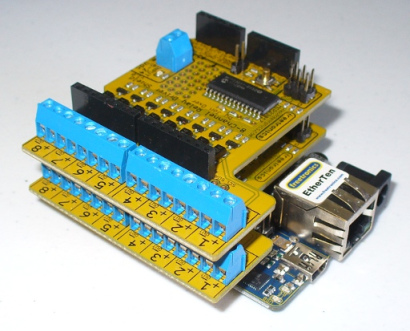
In this article we’re going to look at controlling relays over the Internet. In doing so you will then be able to turn almost anything on and off as long as you have http access on an Internet-enabled device. Why would you want to do this? Connect an outdoor light – and turn it on before arriving home. Control the power to your TV setup – then you can control childrens’ TV viewing at a whim. Control farm water pumps without getting out of the truck. We’ll break this down into two stages. First we’ll explain how the RELAY8: relay control shield works and control it locally, then control it remotely using the teleduino service. We will be using Arduino IDE v1.0.1.
// Example 47.1
#include "Wire.h" // for I2C bus
#define I2C_ADDR 0x20 // 0x20 is the address with all jumpers removed
void setup()
{
 Wire.begin(); // Wake up I2C bus
 // Set I/O bank A to outputs
 Wire.beginTransmission(I2C_ADDR);
 Wire.write(0x00); // IODIRA register
 Wire.write(0x00); // Set all of bank A to outputs
 Wire.endTransmission();
}
int period = 500;
void loop()
{
 byte relay = 1;
 for (int i=1; i<9; i++)
 {
 // turn on relay
 Wire.beginTransmission(I2C_ADDR);
 Wire.write(0x12); // Select bank A
 Wire.write(relay); // Send value to bank A
 Wire.endTransmission();
 delay(period);
// turn off all relays
 Wire.beginTransmission(I2C_ADDR);
 Wire.write(0x12); // Select bank A
 Wire.write(0); // Send value to bank A
 Wire.endTransmission();
 delay(period);

 relay = relay * 2; // move to next relay
 }
}
For more information : http://tronixstuff.com/2012/09/14/internet-controlled-relays-with-teleduino-and-freetronics-relay8/
COMMENTS