Here is a fun project to log Arduino data directly to the Google Cloud using your local network without any middle tier. That is, your data goes right from the Arduino and then out to Google to be logged as a Nimbits Data Point.
You may want to download and setup a copy of the Nimbits Data Logger Server on your own app engine account. Learn More Here
Nimbits is a free, open source data logging server. You can use the public server (with some limitations) on app.nimbits.com or setup your own running instance.
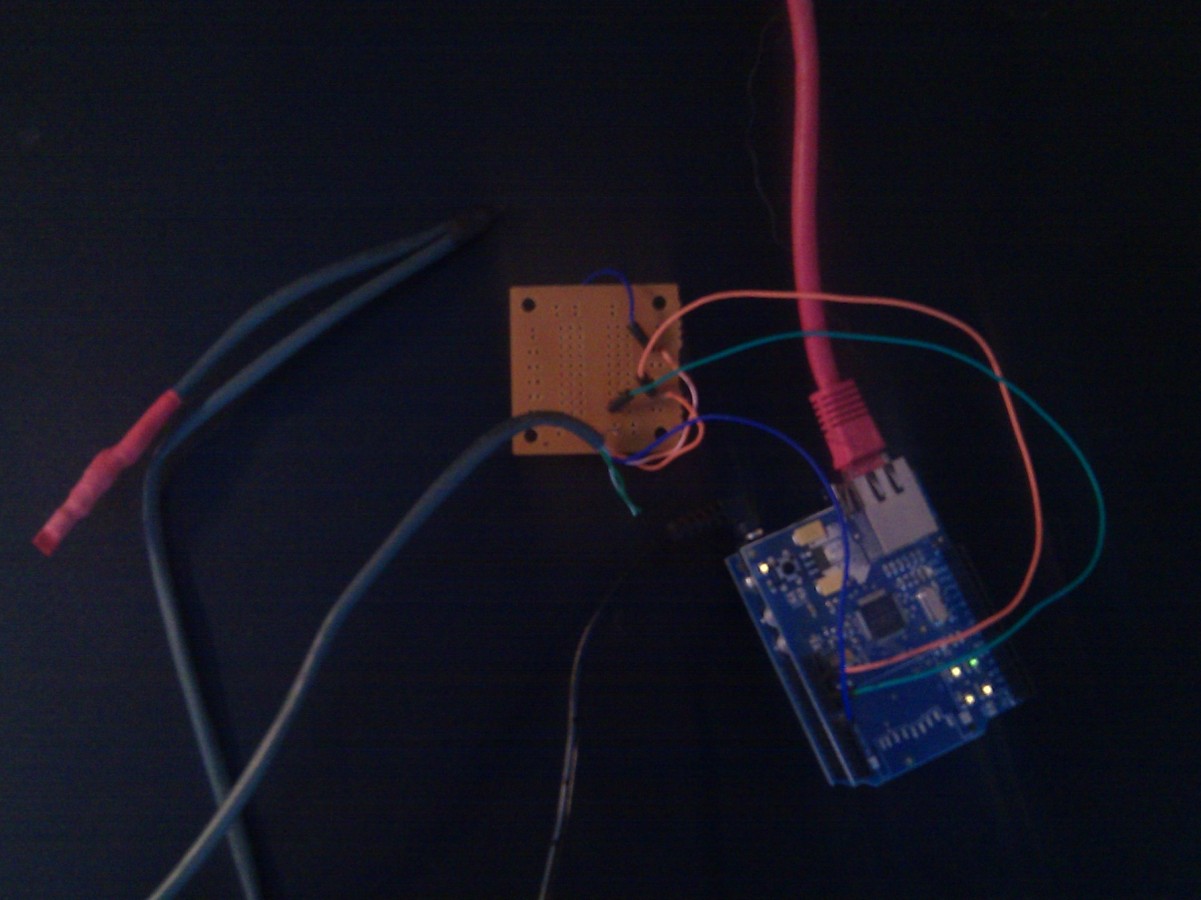
The circuit is very simple and only requires an LM35 temperature sensor and three wires. I went as far as to waterproof my LM35 by soldering it to the end of a cat5 cable and then sealing it in shrink wrap tubing. This is then connected to the ground, 5v and analogue pin 0. There are many examples of this circuit online like this one: http://pscmpf.blogspot.com/2008/12/arduino-lm35-sensor.html

Here is all of the Arduino code you need to feed your device readings into the Cloud. You’ll just need to modify the service url with your server secret (if you are running your own server) or make your point public, and provide an email and user key.
This code posts the temp reading to google with the host header nimbits1.appspot.com. If you are using the public nimbits server then you keep that. If you set up your own copy of Nimbits on your app engine account. You just replace nimbits1 with your app id.
Because we are proving the host header, we can send this request to google.com’s IP and our request will be relayed to the correct service. From there, we can configure nimbits to relay out data to any other url, facebook or twitter.
#include <SPI.h>

#include  <Ethernet.h>

byte mac[] = { 0xDE, 0xAD, 0xBE, 0xEF, 0xFE, 0xED };
byte ip[] = { 192, 168, 1, 17 }; // a valid IP on your LAN
byte server[] =  {72, 14, 204, 104}; // Google.com or Appspot.com's IP
Client client(server, 80);
int pin = 0; // analog pin
int tempc = 0,tempf=0; // temperature variables
int samples[8]; // variables to make a better precision
int i;


void setup()
{
  Ethernet.begin(mac, ip);
  Serial.begin(9600);
}
void loop()
{
  for(i = 0;i<=7;i++)
  {
    samples[i] = ( 5.0 * analogRead(pin) * 100.0) / 1024.0;
    tempc = tempc + samples[i];
    delay(1000);
  }
  tempc = tempc/8.0;
  tempf = (tempc * 9)/ 5 + 32;
  tempc = 0;
  String s = String(tempf,DEC);
  if (client.connect()) {
     client.println("GET /service/currentvalue?value=" + s + "&point=test&email=bsautner@gmail.com&format=double&secret=yournimbitssecet HTTP/1.1");
     client.println("Host:nimbits1.appspot.com");  //here is your app engine url - app id with appspot.com
     client.println("Accept-Language:en-us,en;q=0.5");
     client.println("Accept-Encoding:gzip,deflate");
     client.println("Connection:close");
     client.println("Cache-Control:max-age=0");
     client.println();
     client.stop();
  }

}
Source : http://nimbits.blogspot.kr/2010/11/data-in-connect-arduino-to-cloud.html
COMMENTS