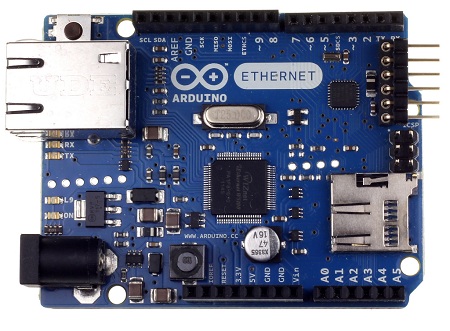
There is not much tutorial on the web that mentioning how to build a simple Web server on the Arduino Ethernet Shield. For beginner, this is a introduction from the arduino.cn for the quickly understand the parameters and usage of a simple Web Server. Official Arduino Ethernet Shield is using the WIZnet W5100; now there are a lot of new Arduino Ethernet board using W5500 in the market. Following routines are also applicable.

This tutorial suitable for using with WIZnet w5100 / w5500 the Arduino controller.
Program 1
Here we use a program Arduino Ethernet to create a simple web server, when the server receives a request sent from the web browser, the server will send a response message, than the browser will receive the response message, HTML text will be converted into the text showing in the web page. This allows information obtain from the sensor to be displayed on the web page, on every computer or other mobile devices in the network, web browser on any platform can get the data from the sensors.
/*
OpenJumper WebServer Example
Establish an Arduino server displaying sensor information
[url=http://www.openjumper.com/]http://www.openjumper.com/[/url]
[url=http://x.openjumper.com/ethernet/]http://x.openjumper.com/ethernet/[/url]
*/

#include <SPI.h>
#include <Ethernet.h>

// Set the MAC address、IP address
// IP address need to refer to your local network configuration
byte mac[] = {
  0xDE, 0xAD, 0xBE, 0xEF, 0xFE, 0xED };
IPAddress ip(192,168,1,177);

// Initialize Ethernet Library
// HTTP default port is 80
EthernetServer server(80);

void setup() {
// Initialize serial port
  Serial.begin(9600);

  // Open ethernet connection and initialization for the server
  Ethernet.begin(mac, ip);
  server.begin();
  Serial.print("server is at ");
  Serial.println(Ethernet.localIP());
}

void loop() {
  // monitor client date
  EthernetClient client = server.available();
  if (client) {
    Serial.println("new client");
    // a HTTP request must have character return at the end
    boolean currentLineIsBlank = true;
    while (client.connected()) {
      if (client.available()) {
        char c = client.read();
        Serial.write(c);
        // If receive empty line, HTTP request will be ended and sent out the message
        if (c == '\n' && currentLineIsBlank) {
          // Send standard HTTP reply
          client.println("HTTP/1.1 200 OK");
          client.println("Content-Type: text/html");
          client.println("Connection: close");
          client.println();
          client.println("<!DOCTYPE HTML>");
          client.println("<html>");
          // added a meta refresh tag, browser will refresh every 5 seconds
          // If this refresh rate is too high,the web page may be hanged
          client.println("<meta http-equiv=\"refresh\" content=\"5\">");
          // print out the every data value from the analog port
          for (int analogChannel = 0; analogChannel < 6; analogChannel++) {
            int sensorReading = analogRead(analogChannel);
            client.print("analog input ");
            client.print(analogChannel);
            client.print(" is ");
            client.print(sensorReading);
            client.println("<br />");
          }
          client.println("</html>");
          break;
        }
        if (c == '\n') {
          // Started a new line
          currentLineIsBlank = true;
        }
        else if (c != '\r') {
          // If there is already got a character
          currentLineIsBlank = false;
        }
      }
    }
    // waiting the browser receiving data
    delay(1);
    // close the connection
    client.stop();
    Serial.println("client disonnected");
  }
}
After downloading the program, through the browser, IP address access ArduinoEthernet located (such as program set the IP address 192.168.1.177), you can see in Figure below.

The web page is displaying the analog value get from A0 to A5,you can also edit the above program to display other types of data.
The above program is modified from Arduino IDE comes with the Web Server sample code. It works by constantly refreshing the page to get data the from the Arduino web server. In fact, nowadays most web developers are using ajax to communicate with the server without refreshing the page. I’ve wrote an ajax + arduino web server examples.
Program 2
In order to make this project, we need to prepare something below:

The HTML part code are listed below:
<!--Sample Arduino Web Control -->
<!--奈何col  2014.12.24 v3.0 -->
<!--学了半小时js,求别吐槽 -->
<html>
<head>
<meta charset="UTF-8">
<title>OpenJumper!Arduino Web Server</title>
<script type="text/javascript">
function send2arduino(){
        var xmlhttp;
        if (window.XMLHttpRequest)
        {// code for IE7+, Firefox, Chrome, Opera, Safari
                xmlhttp=new XMLHttpRequest();
        }
        else
        {// code for IE6, IE5
                xmlhttp=new ActiveXObject("Microsoft.XMLHTTP");
        }

        element=document.getElementById("light");
        if (element.innerHTML.match("Turn on"))
          {
                  element.innerHTML="Turn off";
                  xmlhttp.open("GET","?on",true);
          }
        else
          {
                  element.innerHTML="Turn on";
                  xmlhttp.open("GET","?off",true);
          }
        xmlhttp.send();
}
function getBrightness(){
        var xmlhttp;
        if (window.XMLHttpRequest)
        {// code for IE7+, Firefox, Chrome, Opera, Safari
                xmlhttp=new XMLHttpRequest();
        }
        else
        {// code for IE6, IE5
                xmlhttp=new ActiveXObject("Microsoft.XMLHTTP");
        }
        xmlhttp.onreadystatechange=function()
    {
            if (xmlhttp.readyState==4 && xmlhttp.status==200)
            {
                    document.getElementById("brightness").innerHTML=xmlhttp.responseText;
            }
    }
        xmlhttp.open("GET","?getBrightness",true);
        xmlhttp.send();
}
window.setInterval(getBrightness,5000);
</script>
</head>
<body>
<div align="center">
<h1>Arduino Web Server</h1>
<div>brightness:</div>
<div id="brightness">??</div>
<button id="light" type="button">Turn on</button>
<button type="button">About</button>
</div>
</body>
</html>
In this page, the first id is the button tag of light, used to control the light switch. When clicked, it will call the function send2arduino(), the browser send GET request with “? On” or “? Off” to the Arduino server using AJAX. Arduino server will switch the lamp on or off depending on the request. The function getBrightness() will be executed periodically via a timer, once per second. Each time the Arduino server sends GET request with “? GetBrightness” using AJAX. The Arduino will read the data from the sensor after receiving the request and return the value to the browser. Meanwhile the function getBrightness() will return the data by the DIV tag with id=”brightness”.
In addition, we connect the A0 pin to a photosensitive module for collecting indoor lighting level; D2-pin connect to LED module. Sample code below:
[C++]/*
OpenJumper WebServer Example
[url]http://www.openjumper.com/ethernet/[/url]
Display the light level and control lamp switch to Arduino Server via web and mobile,
A0 pin to a photosensitive module for collecting indoor lighting level; D2-pin connect to LED module。
奈何col 2014.12.25
*/
#include <SPI.h>
#include <Ethernet.h>
byte mac[] = { 0xDE, 0xAD, 0xBE, 0xEF, 0xFE, 0xED };
IPAddress ip(192,168,1,177);
EthernetServer server(80);
EthernetClient client;
String readString="";
int Light=2;
int Sensor=A0;
void setup() {
Serial.begin(9600);
//Initialize Ethernet Communition
Ethernet.begin(mac, ip);
server.begin();
pinMode(Light,OUTPUT);
Serial.print("Server is at ");
Serial.println(Ethernet.localIP());
}
void loop() {
// monitor connected client
client = server.available();
if (client) {
Serial.println("new client");
boolean currentLineIsBlank = false;
while (client.connected()) {
if (client.available()) {
char c = client.read();
readString += c;
if (c == '\n') {
Serial.println(readString);
//if message has ”on”, turn on the lamp
if(readString.indexOf("?on") >0) {
digitalWrite(Light, HIGH);
Serial.println("Led On");
break;
}
//Check if the message has ”off”, if yes turn off the lamp
if(readString.indexOf("?off") >0) {
digitalWrite(Light, LOW);
Serial.println("Led Off");
break;
}
//If the message has ”getBrightness”, get the analog value and send to browser
if(readString.indexOf("?getBrightness") >0) {
client.println(analogRead(Sensor));
break;
}
//Send the HTML text
SendHTML();
break;
}
}
}
delay(1);
client.stop();
Serial.println("client disonnected");
readString="";
}
}
// Function for sending HTML
void SendHTML()
{
client.println("HTTP/1.1 200 OK");
client.println("Content-Type: text/html");
client.println("Connection: close");
client.println();
client.println("<!DOCTYPE HTML>");
client.println("<html><head><meta charset=\"UTF-8\"><title>OpenJumper!Arduino Web Server</title><script type=\"text/javascript\">");
client.println("function send2arduino(){var xmlhttp;if (window.XMLHttpRequest)xmlhttp=new XMLHttpRequest();else xmlhttp=new ActiveXObject(\"Microsoft.XMLHTTP\");element=document.getElementById(\"light\");if (element.innerHTML.match(\"Turn on\")){element.innerHTML=\"Turn off\"; xmlhttp.open(\"GET\",\"?on\",true);}else{ element.innerHTML=\"Turn on\";xmlhttp.open(\"GET\",\"?off\",true); }xmlhttp.send();}");
client.println("function getBrightness(){var xmlhttp;if (window.XMLHttpRequest)xmlhttp=new XMLHttpRequest();else xmlhttp=new ActiveXObject(\"Microsoft.XMLHTTP\");xmlhttp.onreadystatechange=function(){if (xmlhttp.readyState==4 && xmlhttp.status==200)document.getElementById(\"brightness\").innerHTML=xmlhttp.responseText;};xmlhttp.open(\"GET\",\"?getBrightness\",true); xmlhttp.send();}window.setInterval(getBrightness,1000);</script>");
client.println("</head><body><div align=\"center\"><h1>Arduino Web Server</h1><div>brightness:</div><div id=\"brightness\">");
client.println(analogRead(Sensor));
client.println("</div><button id=\"light\" type=\"button\" onclick=\"send2arduino()\">Turn on</button><button type=\"button\" onclick=\"alert('OpenJumper Web Server')\">About</button></div></body></html>");
}
Download the program and connect the Arduino board into the LAN. Now you can access your Arduino through a browser. The web page will show the brightness and updates once per second, you can also “Turn on”, “Turn off” button to control the LED switch.
Please note that the Arduino board only has limited memory, storage and output pages will consume a lot of memory, so in the above sample program, It tries to reduce the number of lines of text client.println () output, you can save some code space.
In the Arduino Ethernet controller and expansion boards usually come with SD card slot, you can also try putting the web page data into the SD card and then read and output in segmented via Ethernet, so this can help to save some memory space.
Via: blog.WIZnet.HK / iwiznet.cn
Source: arduino.cn(Chinese)
COMMENTS