Let’s build a functional Arduino webserver with the Ethernet/SD Card shield
 It’s that time of the week! We’ve been playing around with the Ethernet shield again and this time we’ve come up with an article about creating a webserver from scratch; using the Arduino SD/Ethernet Shield.
This article will show you how to serve files from the SD Card file system and use Javascript to get sensor/variable values via AJAX.
This would be ideal for people looking to add a basic web system to their projects.
So, what do we need?
- 1x Arduino
- 1x SD/Ethernet Shield (eBay, Sparkfun, Adafruit etc.)
- 1x Micro-SD Card (or Micro SDHC, same as above, anywhere online)
- Our code!
We’ll be using an Arduino Uno R3 for this and we have an Ethernet Shield with SD Card capability, this shield is based on the Wiznet W5100 chip. Sparkfun are hosting the Datasheet which can be found here.
Before running any code below; run one of the SD Card examples such as CardInfo so that you can verify that the SD Card is fully working. If you are using the Ethernet Shield version you MUST set pin 10 to HIGH (using digitalWrite(10, HIGH); ) in the setup function; if you don’t then the SD will not initialise properly.
What will this project do?
- Serve files from the SD Card via a Web Browser
- Provide Javascript code to get any sort of values from the Arduino anywhere on the page.
- Give you a base to easily add web functionality to your projects.
First things first, insert the SD Card into a Card Reader and the card should be formatted to a FAT file system – You can do this easily on any Windows based PC by right clicking the drive in Computer and selecting Format. We have tested this on a Sandisk 2GB SDHC Micro Card – These are extremely cheap from any online retailer.
The next thing we’ll need to do is actually create the file that we’ll be serving. Save the following file below as index.htm
1 2 3 4 5 6 7 8 9 10 11 12 13 14 15 16 17 18 19 20 21 22 23 24 25 26 27 28 29 30 31 32 33 34 35 | <!DOCTYPE html> <html lang=“en-US”> <head> <meta charset=“UTF-8” /> <title>Arduino Test</title> <style> body { font-family: Arial; font-size:14px; line-height:20px; padding:30px; background: #f1f1f1} </style> <script type=“text/javascript”> function ajaxRequest() { var xmlhttp; if (window.XMLHttpRequest) { xmlhttp = new XMLHttpRequest(); } else { xmlhttp = new ActiveXObject(“Microsoft.XMLHTTP”); } xmlhttp.onreadystatechange = function() { if (xmlhttp.readyState == 4 && xmlhttp.status == 200) { document.getElementById(“val1”).innerHTML = xmlhttp.responseText; } } xmlhttp.open(“GET”, “http://192.168.0.21/?data=val1”, true); xmlhttp.send(); } </script> </head> <body onload=“ajaxRequest();”> <h1>Hello from Hackshed!</h1> <p>Welcome to your Arduino webpage.</p> <br /> <p>Test Value is: <span id=“val1”></span></p> </body> </html> |
This is a basic HTML page with a little bit of styling. The styling part actually doesn’t matter; it’s just for easier reading. The important part is the actual content of the page (between the <body></body> tags) and the Javascript that is doing the work.
Once the page is actually loaded; it’ll fire off an XMLHttpRequest to the IP Address of the Arduino Webserver – which then gets the content of this and places it inside of the <span id=”val1″></span> tags. If you have used Ajax before then this will be pretty straightforward.
Let’s get started with the actual webserver!
The following sketch is the complete web server code; you can copy this into a new sketch and upload it to the Arduino. I have removed most debugging statements to save memory. This sketch uses 25,728 bytes of 28,672 available; although most of this is just the Ethernet library.
1 2 3 4 5 6 7 8 9 10 11 12 13 14 15 16 17 18 19 20 21 22 23 24 25 26 27 28 29 30 31 32 33 34 35 36 37 38 39 40 41 42 43 44 45 46 47 48 49 50 51 52 53 54 55 56 57 58 59 60 61 62 63 64 65 66 67 68 69 70 71 72 73 74 75 76 77 78 79 80 81 82 83 84 85 86 87 88 89 90 91 92 93 94 95 96 97 98 99 100 101 102 103 104 105 | #include <SPI.h> #include <Ethernet.h> #include <SD.h> byte mac[] = { 0xDE, 0xAD, 0xBE, 0xEF, 0xFE, 0xED }; IPAddress ip(192,168,0,21); IPAddress dns1(192,168,0,1); IPAddress gateway(192,168,0,1); IPAddress subnet(255,255,255,0); EthernetServer server(80); File webFile; void setup() { Ethernet.begin(mac, ip, dns1, gateway, subnet); server.begin(); Serial.begin(9600); digitalWrite(10, HIGH); if (!SD.begin(4)) { return; } } void loop() { int BUFSIZ = 255; int index = 0; char clientline[BUFSIZ]; EthernetClient client = server.available(); if (client) { boolean currentLineIsBlank = true; index = 0; while (client.connected()) { if (client.available()) { char c = client.read(); if (c != ‘\n’ && c != ‘\r’) { clientline[index] = c; index++; if (index >= BUFSIZ) index = BUFSIZ –1; continue; } clientline[index] = 0; char* filename = processFile(clientline); Serial.print(“Requested: “); Serial.println(filename); /* Setup AJAX Requests Here: * These are just direct output values that are requested * with AJAX. */ if (strstr(clientline, “GET /?data=val1”) != 0) { code200(client); client.println(1337); break; } if (SD.exists(filename)) { code200(client); webFile = SD.open(filename); if (webFile) { while(webFile.available()) { client.write(webFile.read()); } webFile.close(); } break; } else { if (strlen(filename) < 2) { webFile = SD.open(“index.htm”); if (webFile) { while(webFile.available()) { client.write(webFile.read()); } webFile.close(); } } else { client.println(“HTTP/1.1 404 Not Found”); client.println(“Content-Type: text/html”); client.println(“Connection: close”); client.println(); client.println(“<html><head><title>404 – Not Found</title></head><body><h1>404 – Not Found</h1></body></html>”); break; } } break; } } delay(1); client.stop(); } } void code200(EthernetClient client) { client.println(“HTTP/1.1 200 OK”); client.println(“Content-Type: text/html”); client.println(“Connection: close”); client.println(); } char* processFile(char clientline[255]) { char *filename; filename = clientline + 5; (strstr(clientline, ” HTTP”))[0] = 0; return filename; } |
Let me start by saying that this was based on the example code from Adafruit and modified to add features/functionality.
The first thing you’ll need to do is make sure that the network settings match your network. The following code should be altered to suit your setup:
1 2 3 4 5 | byte mac[] = { 0xDE, 0xAD, 0xBE, 0xEF, 0xFE, 0xED }; IPAddress ip(192,168,0,21); IPAddress dns1(192,168,0,1); IPAddress gateway(192,168,0,1); IPAddress subnet(255,255,255,0); |
Note: If you are changing the IP Address also make sure to change the URL in the Javascript Ajax request in index.htm.
That’s about it for displaying a page. You’ll see that if you add html pages to the SD Card you can browse to them. Any missing files will be displayed with an HTTP 404 error code “File not Found” message.
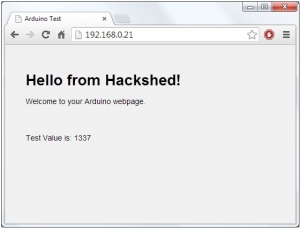
You should see on the page (also shown below) that the value is entered at the end of the sentence “1337″ this is configurable in the sketch and can easily be sensor data or anything else. This is just added to prove that the code actually requests data from the Arduino and feeds it back into the web page.

An example of adding more Ajax requests to the project (you can have an unlimited amount of variables, your only limitation is the memory):
1 2 3 4 5 | if (strstr(clientline, “GET /?data=YOURSTRING”) != 0) { code200(client); client.println(YOUR VARIABLE); break; } |
Just modify the YOURSTRING and you will be able to browse to it and have it show the variable value. You will also need to copy the Javascript code in the index.htm page to suit the new variable; but this request can be copied over and over again and should work fine.
Also note that the speed of the web server will also depend of the speed and type of the SD Card. The faster the card the faster you can serve files. This is because the code is looking to see if a file exists before serving it to the client. If you are using this in a project where you know the files always exist; you could remove this check to make it faster.
If you are wanting to serve images from the SD Card; you’ll need to output the correct content types or it will just display as raw data. We have left it out of this example to try and get the code as small as possible.
Ideally this code would be suited to run on the MEGA and not the Uno/Leonardo as there isn’t much free space to work with; but it’s certainly doable and seems to work really well.
This should pretty much be it. There isn’t too much for you to modify in the code to get it working, if you have any questions or need any help please feel free to leave a comment or send us a message using our contact page
Source : http://www.hackshed.co.uk/lets-build-a-functional-arduino-webserver-sdcard-ethernet/
COMMENTS