How to communicate with the arduino ethernet shield W5100
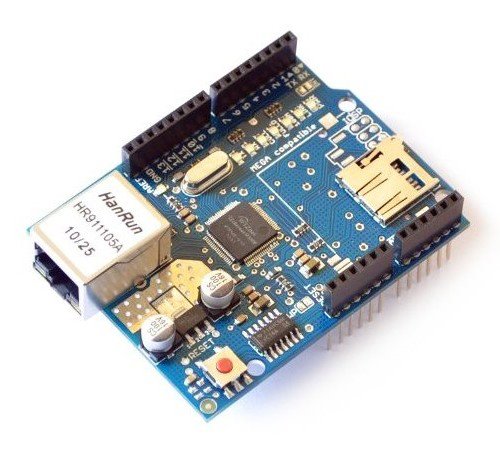
The project will use the W5100 Ethernet shield, retrieving the value of the ultrasonic sensor.

Control sensors or send information remotely is one of the major objectives of those who work with Arduino. The Arduino Ethernet Shield W5100 is another device of this family, which in addition to enabling access to information on your local network, you can still be connected to the internet and enable their monitoring from anywhere in the world.
Attaching the Ethernet Arduino Shield W5100 to your Arduino, just a simple network cable to that in a few minutes, you pass to monitor the state of sensors, switches, and other devices to from your computer or mobile browser. This Shield is based on ethernet chip Wiznet W5100 ( datasheet ) and provides an IP address compatible with the TCP and UDP protocols.
The first step of this tutorial to correctly set the ethernet shield is your set you up with a valid IP address of your network. Here’s how to get the network information in Windows 7, but you can use the same principle for other operating systems.
IP CONFIGURATION:
Click START and, in the dialog box, type CMD. Then press the ENTER :

In the command prompt window, type “ ipconfig / all “(without the quotes) and press ENTER :

The command will be executed and various information will appear on the screen. Look for information regarding your primary network adapter, similar to this highlighted in the image, they are the information you will need to configure the shield: IP Address, Subnet Mask and Default Gateway :

These three parameters are then defined at the beginning of the program, and should be changed according to your network configuration:
IPAddress ip (192,168,1,88) : Replace with an IP address in the same format that you copied in the command prompt window, but the last number must be different.Example: the IP of our equipment is 192.168.1.120, and the program use the 192.168.1.88. Before using any network address, make sure that it is not in use by any other equipment.
IPAddress gateway (192,168,1,1) : Use the same address as the Default Gateway that you obtained in the command prompt window. In our case, 192.168.1.1
IPAddress subnet (255,255,255,0) : Use the same address for the subnet mask , you got it at the command prompt window: 255.255.255.0
Change these parameters according to your network configuration, save the program and load it to your Arduino.Recalling that the library Ultrasonic can be found on this link .
1 2 3 4 5 6 7 8 9 10 11 12 13 14 15 16 17 18 19 20 21 22 23 24 25 26 27 28 29 30 31 32 33 34 35 36 37 38 39 40 41 42 43 44 45 46 47 48 49 50 51 52 53 54 55 56 57 58 59 60 61 62 63 64 65 66 67 68 69 70 71 72 73 74 75 76 77 78 79 80 81 82 83 84 85 86 87 88 89 90 91 92 93 94 95 96 97 98 99 | //Programa : Arduino Ethernet Shield W5100 e HC-SR04//Alteracoes e adaptacoes : FILIPEFLOP////Baseado no programa exemplo de//by David A. Mellis e Tom Igoe#include <Ultrasonic.h>#include <SPI.h>#include <Ethernet.h>//Define os parametros para o sensor ultrasonico HC-SR04#define PINO_TRIGGER 6 //Porta ligada ao pino Trigger do sensor#define PINO_ECHO 7 //Porta ligada ao pino Echo do sensor//Inicializa o sensor ultrasonicoUltrasonic ultrasonic(PINO_TRIGGER, PINO_ECHO);//Definicoes de IP, mascara de rede e gatewaybyte mac[] = { 0xDE, 0xAD, 0xBE, 0xEF, 0xFE, 0xED };IPAddress ip(11,12,13,88); //Define o endereco IPIPAddress gateway(11,12,13,1); //Define o gatewayIPAddress subnet(255, 255, 255, 0); //Define a máscara de rede//Inicializa o servidor web na porta 80EthernetServer server(80);void setup(){ //Inicializa a interface de rede Ethernet.begin(mac, ip, gateway, subnet); server.begin();}void loop() { float cmMsec; long microsec = ultrasonic.timing(); //Le e armazena as informacoes do sensor ultrasonico cmMsec = ultrasonic.convert(microsec, Ultrasonic::CM); //Aguarda conexao do browser EthernetClient client = server.available(); if (client) { Serial.println("new client"); // an http request ends with a blank line boolean currentLineIsBlank = true; while (client.connected()) { if (client.available()) { char c = client.read(); Serial.write(c); // if you've gotten to the end of the line (received a newline // character) and the line is blank, the http request has ended, // so you can send a reply if (c == 'n' && currentLineIsBlank) { // send a standard http response header client.println("HTTP/1.1 200 OK"); client.println("Content-Type: text/html"); client.println("Connection: close"); client.println("Refresh: 2"); //Recarrega a pagina a cada 2seg client.println(); client.println("<!DOCTYPE HTML>"); client.println("<html>"); //Configura o texto e imprime o titulo no browser client.print("<font color=#FF0000><b><u>"); client.print("Envio de informacoes pela rede utilizando Arduino"); client.print("</u></b></font>"); client.println("<br />"); client.println("<br />"); //Mostra o estado da porta digital 3 int porta_digital = digitalRead(3); client.print("Porta Digital 3 : "); client.print("<b>"); client.print(porta_digital); client.println("</b>"); client.print(" (0 = Desligada, 1 = Ligada)"); client.println("<br />"); //Mostra as informacoes lidas pelo sensor ultrasonico client.print("Sensor Ultrasonico : "); client.print("<b>"); client.print(cmMsec); client.print(" cm"); client.println("</b></html>"); break; } if (c == 'n') { // you're starting a new line currentLineIsBlank = true; } else if (c != 'r') { // you've gotten a character on the current line currentLineIsBlank = false; } } } // give the web browser time to receive the data delay(1); // close the connection: client.stop(); }} |
SENDING INFORMATION BY NETWORK:
Plug the Ethernet Arduino Shield W5100 to your Arduino and connect it to a router or hub using a common network cable. We will use the built-in webserver on board to send the browser information about the Arduino two doors, one to report on the status (on / off) of a button connected to port 3, and the other with information about the Ultrasonic Sensor HC-SR04on the gates 6 (sensor trigger pin) and 7 (pin sensor echo):

To test the operation, open the browser on your computer and type in the IP address bar you set in the program. In our case 192.168.1.88 :

You can also access the mobile:

The information is sent by the webserver of the Ethernet card to every 2 seconds (see the program that this is configurable). We can also set up in the html formatting commands to program, such as <font> to display the title text in red, <b> for bold and <u> for underline. You can also use other HTML commands.
Source : http://blog.filipeflop.com/arduino/tutorial-ethernet-shield-w5100.html
Author : Filipeflop, vendas@filipeflop.com, http://blog.filipeflop.com/arduino/tutorial-ethernet-shield-w5100.html,
COMMENTS