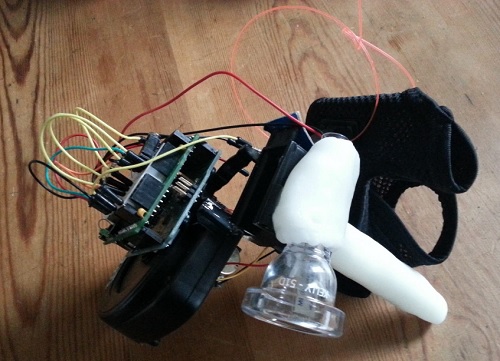
The Trombino is an electronic Trombone based on the Arduino platform. It comes in two flavours, one using a wind sensor and one using a traditional trombone mouthpiece. As well as outputting sound you can also get OSC and MIDI data from the Trombino. It has been made to be used as a learning aid for children, but would be also interested in musician looking for an interesting new interface device.
Let’s see the demonstration first. It’s so unique~
For this project, below parts are mainly used
– Arduino Uno
– Arduino Ethernet Shiled
– Arduino Box
– Wind Sensor
– Piezo vibration film
– Kelly plastic trombone mouthpiece
– Innards from a Gametrak central unit
– 3.5mm audio jack
Step 1
Open up the Gametrak, unplug everything and remove one potentiometer and sliding tower block. (I forgot to take a picture of this, image from here: http://janoc.rd-h.com/archives/129)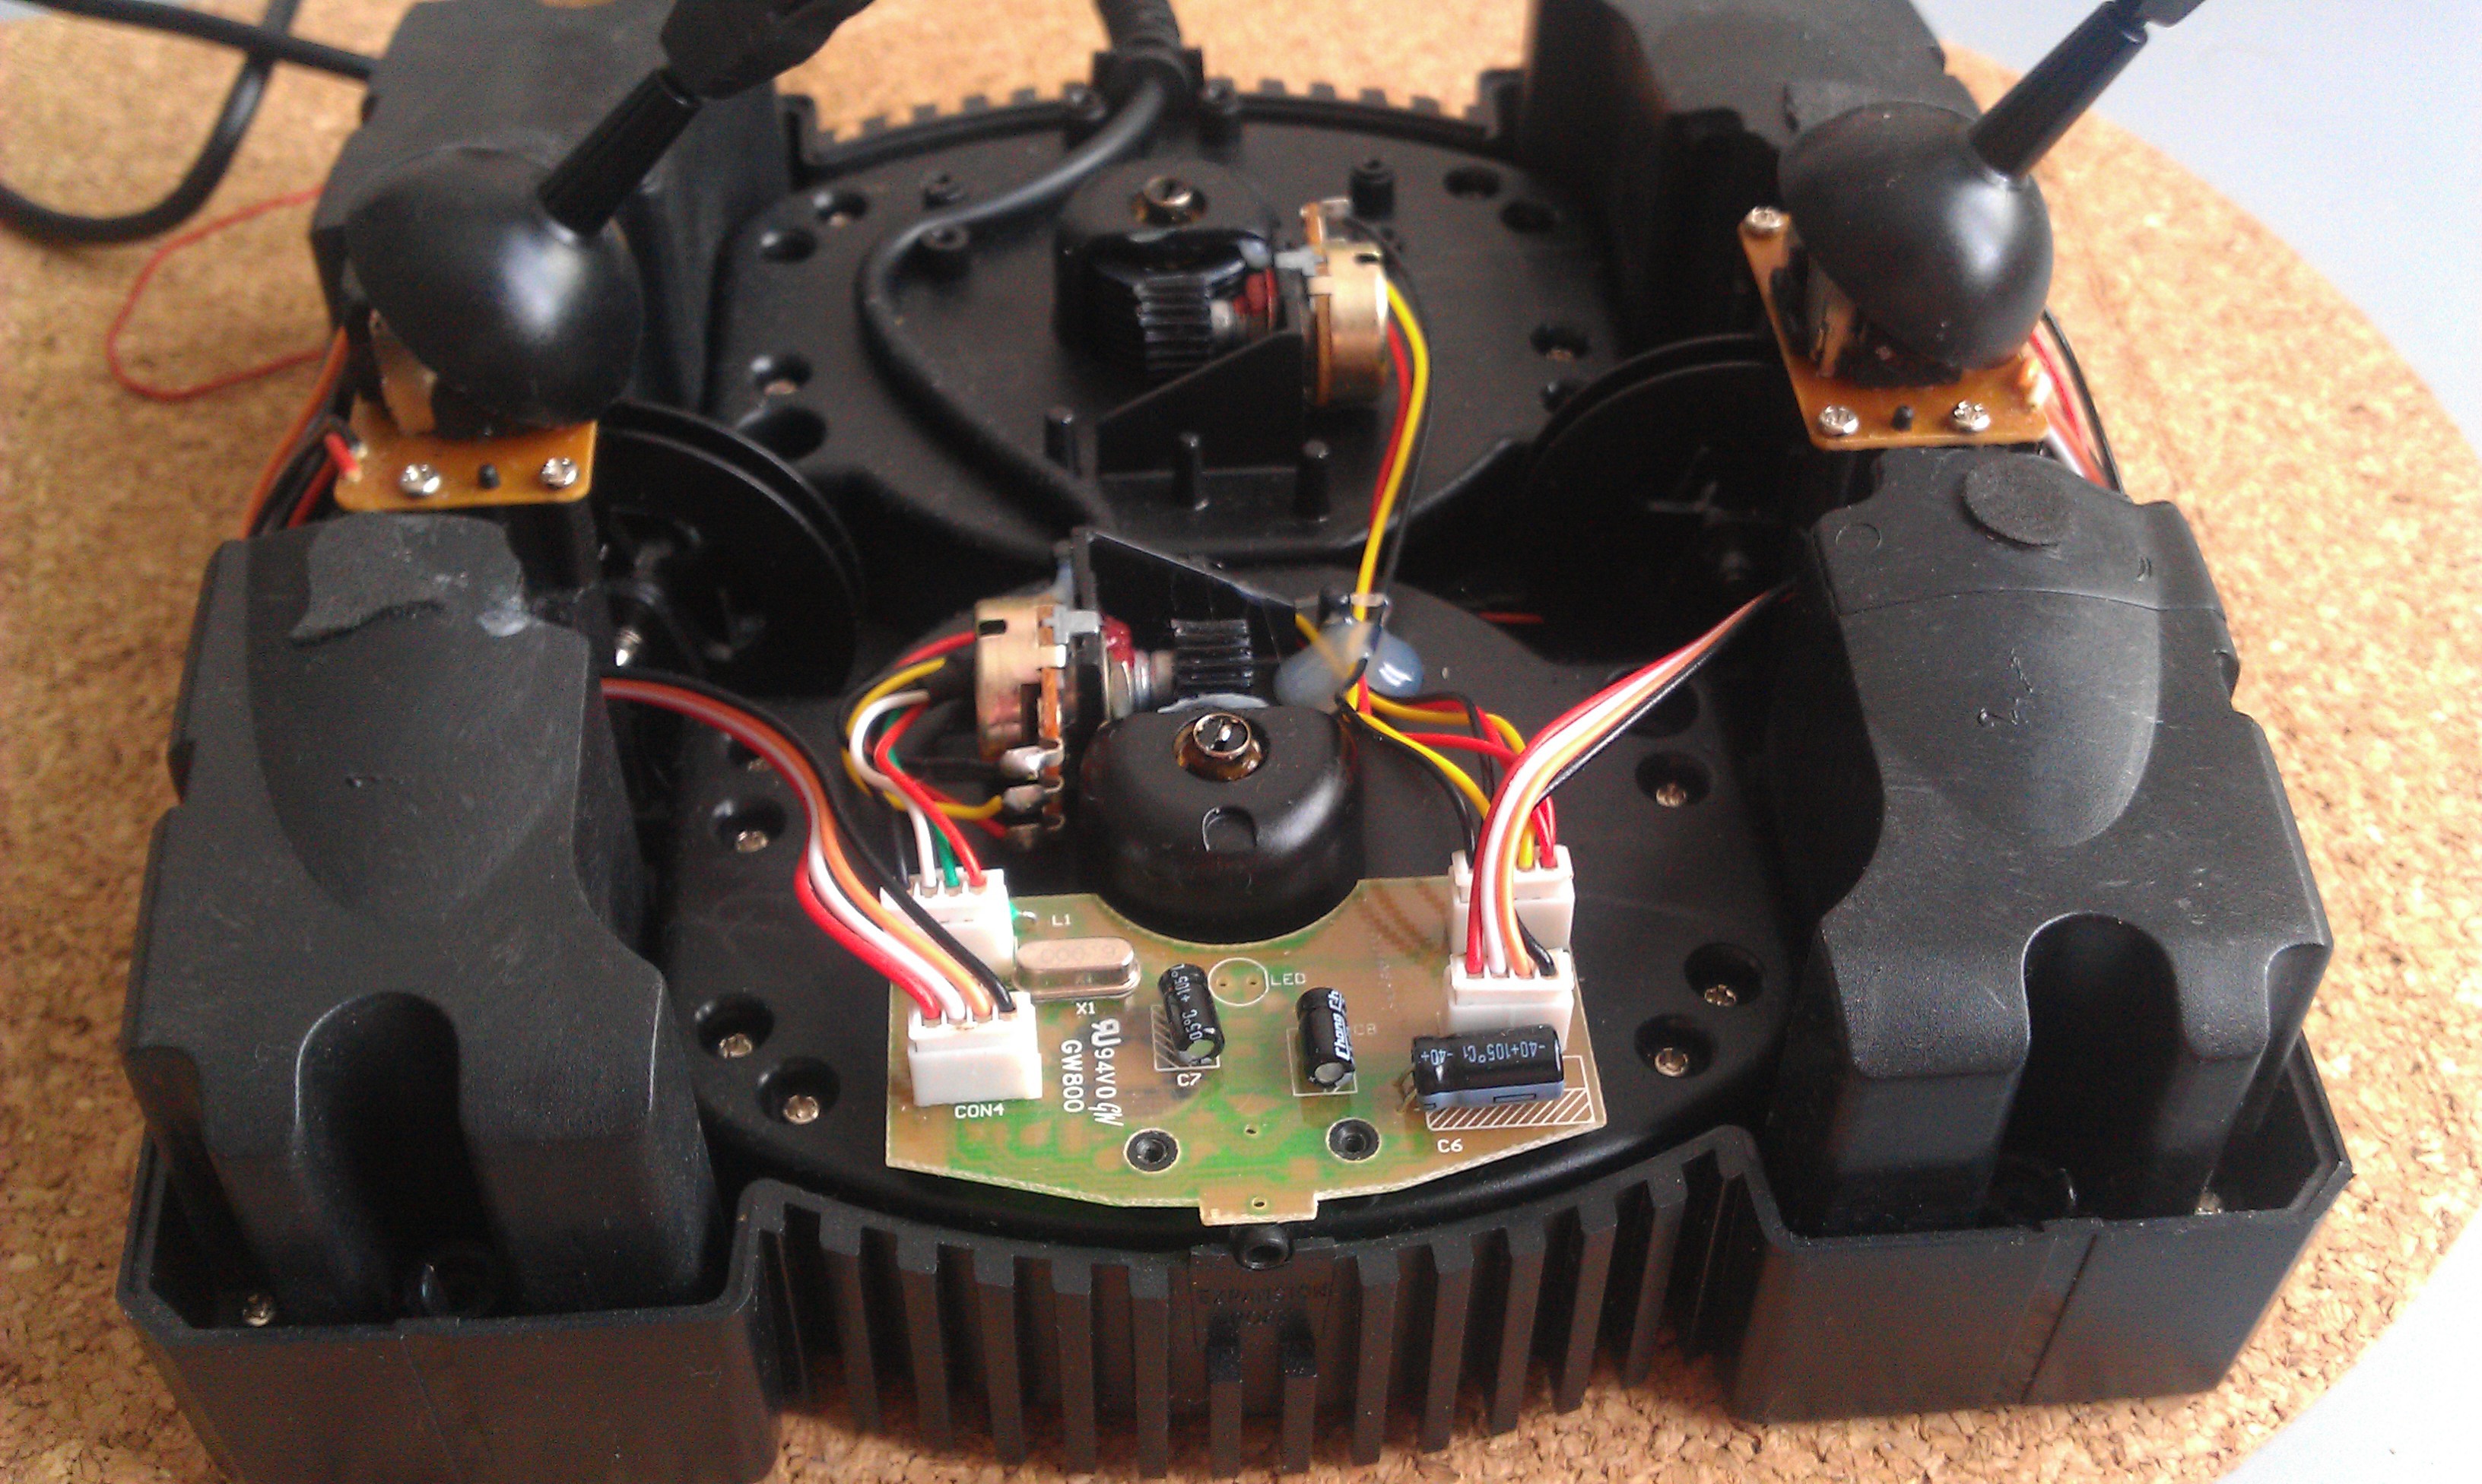
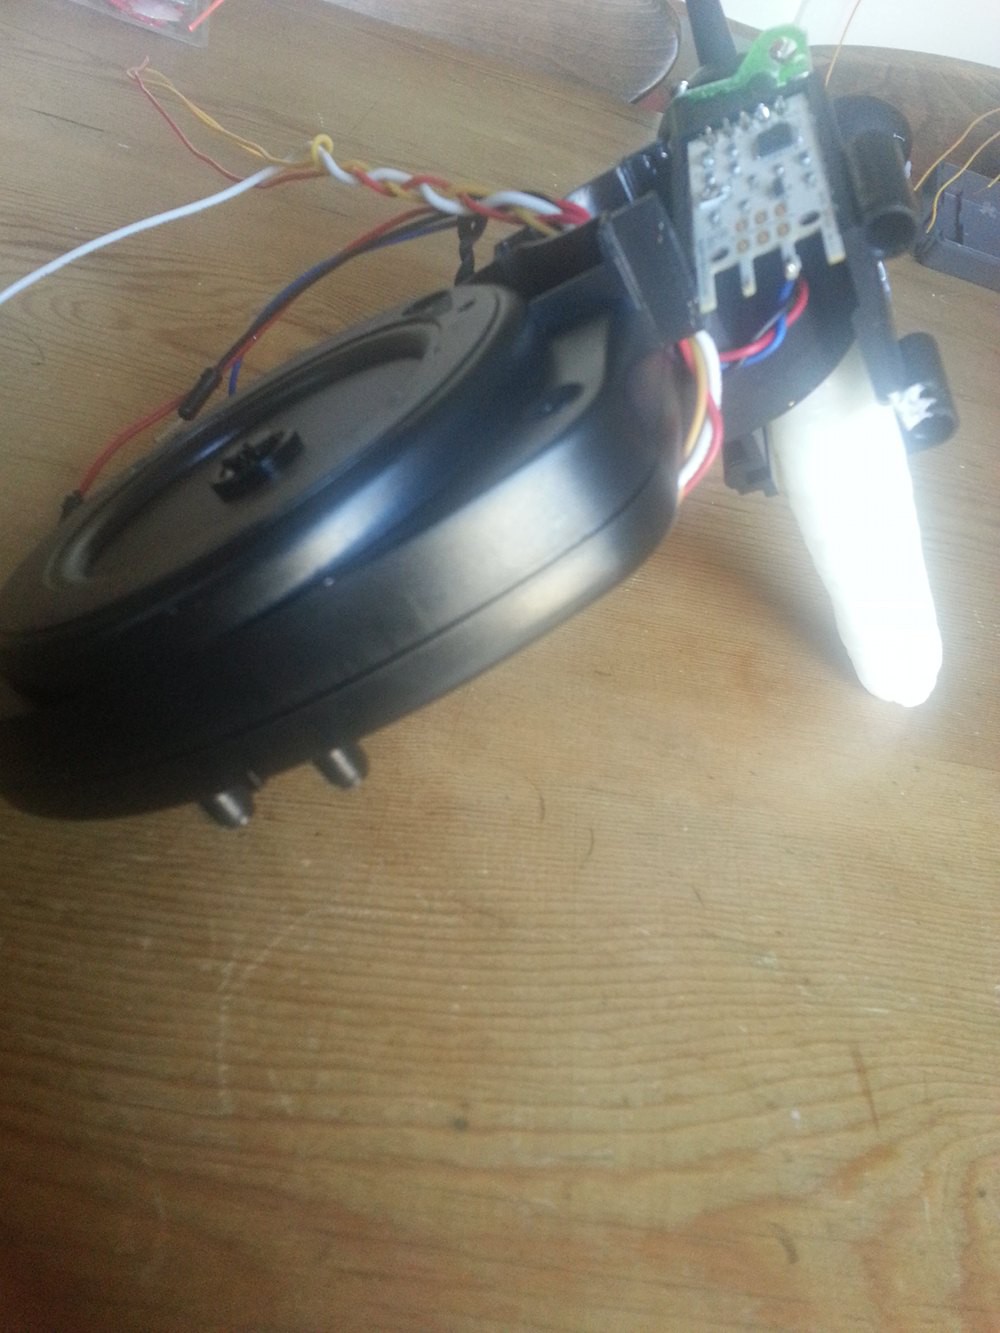
- Step 2Use epoxy to glue the tower to the potentiometer casing. If using a wind sensor solder long wires to the V+, GND and OUT pins of the wind sensor. Seat it in the gap it magically fits perfectly into as shown below. Tidy your cables! I pleated mine and threaded them through the hole created where the tower and potentiometer housing meet. I also created a handle with polymorph and attached it to the underside.
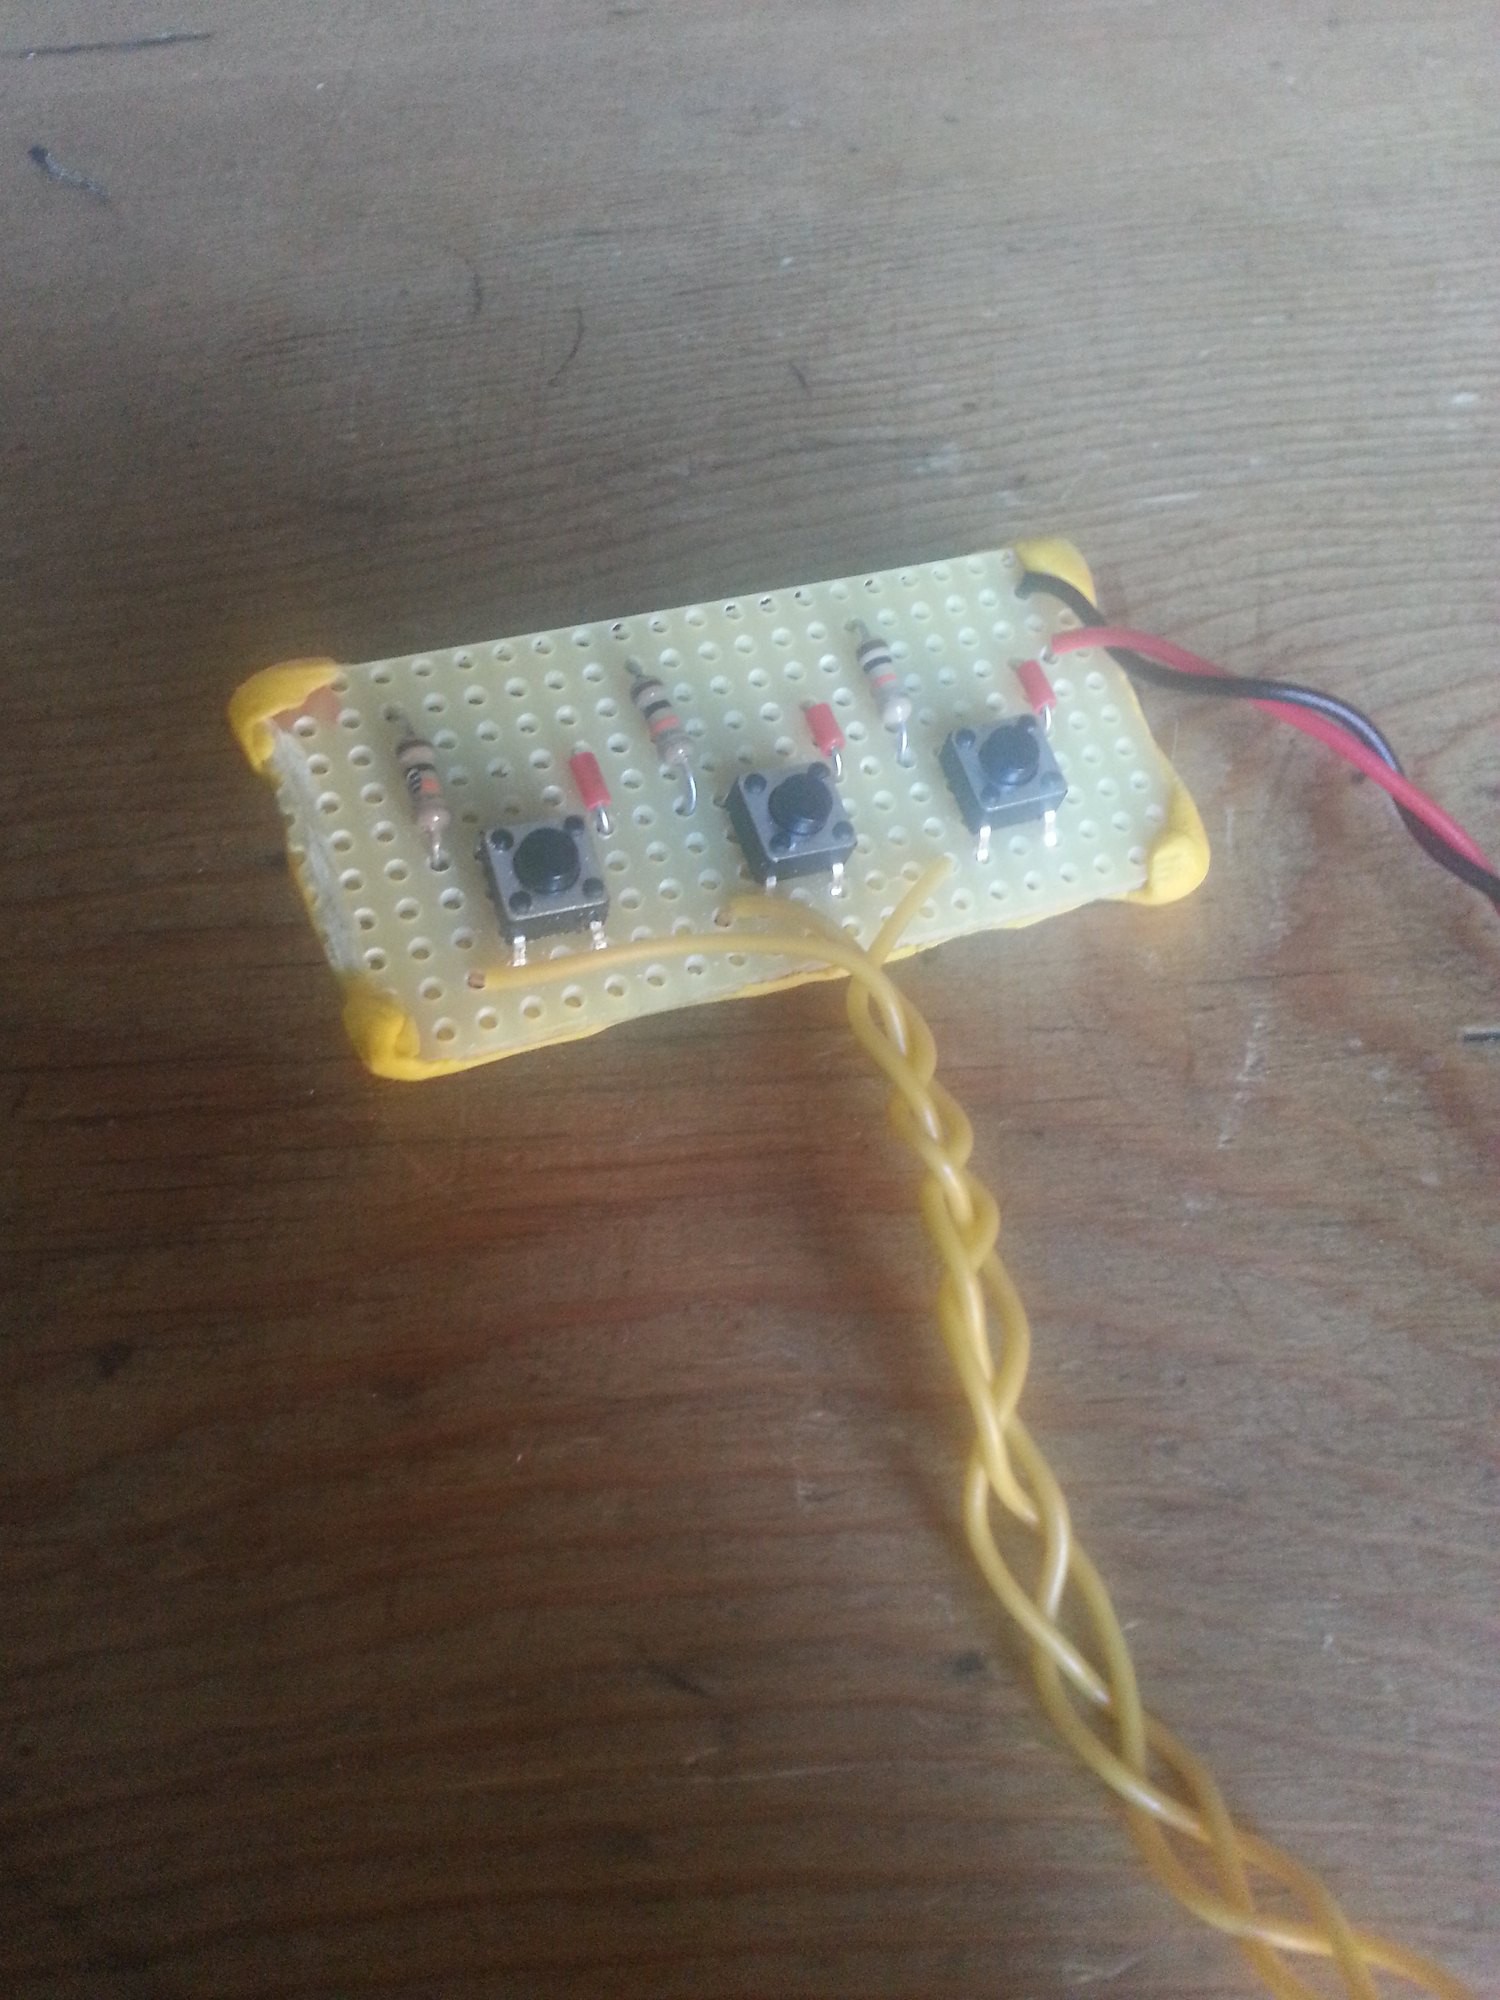
 Step 3For the wind version… Solder parts for the button board onto a small piece of stripboard. The schematic for the layout can be found in the Fritzing file on the projects github repository. Cover the back and sharp edges with Sugru.
For more detail, please visit below link
– Hackaday : https://hackaday.io/project/1010-trombino
– Blog : http://trombino.co.uk/
– Github for source code : https://github.com/iPodling/trombino
Tags : 201405, Arduino Ethernet Shield, W5100, Sensing & Gathering
COMMENTS