This project is an example of Ethernet shield.
User can manage Arduino by using this tutorial.
This project would be included in Tutorial category of WIZnet Museum.
Run Ethernet shield on arduino

Ethernet Shield instantly enables internet connectivity for Arduino
projects. An on-board Wiz5100 ethernet controller handles up to four TCP and UDP connections, just stack it onto an Arduino to create your own networked devices. Easily check connection status with on board indicator lights. Extend your design further with two extra rows of pin header that connect to shields and prototyping boards.
part list
1 x Arduino UNO
https://store.linksprite.com/ethernet-shield/
1 x Ethernet shield:
https://store.linksprite.com/arduino-ethernet-shield-old-version-2009/
Features
- Standard Arduino and Arduino Mega compatible
- Arduino Ethernet Library compatible
- Standard RJ45 ethernet Jack
- 16K byte internal buffer
- Indicator LEDs for all functions
- Easy to access reset button
- Standard pin headers for 0.1″ grid prototyping boards
- Up to 4 TCP/UDP network connections
Wiring Diagram
Ethernet shield directly stack it onto an Arduino , and plug the network cable into the Ethernet shield.
Finally connect arduino USB to the computer to power supply.
Test Code

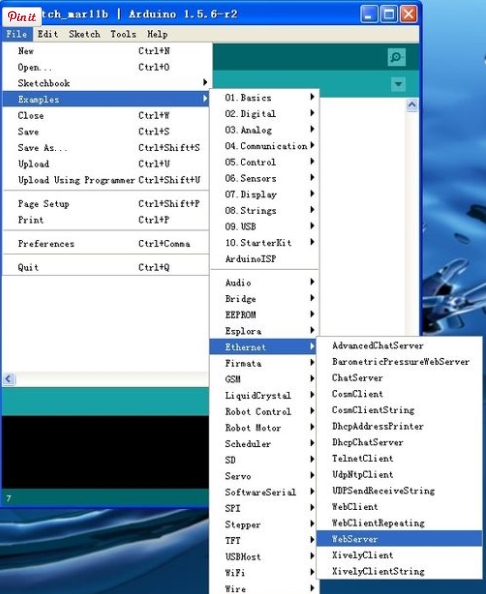
Open the arduino IDE
Choose example -> ethernet -> webserver
Test Result

Input the http://192.168.1.117/ in the browser address and you can see the analog A0-A5 output value
Support Forum:
http://www.pcduino.com/forum
If you want to know more in detail, refer to
Source : http://www.instructables.com/id/Run-Ethernet-shield-on-arduino/
COMMENTS