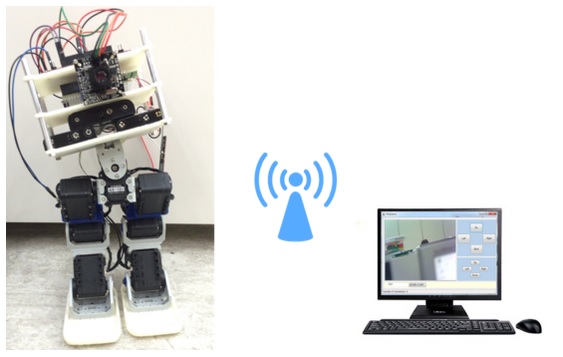
Freed Man is a robot. It is made by one of WIZnet researcher using WIZwiki-W7500 and WizFi250. The name of it originated from ‘a man freed by the researcher.’
It contains a camera and separated into 7 segments. Since it is connected with PC with Wi-Fi, it is possible to control while monitoring through PC. I am going to explain how it works from this point. Follow me
 Parts Required
1.WIZwiki-W7500
WIZwiki-W7500 is a main platform board that controls FREEDMAN.
Online development tool works with WIZwiki-W7500 board since it is ARM mbed certified. It has an advantage of using every codes supported by mbed Community.
For detailed information about characteristics of WIZwiki-W7500, please click below link.
http://wizwiki.net/wiki/doku.php?id=products:wizwiki_w7500:start
2. WizFi250
This module makes a Wi-Fi connection possible by connecting with WIZwiki-W7500 board. It is UART connected with WIZwiki-W7500 and controls the module through AT Command. For detailed information about characteristics of WizFi250, please click below link.
http://wizwiki.net/wiki/doku.php?id=products:wizfi250:start
3. LJ-DSC02
LJ-DSC02, a serial camera, was the most difficult element in FREEDMAN development.
As I explained, an mbed certification of WIZwiki-W7500 made this project possible to use various components registered on mbed. I was also planning to use one of mbed component camera, but ended up using a another camera bought from Chinese website. Anyway, I succeeded porting using one of camera example on mbed component. I guess it was possible since serial camera’s commands on market are mostly similar.
http://world.taobao.com/item/36084011717.htm?fromSite=main&tracelogww=ltckbburl&qq-pf-to=pcqq.c2c

It is a motor that will put FREEDMAN in action. I assume most of people who studied on robot know about it. It is AX-12 of ROBOTIS. It is possible to control and monitor with Serial Command and easier to used compare to previous RC sub-motor. It reduced MCU pin usage with daisy chain connection and much more convenience. I hope you guys can apply it well if you are interested in building a robot.
Connecting Hardware
Now I am going to connect all of components with important components ready. Please look at following diagram for connection between WIZwiki-W7500 main board and camera & motor. Then connect Wi-Fi module using PIN information of WizFi250.

Mechanism
See ‘Gerwalk’ which is a practice robot of BIOLOID of ROBOTIS for an elemental Mechanism and motion related codes.

Software
Following link will provide you information about all of FREEDMAN firmwares
https://developer.mbed.org/users/Ricky_Kwon/code/Freedman_v2/
Firmware is made of combination of TCP/IP Client, Server, CameraC328, AX-12, WizFi250 practices supported by mbed.
A code of sending a camera data to TCP/IP is changed from the original practice to following code.
void jpeg_callback(char *buf, size_t siz) {
//for (int i = 0; i < (int)siz; i++) {
//fprintf(fp_jpeg, “%c”, buf[i]);
Streaming.send(buf, siz);
//}
}
Be aware that AX-12 library does not work. It works well within couple numbers motors but it does not work properly as numbers of motors are increased since this library has to declare every single motor. Therefore, I just brought important parts of code of library. Also, I only connected TX without half duplex circuit seen as PIN map right above cause I figure out that checking on motor status is not necessarily needed.
Added Freedman adjustment only program on PC. It is made of C# and includes image views and few buttons.
COMMENTS