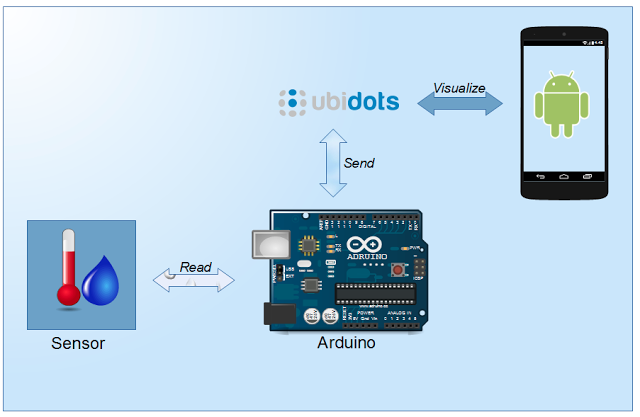
The purpose of this Internet of things project is sending data to the cloud and store it, so we have to implement the agent that takes care to send the data.
Ubidots provides an example that can be useful. In Arduino, we have to develop an HTTP client that calls a JSON service passing the data we want to store in the cloud.

Building IoT Project
The first step is setup the Arduino sketch and the wire connections. The DHT11 sensor is hooked up with Arduino as shown below.

In this sketch, DHT11 sensor is connected to Arduino board, that, in turn, uses the Ethernet shield to connect to the network to send data.
As the first step, we should check if everything is connected correctly trying to read the value of the temperature and the humidity.
Arduino sketch to test the sensor:
– See more at
: http://www.survivingwithandroid.com/2015/12/internet-of-things-project-arduino-ubidots-android.html#sthash.issPvrpQ.dpuf

In this first part of Internet of things project, you learned how to connect Arduino to the cloud using Ubidots and Ethernet shield. Arduino read DHT11 data values and sends them to Ubidots.
In the next post, you will know how to read these values from Android Smartphone and how to create charts on smartphones. – See more at: http://www.survivingwithandroid.com/2015/12/internet-of-things-project-arduino-ubidots-android.html#sthash.issPvrpQ.dpuf
Source : http://www.survivingwithandroid.com/2015/12/internet-of-things-project-arduino-ubidots-android.html
COMMENTS