1. Project Description
The author for this project states that using an Ethernet shield along with Arduino board users can turn it into a simple web server which can be accessed by anyone on the internet, and by accessing that server with a browser running on any computer connected to the same network as the Arduino board, users can:
- Control hardware from the webpage like fan or lights (using Javascript buttons).
- Read the state of a switch which can be either ON or OFF (using simple HTML).
- Read value of a sensors connected to Arduino board (using simple HTML).


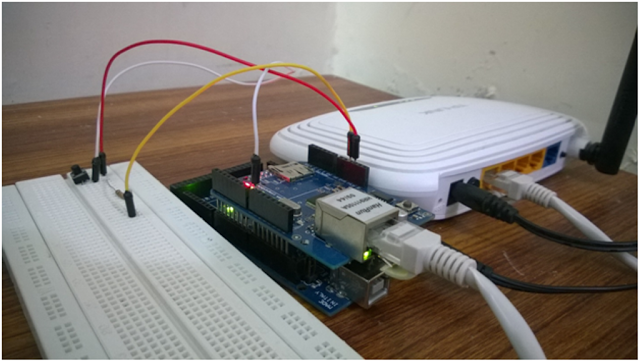
2. Parts
Arduino and Arduino Ethernet shield – To connect with LAN
DC Voltage of 5V from Arduino – To power the Ethernet Shield
Connection speed: 10/100Mb – For optimum performance.
Connection with Arduino on SPI port
Components required:
- 1 x Ethernet cable
- 1 x Wi-Fi Router (Optional)
- 1 x Arduino Mega2560 or Arduino UNO
- 1 x Ethernet Shield
- 1 x Breadboard or blank circuit board can do as well
- 3 x Jumper Wires
- 1 x 1k Resistor
- 2 x 9V DC Adaptor
- 1 x Push button

3. Implement Guideline and Source Code
Users can find the detailed implement guideline and source code on the author’s website.
For more information, please refer to the following link;
Link: http://elektriktech.blogspot.in/2015/10/using-arduino-as-simple-web-server.html
COMMENTS