ARDUINO ETHERNET SHIELD W5100 – TUTORIAL(português)

This project is tutorial of Ethernet shield. You can monitor your sensors, keys, and LED through the browser using your computer.
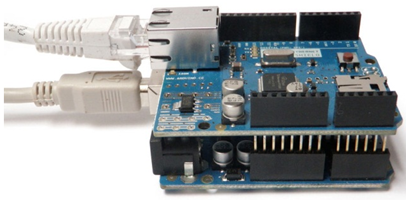
Parts
- Arduino Uno
- Arduino Ethernet shield
- LED 2 and registor 2
Wiring

Go to the START menu, and then type the command CMD in the dialog box and press ENTER.

You’ll need them to configure the Arduino Ethernet Shield W5100.
Code
/*************************************************************** Tutorial Ethernet Shield Objetivo: LED Control's Internet Author: Guilherme Vianna Santos ***************************************************************/ #include#include byte mac[] = {0xDE, 0xAD, 0xBE, 0xEF, 0xFE, 0xED }; //MAC address IPAddress ip(192,168,1,177); // IP da lan IPAddress gateway(192,168,1,255);// Gateway Padrão IPAddress subnet(255,255,255,0); // Máscara de sub-rede EthernetServer server(8080); //porta de conexão EthernetClient client; String readString; int flagLed2=0; //Flag para comando do Led 2 int flagLed1=0; //Flag para comando do Led 1 void setup(){ pinMode(5, OUTPUT); //pin do LED1 pinMode(7, OUTPUT); //pin do LED2 Ethernet.begin(mac,ip,gateway,subnet); server.begin(); Serial.begin(9600); //Seta a velocidade para comunicação serial Serial.println("server/client 1.0 test"); Serial.println("Enviando um g na serial monitor para Client - Test"); } void loop() { // Verifica a comunicação Serial if (Serial.available() > 0) { byte inChar; inChar = Serial.read(); if(inChar == 'g') { } } EthernetClient client = server.available(); if (client) { while (client.connected()) { if (client.available()) { char c = client.read(); if (readString.length() < 100) { readString += c; Serial.print(c); } if (c == '\n') { Serial.println(readString); //Mostra no Serial Monitor o debuging // HTML data header if(readString.indexOf('?') >=0) { client.println("HTTP/1.1 Controle de LED's"); client.println(); client.println(); } else { /*LED 1*/ if(readString.indexOf("led1on") >0) //checa se o led 1 foi aceso { flagLed1=1; digitalWrite(5, 1); // set pin 5 high Serial.println("Led1 On"); } if(readString.indexOf("led1off") >0) //checa se o led 1 foi apagado { flagLed1=0; digitalWrite(5, 0); // set pin 5 low Serial.println("Led1 Off"); } /*LED 2*/ if(readString.indexOf("led2on") >0) // checa se o led 2 foi aceso { flagLed2=1; digitalWrite(7, 1); // set pin 7 high Serial.println("Led2 On"); } if(readString.indexOf("led2off") >0) // checa se o led 2 foi apagado { flagLed2=0; digitalWrite(7, 0); // set pin 7 low Serial.println("Led2 Off"); } client.println("HTTP/1.1 200 OK"); //Envia uma noga Página. client.println("Content-Type: text/html"); client.println(); /******************************Página em HTML******************************/ client.println(""); client.println(""); client.println(" Arduino - Teste LED's "); client.println(""); client.println(""); client.println(""); client.println(""); client.println("
"); client.println("LED's - ON/OFF
"); //Led 1 - Controle de imagem client.println("
"); if(flagLed1==0) { client.println(" Led's Estados "); } else { client.println(" "); client.println(" "); } //Led 2 - controle de imagem if(flagLed2==0) { client.println(" "); client.println(" "); } else { client.println(" "); client.println(" "); } //bloqueio de acesso as páginas{led2on;led2off} client.println(""); client.println(""); client.println(""); } delay(1); client.stop(); readString=""; readString=""; } } } } } "); client.println(" Result
To test the operation of the system, just open your favorite web browser on your computer and type in the IP address bar followed by the access door that you configured earlier in the program. For the test made by author the IP was 192.168.1.177:8080. The access door is defined by the “EthernetServer server (8080)”
Video
For more information, you visit the web site of author:
http://eletronicaemcasa.blogspot.kr/2016/04/Arduino-Ethernet-Shield-W5100-Tutorial-de-como-comunicar.html


COMMENTS