details
Interact with Arduino over the Internet with Teleduino
by John Boxall

Overview
These posting mention Teleduino of interacting with an ethernet-enabled Arduino board. In this article we test a few of the basic features and see what is possible.
Recently a new method of interacting with an ethernet-enabled Arduino board and the Internet was brought to my attention – a new system called Teleduino. In this article we test a few of the basic features and see what is possible. Please note that this is my own experiments and that Teleduino is a work in progress. So follow along and see for yourself.
Get Started
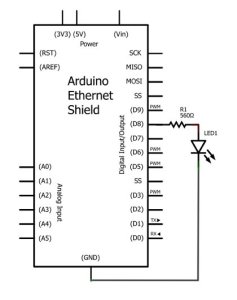
- You will need an Arduino Uno (or compatible) board and Ethernet shield with the Wiznet chip – or a Freetronics Eleven(a much neater solution). At this stage Teleduino doesn’t support other boards such as the Mega.
- Download and install the Teleduino Arduino library. This is available from the resources section of the home page. You will also need to be running Arduino IDE v1.0 or greater.
- Request an API key. This identified your particular Arduino from the rest.
- Get together some basic electronics components for testing, such as some LEDs and 560R resistors; sources of analog input such as an LDR or TMP36 temperature sensor; and a solderless breadboard.
- Don’t forget the ethernet cable from your Arduino stack to the router!
- Finally, some rudimentary knowledge about networking will be useful. (IP address, DHCP, etc.)
Parts :
- Arduino Uno & Mega
- Ethernet shield
- LEDs
- 560R registers
- LDR – analog input
- TMP36 – Temperature sensor
COMMENTS