

Aim: To teach basics in connecting Arduino Uno R3 to the internet with Arduino Web Server and to turn On/Off LED using the same. The hardware network is designed for beginners and is not professionally suggested.
Ethernet/ LAN Cable = 1 Qty.
Jumper Wire (male to male) = 2 Qty.
Red LED = 1 Qty.
Resistor 220 Ohms = 1 Qty.
Standard USB Cable A Plug B Plug for Arduino = 1 Qty.
Laptop with Windows 7 Operating System.
Internet connection (USB dongle or Cable). I got Tata Photon+ 3G
Softwares Required:
USB Drivers for Arduino
(DNS Update Client) (from No-IP)
on SourceForge.net
Knowledge Required:
Arduino Language.
HTML Language.
Google Drive.
Networking in Windows.

Connections shown through photographs:
(Green Jumper Wire corresponds to Ground / Yellow Jumper Wire corresponds to Digital IO Pin 6 Output)
 |
| My Web Server Setup |
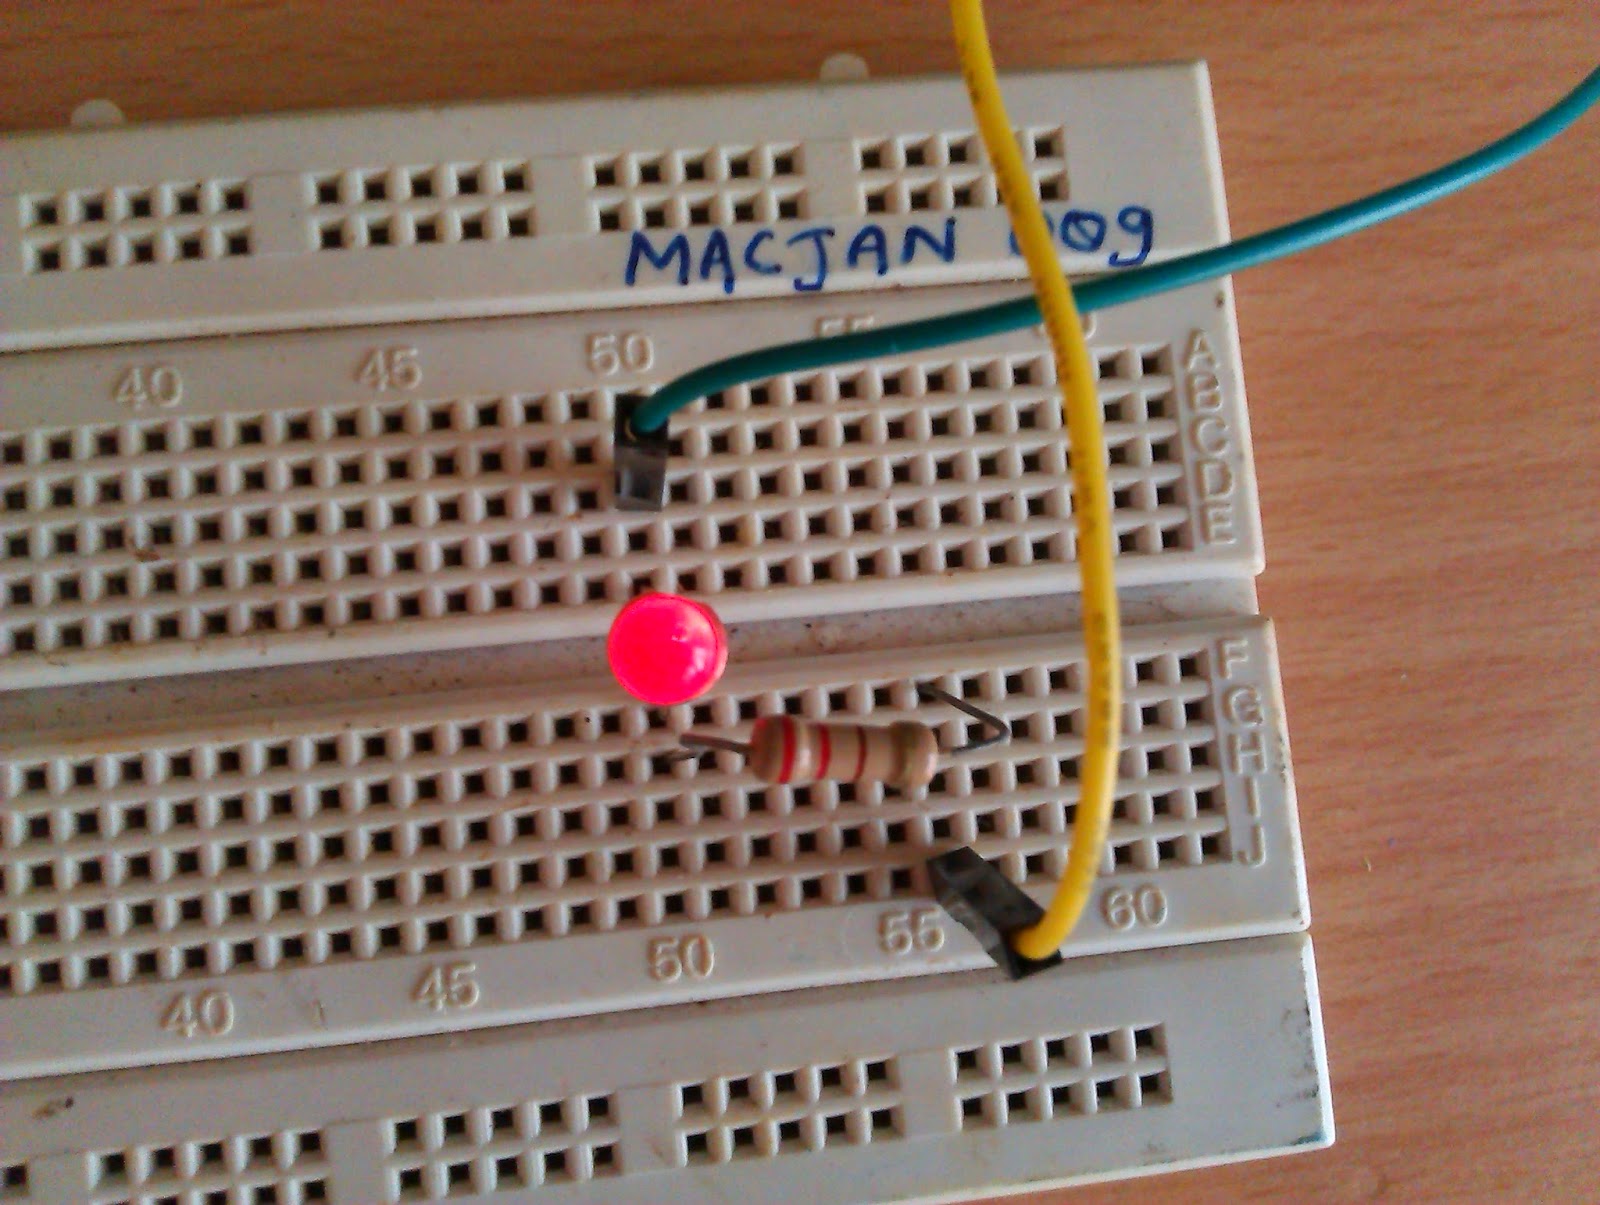 |
| Red LED connected in Series with 22 Ohms for Current Limiting |
 |
| Arduino connection for Ground and Digital Output |
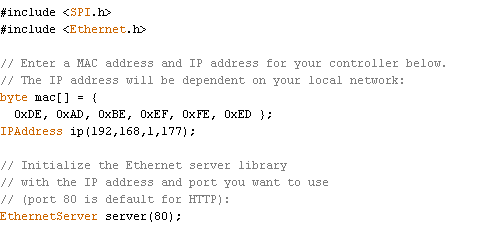 | |
| Basic Ethernet Initialization |
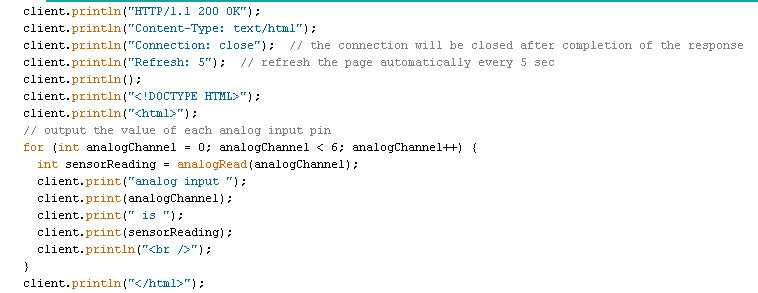
When you get this page on browser it will look like below:

But to understand what was sent to client computer (your PC) you need to Right Click – View Page Source

You can also download my code for turning On/Off LED.
You can view my page (Live) By

Well thank you to Sourceforge.net. From software requirements download PassPort Utility from above.
PassPort Utility looks like this:


COMMENTS