Description:
This tutorial describes how to create an Internet of things with Android and Arduino project: Android app to control a remote Led.Arduino board is one of the most important object in this ecosystem.


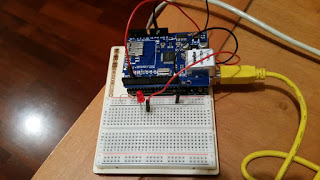
Hardware used:
•Arduino Uno
•Ethernet Shield
•Smartphone with Android
#include <spi.h>
#include <ethernet.h>
byte mac[] = { 0xDE, 0xAD, 0xBE, 0xEF, 0xFE, 0xED };
IPAddress ip(192, 168, 1, 130); // Arduino IP Add
EthernetServer server(80); // Web server

// Http data
String reqData; // Request from Smartphone
String header;
int contentSize = -1;
String CONTENT_LENGTH_TXT = "Content-Length: ";

void setup() {
  // put your setup code here, to run once:
  Serial.begin(9600);
  pinMode(3, OUTPUT); // Set Pin 3 to OUTPUT Mode
  Serial.print("Ready...");
  //
  Ethernet.begin(mac, ip);
  server.begin();
}

void loop() {
  // Is there a client (Our Android smartphone)
  EthernetClient client = server.available();

  if (client) {
    // Let's start reading
    boolean isLastLine = true;
    boolean isBody = false;
    header = "";
    reqData = "";
    int contentLen = 0;
    Serial.print("Client connected!");
    while (client.connected()) {
     if (client.available()) {
       // Read data
      char c = client.read();

     if (contentSize == contentLen) {
       int idx = reqData.indexOf(":");
       String status = reqData.substring(idx + 1, idx + 2);
       Serial.println("Status : " + status);
       if (status.equals("1")) {
         digitalWrite(3, HIGH);
       }
       else {
         digitalWrite(3, LOW);
      }

     client.println("HTTP/1.1 200 OK");
     client.println("Content-Type: text/html");
     client.println("Connection: close");
     client.println();
     // send web page
     client.println("");
     client.println("");
     delay(1);
     break;
   }

  if (c == 'n' && isLastLine) {
   isBody = true;
   int pos = header.indexOf(CONTENT_LENGTH_TXT);
   String tmp = header.substring(pos, header.length());
   int pos1 = tmp.indexOf("rn");
   String size = tmp.substring(CONTENT_LENGTH_TXT.length(), pos1);
   Serial.println("Size ["+size+"]");
   contentSize = size.toInt();
  }

  if (isBody) {
   reqData += c;
   contentLen++;
  }
  else {
   header += c;
  }
  if (c == 'n' ) {
   isLastLine = true;
  }
  else if (c != 'r' ) {
    isLastLine = false;
  }
 }
}

// Close connection
Serial.println("Stop..");
client.stop();
}
}

n this way Arduino is ready to be integrated inside our internet of things world, it can exchange JSON request with external application including an app that runs on a smartphone. In this first part of Internet of things with Android and Arduino project, you gained the knowledge how to handle HTTP request in Arduino.
Android Client: Send HTTP Request
To complete our Internet of things with Android and Arduino scenario, it is necessary to implement an Android app that sends JSON request.On Android code side, the things are much more simpler; the Android UI is shown below:

Demo:
Source:
https://www.survivingwithandroid.com/2015/06/internet-of-things-with-android-and-arduino.html
https://www.survivingwithandroid.com/2016/03/arduino-led-control-android-app.html
COMMENTS