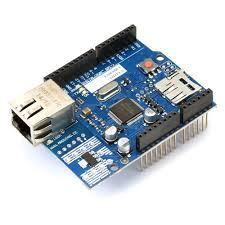
In this article, we are going to discuss a specific shield of Arduino known as ETHERNET shield which provides internet connectivity to Arduino board. We will discuss about its pin configuration with Arduino , requirements , informational LED’s , how to assign addresses to it and last but not least we will list some projects in which this shield is used.
Ethernet Shield allows internet connectivity to Arduino board by using its Ethernet library. We can use this Ethernet library to write sketches (Arduino program written in IDE) that will help us to configure this shield to connect to internet. This shield is compatible with almost all versions of Arduino boards. It enables our board to receive and send data worldwide by providing it internet connection. SD card option is also available in it and we can write and read this card by using SD library. Endless amount of possibilities are provided by just allowing your project to connect to internet.
This shield relies on Wiznet W5100 chip Ethernet with internal buffer space of 16 KB. It can support up to 4 simultaneous socket connections. This chip provides a network IP stack which is capable of both transport layer protocol of internet i.e. TCP (transmission control protocol) and UDP (user datagram protocol). TCP provides more reliable service of transporting messages as compared to UDP and much more features of these 2 protocols are there but that’s not our concern in this article right now. We are simply focused on providing our board internet connectivity via this shield.
The newer version of this shield relies on W5500 Ethernet chip having 32 KB buffer size, supports auto negotiation and supports I2C , UART interface. By making use of long wire warp headers for connecting Ethernet shield to Arduino board keeps the pin layout intact and other shields can be stacked on top of it.
PROJECTS ideas with ARDUINO ETHERNET SHIELD
Some of the projects which are done using Ethernet shield are listed below:
- Ethernet-based home automation system using Arduino Ethernet shield
- Chat server
- Homeotic (Home automation system)
- Web client
- Automated Garden
- Web server
- Barometric pressure web server
- Web client repeating
- UDP send receive the string
- UDP NTP client
- DHCP address printer
- Telnet client
- DHCP chat server
That’s all folks. I hope you really like this article. Any suggestion or queries related to this article can be asked in the comment section below.


COMMENTS