What if you do not have physical access to your Router & your Laptop is connected over WIFI to the Router. Or you cannot run a RJ45 cable from Router to Ethernet shield.
First step is to enable SHARING of your existing internet. Using Laptop as WiFi to Ethernet Gateway.
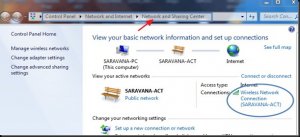
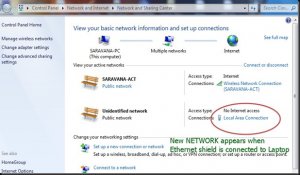
Open control Panel > Network & Internet > Network & Sharing Center
Click on the existing Internet connection
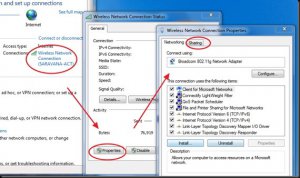
click PROPERTIES > SHARING
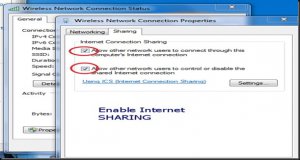
Enable SHARING of Internet connection
Connect Arduino USB cable to Laptop USB port, And Arduino Ethernet cable to Laptop Ethernet port

check UNINENTIFIED NETWORK
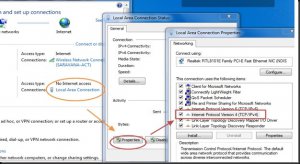
click NEW Network > select PROPERTIS > double click TCP/IPV4
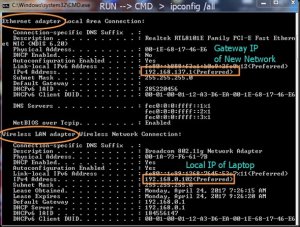
Set IP address as Gateway Address of the new network formed by Ethernet shield.
If you do not see any IP, just type manually the IP

RUN > CMD > IPCONFIG/ALL
you can check the IP you set.
This is now the Gateway IP & Ethernet shield will be allotted IP in this range.
Now fullfill the Arduino Code.
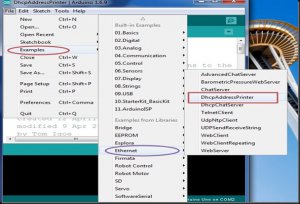
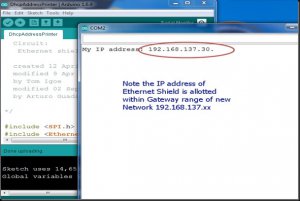
Open Arduino IDE > File > Examples > Ethernet > DhcpAddressPrinter
Upload Code > Open Serial Monitor > check my IP address
If you want to learn more about this tutorial, please enter the original link on top.
Thank you
COMMENTS