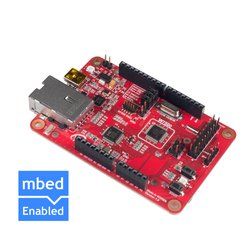
WIZwiki-W7500 is mbed enabled IoT oriented platform and this Instructable is the getting started guide for this platform.
One of the unique things about wiznet products is that their ICs come with TCP/IP stack implemented in the hardware as opposed to the conventional IoT or web enabled hardware platforms. TCP/IP is the stack which makes the web tick this component (usually software component) is responsible for sending and receiving the data between two interconnected device by making use of underlaying hardware such as ethernet or wifi.
In this getting started guide, we will be blinking the on-board LED.
Step 1: Creating Mbed Account


If you do not have an mbed account already, follow these steps to create an account.
Creating an account allows you access to the mbed’s online compiler using which you’ll be able to develop code right from your browser.
- Go to https://developer.mbed.org/
- Click on “Login or sign up”
- Click on “sign up”
- Click on “No, I haven’t created an account before”
- Fill in your details and click on “Signup”
Step 2: Write the Blink Code


Log in to your account and click on “compiler” this should take you to your workspace.
First, you need to add the WizWiki platform into your workspace.
Do this by clicking on this link while you have logged in and click on “Add to your mbed Compiler” direct link:
https://developer.mbed.org/platforms/WIZwiki-W7500…
You might need to select the WIZwiki as the target platform in your IDE. You can do this by clicking on the button present at the top right corner. By default this should be “mbed LPC1768” select WIZwiki-W7500 and click on “Select Platform”
Click on “New” to create a new project and click on “OK” in the dialog box that appears next.
Double click on “main.cpp” to start editing. Remove all of the code from the editor and paste the following code:
#include "mbed.h"<br>
DigitalOut RED(LED_RED);
DigitalOut GREEN(LED_GREEN);
DigitalOut BLUE(LED_BLUE);

int main() {
    while(1) {
        RED = 1;
        GREEN = 0;
        BLUE = 0;
        wait(0.2);
        RED = 0;
        GREEN = 1;
        BLUE = 0;
        wait(0.2);
        RED = 0;
        GREEN = 0;
        BLUE = 1;
        wait(0.2);
    }
}
Click on “Compile” after some time you should see “Download file” window pop up or if you are using Chrome the download of the executable file of the program compiled should be downloaded.
Step 3: Blinking the LEDs


Now connect the WIZwiki platform to your PC using a USB cable.
You should see a drive by name “MBED” open the drive and copy the downloaded “.bin” file onto this drive.
Click on the reset button (SW1) once the drive dismounts and mounts automatically.
You should see the RGB LED light up in red, green and blue pattern repeatedly.
COMMENTS