How to use with Arduino – Ethernet Shield W5100 (Web server)

The Ethernet Shield W5100 is a card that allows the Arduino to connect to a local network or the internet.
ORIGINAL POST
By Euler Oliveira
components
Hardware Components
details

Arduino1.png

– Description:

The  Ethernet Shield W5100  is a card that allows the Arduino to connect to a local network or the internet. It has the Wiznet W5100 chip and supports up to four socket connections simultaneously. The shield has a memory card slot (micro SD), where you can store files that can be sent over the local network / internet, and also has libraries for use by Arduino.

Due to the need to connect the Arduino to the world wide web, the  Ethernet Shield W5100 was developed Many projects developed with Arduino need access / control remotely and when using the Ethernet Shield W5100 this need is supplied in a simple and practical way, simply attach the shield to the Arduino, connect the shield to the router / modem through a RJ45 network cable, insert the correct source code into the Arduino and enjoy the benefits.

By inserting Arduino on the internet, you can access it from anywhere in the world, whether with a computer, smartphone or tablet and get information or request that actions be performed. For projects involving integration between Arduino and Android or iOS applications, the  Ethernet Shield W5100  becomes an important member of the project. Because it is a shield, even attached to the top of the Arduino, you can still use most of the digital and analog ports on the board.

– Specifications and features:

– Supported protocols: TCP / IP, UDP, ICMP, IPv4 ARP, IGMP, PPPoE, Ethernet – Support (Full-duplex and half-duplex) – Controller: W5100
– Operating voltage: 3.3V – 5VDC
– Connection speed: 10 / 100Mb -Duplex) – Support ADSL connection (PPPoE with PAP / CHAP in authentication mode) – Support 4 independent connections simultaneously – Internal Memory: 16Kb for Tx / Rx buffers – Arduino connection via SPI

 Practice wiring diagram:

img01_como_usar_com_arduino_ethernet_shield_w5100_uno_mega_2560_nano_internet_automacao_residencial_android_telefone_rele_web_server

#include <SPI.h> //INCLUSÃO DE BIBLIOTECA
#include <Ethernet.h> //INCLUSÃO DE BIBLIOTECA
byte mac[] = { 0xDE, 0xAD, 0xBE, 0xEF, 0xFE, 0xED }; //ATRIBUIÇÃO DE ENDEREÇO MAC AO ETHERNET SHIELD W5100
byte ip[] = { 192, 168, 0, 175 }; //COLOQUE UMA FAIXA DE IP DISPONÍVEL DO SEU ROTEADOR. EX: 192.168.1.110  **** ISSO VARIA, NO MEU CASO É: 192.168.0.175
byte gateway[] = {192, 168, 0, 1}; //GATEWAY DE CONEXÃO (ALTERE PARA O GATEWAY DO SEU ROTEADOR)
byte subnet[] = {255, 255, 255, 0}; //MASCARA DE REDE (ALTERE PARA A SUA MÁSCARA DE REDE)
EthernetServer server(80); //PORTA EM QUE A CONEXÃO SERÁ FEITA
const int ledPin = 9; //PINO DIGITAL UTILIZADO PELO LED
String readString = String(30); //VARIÁVEL PARA BUSCAR DADOS NO ENDEREÇO (URL)
int status = 0; //DECLARAÇÃO DE VARIÁVEL DO TIPO INTEIRA(SERÁ RESPONSÁVEL POR VERIFICAR O STATUS ATUAL DO LED)
void setup(){
  Ethernet.begin(mac, ip, gateway, subnet); //PASSA OS PARÂMETROS PARA A FUNÇÃO QUE VAI FAZER A CONEXÃO COM A REDE
  server.begin(); //INICIA O SERVIDOR PARA RECEBER DADOS NA PORTA 80
  pinMode(ledPin, OUTPUT); //DEFINE O PINO COMO SAÍDA
  digitalWrite(ledPin, LOW); //LED INICIA DESLIGADO
  }
void loop(){
EthernetClient client = server.available(); //CRIA UMA CONEXÃO COM O CLIENTE
  if (client) { // SE EXISTE CLIENTE, FAZ
    while (client.connected()) {//ENQUANTO EXISTIR CLIENTE CONECTADO, FAZ
   if (client.available()) { //SE O CLIENTE ESTÁ HABILITADO, FAZ
    char c = client.read(); //LÊ CARACTERE A CARACTERE DA REQUISIÇÃO HTTP
    if (readString.length() < 100) //SE O ARRAY FOR MENOR QUE 100, FAZ
      {
        readString += c; // “readstring” VAI RECEBER OS CARACTERES LIDO
      }  
        if (c == ‘n’) { //SE ENCONTRAR “n” É O FINAL DO CABEÇALHO DA REQUISIÇÃO HTTP
          if (readString.indexOf(“?”) <0){ //SE ENCONTRAR O CARACTER “?”, FAZ
          }
          else //SENÃO,FAZ
        if(readString.indexOf(“ledParam=1”) >0) //SE ENCONTRAR O PARÂMETRO “ledParam=1”, FAZ
           {
             digitalWrite(ledPin, HIGH); //LIGA O LED
             status = 1; //VARIÁVEL RECEBE VALOR 1(SIGNIFICA QUE O LED ESTÁ LIGADO)
           }else{ //SENÃO, FAZ
             digitalWrite(ledPin, LOW); //DESLIGA O LED
             status = 0; //VARIÁVEL RECEBE VALOR 0(SIGNIFICA QUE O LED ESTÁ DESLIGADO)            
           }
          client.println(“HTTP/1.1 200 OK”); //ESCREVE PARA O CLIENTE A VERSÃO DO HTTP
          client.println(“Content-Type: text/html”); //ESCREVE PARA O CLIENTE O TIPO DE CONTEÚDO(texto/html)
          client.println(“”);
          client.println(“<!DOCTYPE HTML>”); //INFORMA AO NAVEGADOR A ESPECIFICAÇÃO DO HTML
          client.println(“<html>”); //ABRE A TAG “html”
          client.println(“<head>”); //ABRE A TAG “head”
          client.println(“<link rel=’icon’ type=’image/png’ href=’http://blogmasterwalkershop.com.br/arquivos/artigos/sub_wifi/logo_mws.png’/>”); //DEFINIÇÃO DO ICONE DA PÁGINA
          client.println(“<title>MasterWalker Shop – Controle de Led via Web server</title>”); //ESCREVE O TEXTO NA PÁGINA
          client.println(“</head>”); //FECHA A TAG “head”
          client.println(“<body style=background-color:#ADD8E6>”); //DEFINE A COR DE FUNDO DA PÁGINA
          client.println(“<center><font color=’blue’><h1>MASTERWALKER SHOP</font></center></h1>”); //ESCREVE “MASTERWALKER SHOP” EM COR AZUL NA PÁGINA
          client.println(“<h1><center>CONTROLE DE LED</center></h1>”); //ESCREVE “CONTROLE DE LED” NA PÁGINA
          if (status == 1){ //SE VARIÁVEL FOR IGUAL A 1, FAZ
          //A LINHA ABAIXO CRIA UM FORMULÁRIO CONTENDO UMA ENTRADA INVISÍVEL(hidden) COM O PARÂMETRO DA URL E CRIA UM BOTÃO APAGAR (CASO O LED ESTEJA LIGADO)
          client.println(“<center><form method=get name=LED><input type=hidden name=ledParam value=0 /><input type=submit value=APAGAR></form></center>”);
          }else{ //SENÃO, FAZ
          //A LINHA ABAIXO CRIA UM FORMULÁRIO CONTENDO UMA ENTRADA INVISÍVEL(hidden) COM O PARÂMETRO DA URL E CRIA UM BOTÃO ACENDER (CASO O LED ESTEJA DESLIGADO)
          client.println(“<center><form method=get name=LED><input type=hidden name=ledParam value=1 /><input type=submit value=ACENDER></form></center>”);
          }
          client.println(“<center><font size=’5′>Status atual do LED: </center>”); //ESCREVE “Status atual do LED:” NA PÁGINA
          if (status == 1){ //SE VARIÁVEL FOR IGUAL A 1, FAZ
              client.println(“<center><font color=’green’ size=’5′>LIGADO</center>”); //ESCREVE “LIGADO” EM COR VERDE NA PÁGINA
          }else{ //SENÃO, FAZ
              client.println(“<center><font color=’red’ size=’5′>DESLIGADO</center>”); //ESCREVE “DESLIGADO” EM COR VERMELHA NA PÁGINA
          }    
          client.println(“<hr/>”); //TAG HTML QUE CRIA UMA LINHA HORIZONTAL NA PÁGINA
          client.println(“<hr/>”); //TAG HTML QUE CRIA UMA LINHA HORIZONTAL NA PÁGINA
          client.println(“</body>”); //FECHA A TAG “body”
          client.println(“</html>”); //FECHA A TAG “html”
          readString=“”; //A VARIÁVEL É REINICIALIZADA
          client.stop(); //FINALIZA A REQUISIÇÃO HTTP E DESCONECTA O CLIENTE
            }
          }
        }
      }
}

Arduino1.png

– Description:

The  Ethernet Shield W5100  is a card that allows the Arduino to connect to a local network or the internet. It has the Wiznet W5100 chip and supports up to four socket connections simultaneously. The shield has a memory card slot (micro SD), where you can store files that can be sent over the local network / internet, and also has libraries for use by Arduino.

Due to the need to connect the Arduino to the world wide web, the  Ethernet Shield W5100 was developed Many projects developed with Arduino need access / control remotely and when using the Ethernet Shield W5100 this need is supplied in a simple and practical way, simply attach the shield to the Arduino, connect the shield to the router / modem through a RJ45 network cable, insert the correct source code into the Arduino and enjoy the benefits.

By inserting Arduino on the internet, you can access it from anywhere in the world, whether with a computer, smartphone or tablet and get information or request that actions be performed. For projects involving integration between Arduino and Android or iOS applications, the  Ethernet Shield W5100  becomes an important member of the project. Because it is a shield, even attached to the top of the Arduino, you can still use most of the digital and analog ports on the board.

– Specifications and features:

– Supported protocols: TCP / IP, UDP, ICMP, IPv4 ARP, IGMP, PPPoE, Ethernet – Support (Full-duplex and half-duplex) – Controller: W5100
– Operating voltage: 3.3V – 5VDC
– Connection speed: 10 / 100Mb -Duplex) – Support ADSL connection (PPPoE with PAP / CHAP in authentication mode) – Support 4 independent connections simultaneously – Internal Memory: 16Kb for Tx / Rx buffers – Arduino connection via SPI

 Practice wiring diagram:
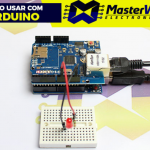
img01_como_usar_com_arduino_ethernet_shield_w5100_uno_mega_2560_nano_internet_automacao_residencial_android_telefone_rele_web_server

#include <SPI.h> //INCLUSÃO DE BIBLIOTECA
#include <Ethernet.h> //INCLUSÃO DE BIBLIOTECA
byte mac[] = { 0xDE, 0xAD, 0xBE, 0xEF, 0xFE, 0xED }; //ATRIBUIÇÃO DE ENDEREÇO MAC AO ETHERNET SHIELD W5100
byte ip[] = { 192, 168, 0, 175 }; //COLOQUE UMA FAIXA DE IP DISPONÍVEL DO SEU ROTEADOR. EX: 192.168.1.110  **** ISSO VARIA, NO MEU CASO É: 192.168.0.175
byte gateway[] = {192, 168, 0, 1}; //GATEWAY DE CONEXÃO (ALTERE PARA O GATEWAY DO SEU ROTEADOR)
byte subnet[] = {255, 255, 255, 0}; //MASCARA DE REDE (ALTERE PARA A SUA MÁSCARA DE REDE)
EthernetServer server(80); //PORTA EM QUE A CONEXÃO SERÁ FEITA
const int ledPin = 9; //PINO DIGITAL UTILIZADO PELO LED
String readString = String(30); //VARIÁVEL PARA BUSCAR DADOS NO ENDEREÇO (URL)
int status = 0; //DECLARAÇÃO DE VARIÁVEL DO TIPO INTEIRA(SERÁ RESPONSÁVEL POR VERIFICAR O STATUS ATUAL DO LED)
void setup(){
  Ethernet.begin(mac, ip, gateway, subnet); //PASSA OS PARÂMETROS PARA A FUNÇÃO QUE VAI FAZER A CONEXÃO COM A REDE
  server.begin(); //INICIA O SERVIDOR PARA RECEBER DADOS NA PORTA 80
  pinMode(ledPin, OUTPUT); //DEFINE O PINO COMO SAÍDA
  digitalWrite(ledPin, LOW); //LED INICIA DESLIGADO
  }
void loop(){
EthernetClient client = server.available(); //CRIA UMA CONEXÃO COM O CLIENTE
  if (client) { // SE EXISTE CLIENTE, FAZ
    while (client.connected()) {//ENQUANTO EXISTIR CLIENTE CONECTADO, FAZ
   if (client.available()) { //SE O CLIENTE ESTÁ HABILITADO, FAZ
    char c = client.read(); //LÊ CARACTERE A CARACTERE DA REQUISIÇÃO HTTP
    if (readString.length() < 100) //SE O ARRAY FOR MENOR QUE 100, FAZ
      {
        readString += c; // “readstring” VAI RECEBER OS CARACTERES LIDO
      }  
        if (c == ‘n’) { //SE ENCONTRAR “n” É O FINAL DO CABEÇALHO DA REQUISIÇÃO HTTP
          if (readString.indexOf(“?”) <0){ //SE ENCONTRAR O CARACTER “?”, FAZ
          }
          else //SENÃO,FAZ
        if(readString.indexOf(“ledParam=1”) >0) //SE ENCONTRAR O PARÂMETRO “ledParam=1”, FAZ
           {
             digitalWrite(ledPin, HIGH); //LIGA O LED
             status = 1; //VARIÁVEL RECEBE VALOR 1(SIGNIFICA QUE O LED ESTÁ LIGADO)
           }else{ //SENÃO, FAZ
             digitalWrite(ledPin, LOW); //DESLIGA O LED
             status = 0; //VARIÁVEL RECEBE VALOR 0(SIGNIFICA QUE O LED ESTÁ DESLIGADO)            
           }
          client.println(“HTTP/1.1 200 OK”); //ESCREVE PARA O CLIENTE A VERSÃO DO HTTP
          client.println(“Content-Type: text/html”); //ESCREVE PARA O CLIENTE O TIPO DE CONTEÚDO(texto/html)
          client.println(“”);
          client.println(“<!DOCTYPE HTML>”); //INFORMA AO NAVEGADOR A ESPECIFICAÇÃO DO HTML
          client.println(“<html>”); //ABRE A TAG “html”
          client.println(“<head>”); //ABRE A TAG “head”
          client.println(“<link rel=’icon’ type=’image/png’ href=’http://blogmasterwalkershop.com.br/arquivos/artigos/sub_wifi/logo_mws.png’/>”); //DEFINIÇÃO DO ICONE DA PÁGINA
          client.println(“<title>MasterWalker Shop – Controle de Led via Web server</title>”); //ESCREVE O TEXTO NA PÁGINA
          client.println(“</head>”); //FECHA A TAG “head”
          client.println(“<body style=background-color:#ADD8E6>”); //DEFINE A COR DE FUNDO DA PÁGINA
          client.println(“<center><font color=’blue’><h1>MASTERWALKER SHOP</font></center></h1>”); //ESCREVE “MASTERWALKER SHOP” EM COR AZUL NA PÁGINA
          client.println(“<h1><center>CONTROLE DE LED</center></h1>”); //ESCREVE “CONTROLE DE LED” NA PÁGINA
          if (status == 1){ //SE VARIÁVEL FOR IGUAL A 1, FAZ
          //A LINHA ABAIXO CRIA UM FORMULÁRIO CONTENDO UMA ENTRADA INVISÍVEL(hidden) COM O PARÂMETRO DA URL E CRIA UM BOTÃO APAGAR (CASO O LED ESTEJA LIGADO)
          client.println(“<center><form method=get name=LED><input type=hidden name=ledParam value=0 /><input type=submit value=APAGAR></form></center>”);
          }else{ //SENÃO, FAZ
          //A LINHA ABAIXO CRIA UM FORMULÁRIO CONTENDO UMA ENTRADA INVISÍVEL(hidden) COM O PARÂMETRO DA URL E CRIA UM BOTÃO ACENDER (CASO O LED ESTEJA DESLIGADO)
          client.println(“<center><form method=get name=LED><input type=hidden name=ledParam value=1 /><input type=submit value=ACENDER></form></center>”);
          }
          client.println(“<center><font size=’5′>Status atual do LED: </center>”); //ESCREVE “Status atual do LED:” NA PÁGINA
          if (status == 1){ //SE VARIÁVEL FOR IGUAL A 1, FAZ
              client.println(“<center><font color=’green’ size=’5′>LIGADO</center>”); //ESCREVE “LIGADO” EM COR VERDE NA PÁGINA
          }else{ //SENÃO, FAZ
              client.println(“<center><font color=’red’ size=’5′>DESLIGADO</center>”); //ESCREVE “DESLIGADO” EM COR VERMELHA NA PÁGINA
          }    
          client.println(“<hr/>”); //TAG HTML QUE CRIA UMA LINHA HORIZONTAL NA PÁGINA
          client.println(“<hr/>”); //TAG HTML QUE CRIA UMA LINHA HORIZONTAL NA PÁGINA
          client.println(“</body>”); //FECHA A TAG “body”
          client.println(“</html>”); //FECHA A TAG “html”
          readString=“”; //A VARIÁVEL É REINICIALIZADA
          client.stop(); //FINALIZA A REQUISIÇÃO HTTP E DESCONECTA O CLIENTE
            }
          }
        }
      }
}
documents
Others
MasterWalker Shop

COMMENTS

Please Login to comment
  Subscribe  
Notify of
POSTED BY