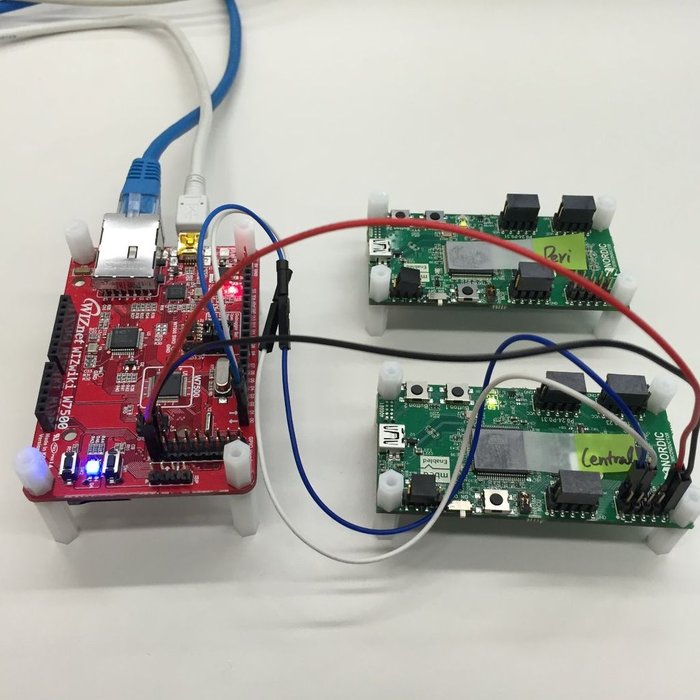
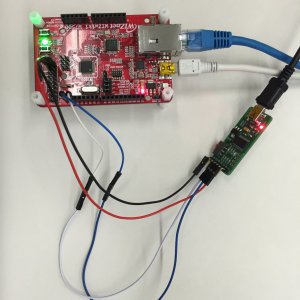
Step 1: Hardware Connection

Please connect an USB cable and LAN cable.
You can get more HW info by the following site.
http://wizwiki.net/wiki/doku.php?id=products:wizwiki_w7500:start
Step 2: Prepare Development Environment
I prepared GCC development environment by the following site.
http://lghmms.cafe24.com/how-to-build-a-development-environment-with-gnu-arm-java-jdk-eclipse-cygwin/
I installed GNU Toolchain, Java JDK, Eclipse, Cygwin.
If you install all tools, you are ready for running this project.
You can use a Configuration Tool by the following temporarily.
http://wizwiki.net/wiki/doku.php?id=products:wiz550s2e:wiz550s2e_download
How to use a CFG tool : http://wizwiki.net/wiki/doku.php?id=products:wiz550s2e:wiz550s2epg_en#configuration_tool
WIZwiki-W7500 library source : http://wizwiki.net/wiki/doku.php?id=products:w7500:library
Step 3: Software : GitHub Repository
I opened source codes of this project in GitHub.
https://github.com/bingdo/S2EApp_WIZwiki-W7500_Eclipse
You can download this project files. And then import project into Eclipse.
You must modify source codes for this test.
After compile, you can run S2E application of WIZwiki-W7500.
This project is open for everyone. I expect your participation to improve a quality of project.
Step 4: How to Run : Test Result
1. To program FW into a target.
2. To reset a target and insert MAC address.
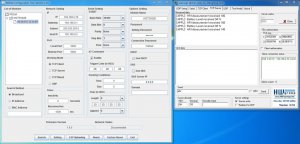
3. To search a target by Configuration Tool.
4. To check Host IP and start Server.
5. To change IP, Gateway, HostIP properly.
6. To change Working Mode of target to TCP Client or Mixed Mode by CFG tool.
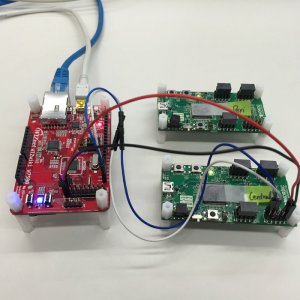
7. To connect with nRF51822-mKIT(Central) through UART0.
8. Turn nRF51822-mKIT(Peripheral) on.
You can see the test result.
COMMENTS