components
Hardware Components
Software Apps and online services
Flash Download Tools (ESP8266 & ESP32) details

ESP32 is undoubtly a powerful and popular SoC used in many projects since its introduction to the market. It enjoys a mighty 32-bit tensilica core providing WiFi and Bluetooth connectivity and a rich set of periphrals. It is been some years since ESP32 appeared on IoT scene ;however, the majority of development board designed for it so far, if not all, are based on ESP8266 node mcu pinout which is for breadboard install. On the other hand, ESP32 has an Arduino core supported by arduino software. So one can use already available Arduino libraries for the ESP32. Despite flexibilty in software, it is not very convenient to use availabe Arduino shields with ESP32.
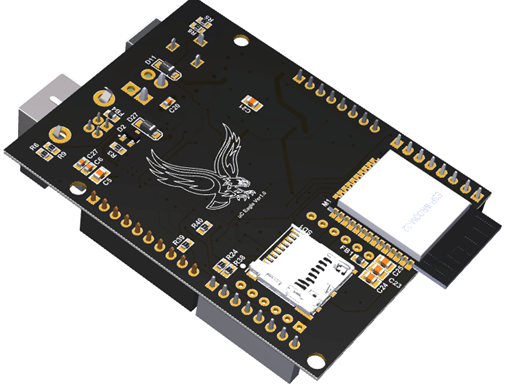
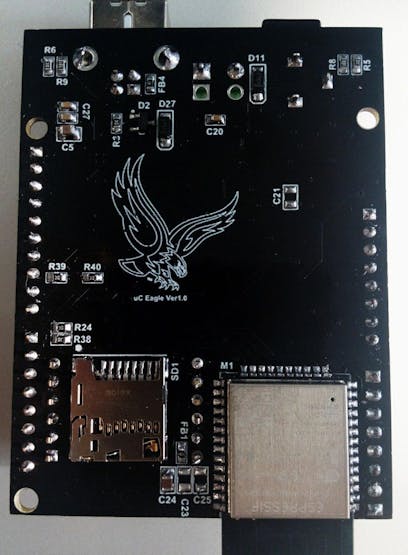
As a conclusion, the idea of an ESP32-based Arduino compatible system came in to my mind. I decided to make it as flexible and as powerful as possible by adding sensor interfacing circuits, micro-SD card, and ethernet module to the system to make it a complete IoT solution. So, the developer already have almost all they need for an IoT application in a single board in Arduino UNO layout. The result was ESP Eagle.
All the ESP32 I/O pins that are exposed to connectors are protected against ESD, short circuit, and over voltage. In aditition, The power supply uses TPS73801 regulator which can be powered easily from a transfomer jack or terminal connector up to 12V without too much heat dissipation. There is also an on-board CP2102N which can be used to programming and debugging purposes the ESP32 without much effort via the USB. The USB also can power the board as long as it draws up to 500mA which is most of the time.
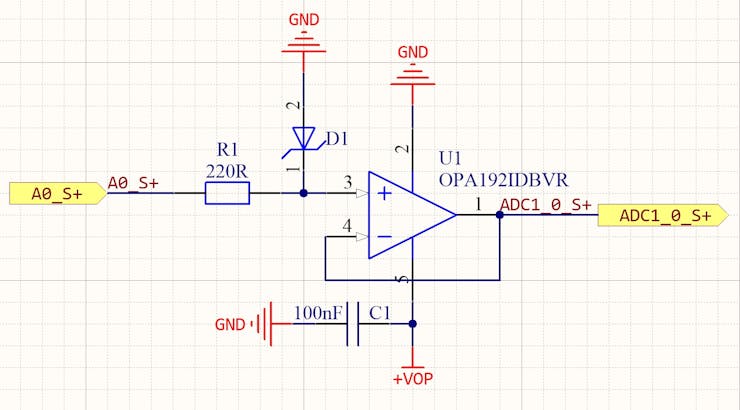
The IO0 and EN push buttons are also available on the board in case it is required. For the analog Input pins, there is a buffer stage including over voltage protection using a OP192 precision opamp. Using this stage sensors can be directly connected to the analog input pins. The analog circuits have an isolated ground plane and a different regulator not be affected by digital noise of circuit.
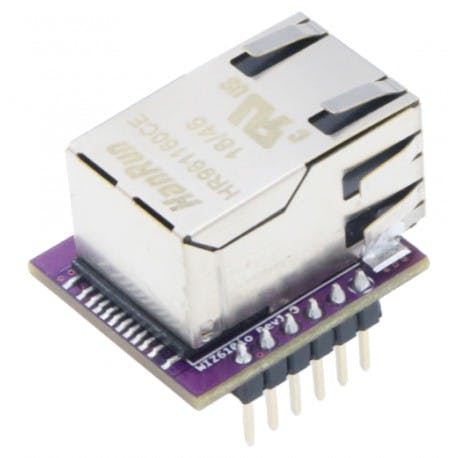
For Ethernet connectivity, there is room for a Wiz610io ethernet module. This is the newest Wiznet W6100 SPI to Ethernet chip. The good thing about this module is that you can install it when you require it. Otherwise, you can remove it to further redcue power consumption. HSPI of ESP32 is connected to this module.
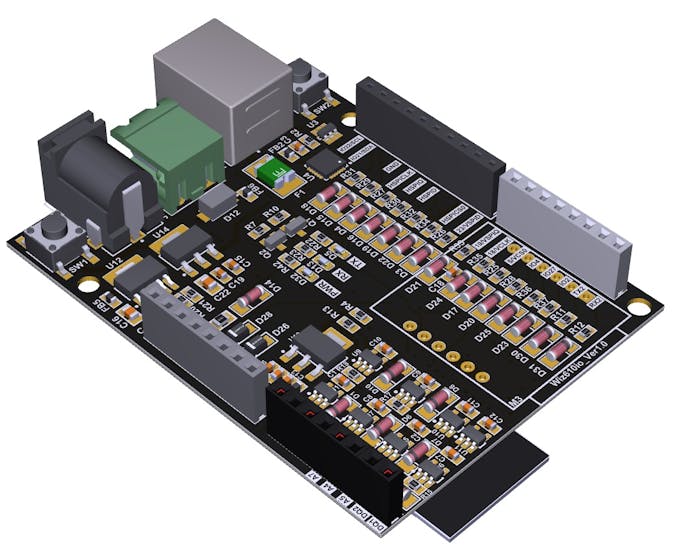
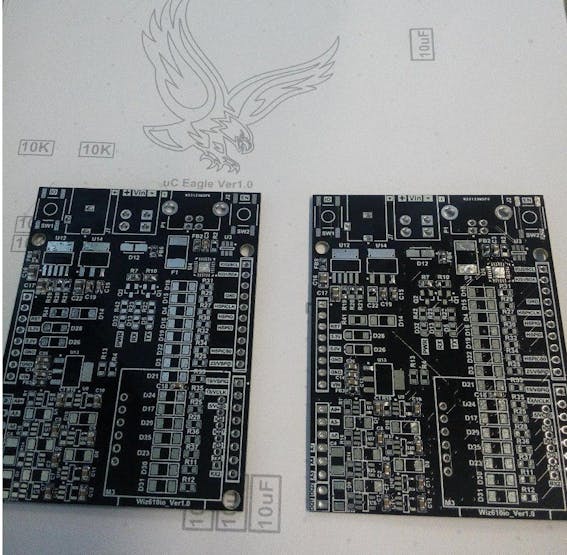
Finally, the I/O pins of ESP32 are protected, so you can easily use 5V arduino shields with it without worry. Due to high circuit density in some parts and also due to better EMC performace, 4-layer stack-up was chosen.

The PCB was manufactured by PCBWay in china for a reasonable price. I really recommend this manufacturer. They manufactured 10 4-layer PCBs for just 49$. The PCB quality is really good. I ordered the same components that is found in BOM of the project from DigiKey.
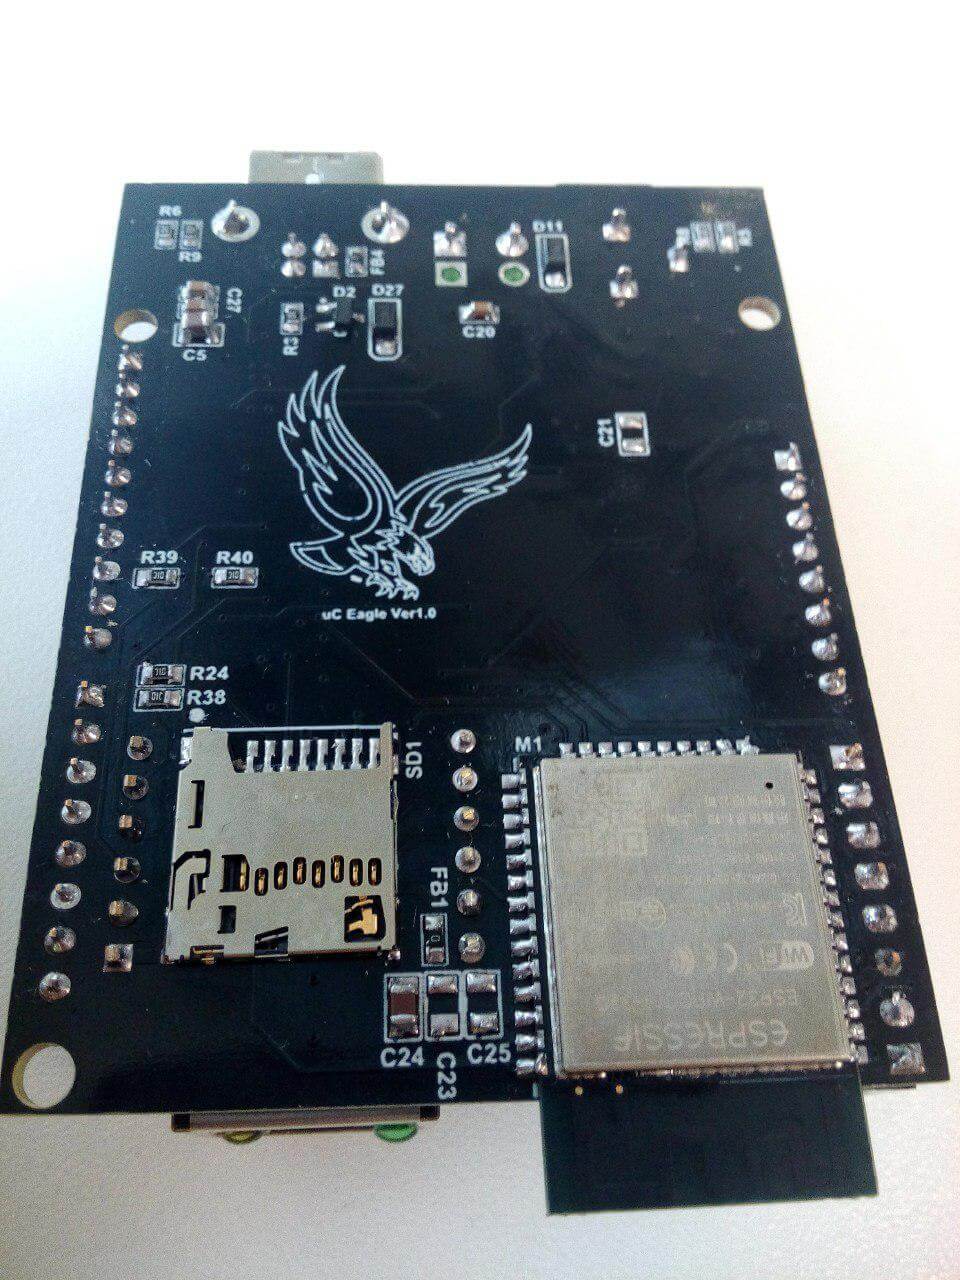
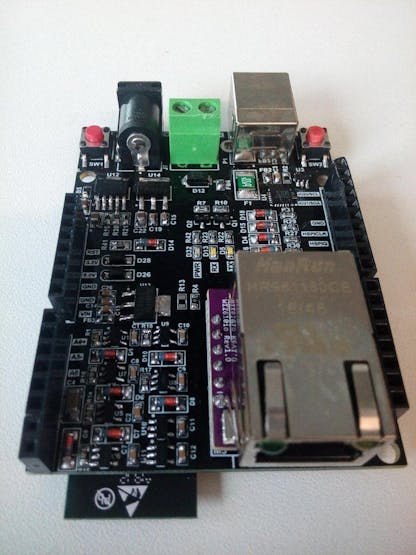
Finally the soldered and Tested board look awesome!
NOTE for soldering:
For hand soldering the board try to solder the CP2102N and the OPAMPs. Afterwards, solder the remaining components. Otherwise it might be difficult and some components might get over heat. This happened to me and one of the connectors melted a little bit.
Hi,
Thanks for this project. It looks very interesting.
I can see you’ve used W6100 in this project together with ESP32.
Have you tried to use MQTT on this device or other long-running TCP connections? Have you spotted any instability?
Hi. I have only tested the functionality so far to see if the ESP32 is programmed and if the W6100 is able to communicate correctly with Ethernet. It is because I am working on the next revision. I will do a comprehensive test later.
Hi,
I have another hardware, ESP32 with W5500, all my programs work.
Now I want to switch from W5500 to W6100, but can not find a working Ethernet library.
Which Ethernet library do you use in your test program?
If you want to the W6100 library for Arduino, You can refer to https://github.com/Wiznet/Ethernet/tree/W6100
Thank you.
This library is known to me, but can’t be used for ESP32, you will get lot of compiler errors. It is OK only for classic AVR Arduinos.
Thank you anyway.
HI! Very good work! I have one question for you: The Opamp OPA192 is powered with 5Volt or 3.3Volt?
Thanks! Best regards