First you will go to “Examples > Simple > Touch buttons (LC717A00_Touch)” (See Figure 1). After you load this example you might see an Indexing error (Figure 2). If so, Right-Click on the project header on the left and click “Index > Rebuild” (Figure 3).

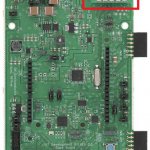
Next, we will program the device. Plug in your USB A to MINI B cord (Figure 4) into the port on the BB-GEVK (Figure 5). Then open Device Manager and go to “Ports (COM & LPT)” and find the “USB Serial Port (COMx)” (Figure 6). Note what COM port it is in.

Connect the J7, J13 a J15 jumpers on the TPS shield as per Figure 7 (Yellow). Connect the TS-GEVB to the BB-GEVK in one of the two ports highlighted (Figure 8).

To program the device go to “Project > Build All” (Figure 9). Then select the Project Name in the Project Explorer and press the ON Button icon (Figure 10). It was then ask you to select which COM port to program to (Figure 11). Select the COM port found before.

Now a CMD Window will pop up tell you to “Please reset the board” (Figure 12). Select the button to the left of the LCD screen that says “RESET SW6” (Figure 13). The device will then begin to program (Figure 14).

Reset the board and The cmd window and the baseboard LCD display will show a number-based integer corresponding to the spot you touch (Figures 15 and 16). At the same time, the particular LED diode should light up. (Figure 17)


COMMENTS