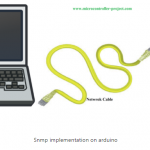
SNMP(Simple Network Management Protocol) Implementation on Arduino Ethernet Shield: Monitoring Room Temperature

n this tutorial i am going to teach you how to implement snmp over arduino Ethernet shield and monitor a remote system over a network. So what is snmp? Snmp stands for Simple Network Management Protocol
ORIGINAL POST
By EG Project
components
Hardware Components
Arduino UNO R3
X 1
ethernet shield W5100
X 1
LM35
X 1
details

ethernet7.PNG

n this tutorial i am going to teach you how to implement snmp over arduino Ethernet shield and monitor a remote system over a network. So what is snmp? Snmp stands for Simple Network Management Protocol. As the name depicts the protocol is used to monitor the equipment/peripherals connected to a network. Snmp can monitor and update the status of network peripherals such as routers, servers, printers, switches, hubs and other devices connected to a network. Today snmp protocol is widely used in telecom industry to monitor the status of remote BTS(Base Stations) sites and data centers. At BTS sites snmp is used to monitor the generator status, rectifier voltages, battery voltages and ups efficiency etc. Almost all the telecom industry is using snmp for their remote site telecom equipment monitoring.

A network that implements snmp protocol consist of two broad entities. 

  • SNMP Agents
  • SNMP Managers

Project Circuit Diagram

Mount Arduino Ethernet shield on Arduino uno. Connect LM35 Vout pin to Analog channel-0 of arduino. Vout is middle pin of lm35. Ground gnd pin of lm35 with arduino ground. Apply vcc +5 volts to another pin of lm35, connect it to +5 volt pin of arduino. Insert on end of network cable in RJ45 port of arduino Ethernet shield and connect other end of network cable to PC or your lap top on whom you installed the snmp manager.

Note:
 You can use any other arduino board if you want. Code is compatible with all arduino boards mega etc. Make sure to use TTL level boards. Arduino due is a +3.3v board, Ethernet shield will not work with it.
If you are new and don’t know about LM35 Pin out, its internal structure and formula derivation for arduino than i have some good tutorial for you.


documents
Code
Arduino code

COMMENTS

Please Login to comment
  Subscribe  
Notify of
POSTED BY