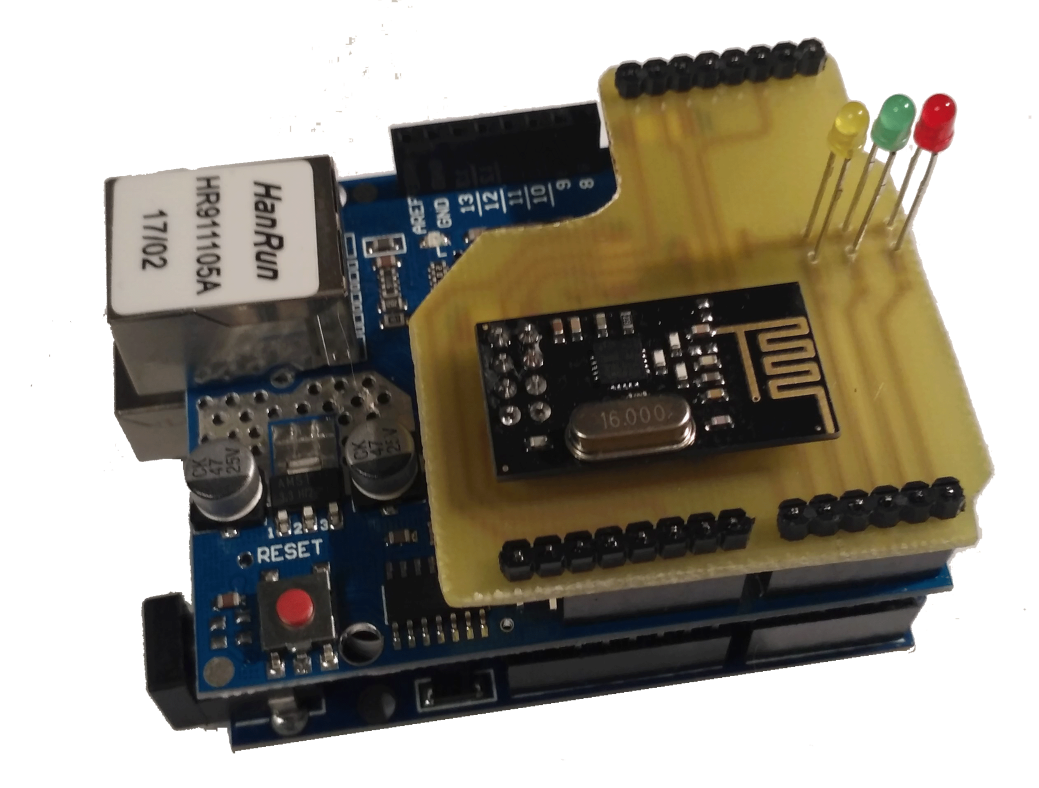
NRF24L01 shield for Arduino Uno (for MySensors gateway)

Connect radio module to gateway without tons of wires and without spending money and time for PCB
ORIGINAL POST
By Stormy
details

IMG_20190119_230926.png

PROJECT HIGHLIGHTS

  • shield for Arduino Uno / Wiznet W5100 ethernet shield
  • compatible with NRF24L01 and NRF24L01 PA LNA
  • stable power supply for NRF24L01
  • PCB easy to DIY even for beginner:
    • single layer
    • track width 0,8mm
    • track clearance 0,8mm

DESCRIPTION

This device was designed to be installed on Arduino Uno and/or Wiznet W5100 ethernet shield. This board is designed to be easy to DIY with termotranfer or chemotransfer method so it is single layer, track are 0,8mm wide and track clearance is also 0,8mm. This design uses 0 Ohm SMD2512 resistor as jumper. It is easy, convinient and aesthetic but you can obviously drill holes in pads and use wires as jumpers.

ASSEMBLY INSTRUCTIONS

If you never try DIY PCB before it is good reason to try it!

  1. Make PCB
  2. [optional] You can paint top side of board to make it pretty 🙂
  3. Solder SMD components on bottom side
  4. Solder NRF24L01
  5. Solder goldpins
  6. Solder diodes – you can solder diodes in many ways, straight, at 90 degree angle etc. It depends on your gateway case.
  7. [optional] Protect tracks on bottom side with some protective coat. I can recommend this one: https://www.tme.eu/en/details/70_200/protection-screen-coatings/kontakt-chemie/74309-003/

    DISCLAIMER

If you order or use this you agree to and understand that the author is not liable for any injury or damage howsoever caused and that you use this PCB at your own risk. This is DIY and the author has not made any professional test. This product has not been marked with any certification marks and cant be guaranteed to compliance with any standards.

COMMENTS

Please Login to comment
  Subscribe  
Notify of