Overview
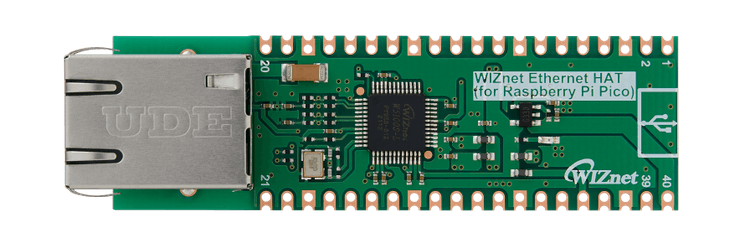
WIZnet Ethernet HAT (Hardware Attached on Top) is a Raspberry Pi Pico pin-compatible board that utilizes W5100S and supports both 3.3V & 5V.
Please refer to this link to find more information about W5100S.
- Raspberry Pi Pico Pin-Compatible
- Ethernet (W5100S Hardwired TCP/IP CHIP)
- Product page : https://docs.wiznet.io/Product/iEthernet/W5100S/overview
- Support 4 Independent Hardware SOCKETs simultaneously
- Support SOCKET-less new Command: ARP-Request, PING-Request
- Support Auto-MDIX only when Auto-Negotiation mode

RP2040 Datasheet – https://www.raspberrypi.org/documentation/microcontrollers/raspberry-pi-pico.html

Prepare
Prepare Hardware
1.Combine WIZnet Ethernet HAT with Raspberry Pi Pico.
2.Connect ethernet cable to Ethernet HAT ethernet port.
3.Connect Raspberry Pi Pico to desktop or laptop using 5 pin micro USB cable.
– If you use W5100S-EVB-Pico, you can skip ‘1. Combine…’
Prepare Software
Installing CircuitPython
Install CircuitPython on Raspberry Pi Pico by referring to the link above.
https://learn.adafruit.com/getting-started-with-raspberry-pi-pico-circuitpython/circuitpython
- Download the below uf2 file link on your computer
CircuitPython 7.0.0 – https://downloads.circuitpython.org/bin/raspberry_pi_pico/en_US/adafruit-circuitpython-raspberry_pi_pico-en_US-7.0.0.uf2
Setup WIZnet Ethernet Library
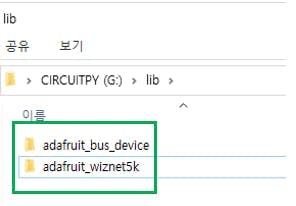
Copy the WIZnet library Into the lib folder inside the Raspberry Pi Pico. https://learn.adafruit.com/ethernet-for-circuitpython/circuitpython-setup
Before continuing, make sure your board’s lib folder has at least the following files and folders copied over: https://github.com/Wiznet/RP2040-HAT-CircuitPython
adafruit_bus_device
adafruit_wiznet5k
Run PICO
Before this, you should find the Raspberry Pi Pico COM port number from “Device Manager” on your PC.

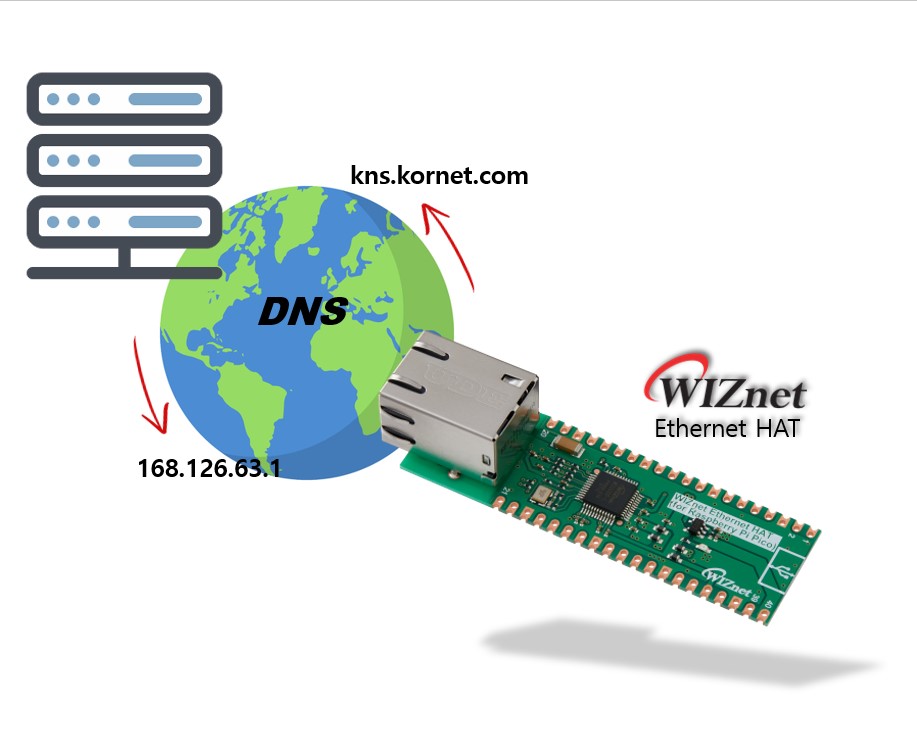
How to DNS Example
Setup DNS Example
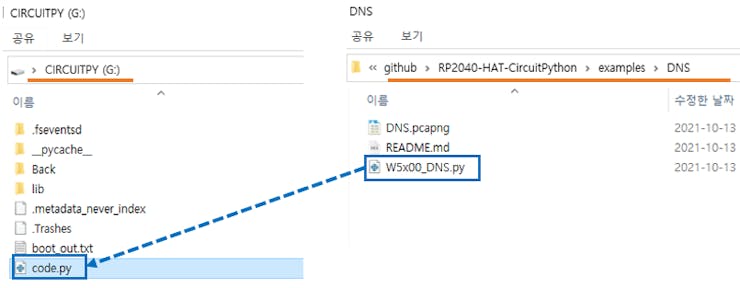
– download https://github.com/Wiznet/RP2040-HAT-CircuitPython/tree/master/examples/DNS
– Copy all code from download W5x00_DNS.py file or below code section.
– Paste code into code.py on your Raspberry Pi Pico and Save it.
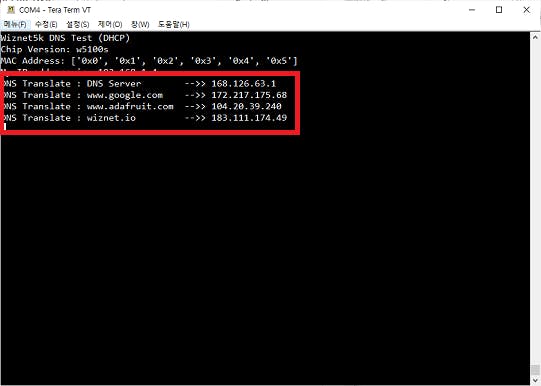
– Press “Ctrl+D” on the terminal window. you can see the messages as follows.
– Access the domain URL of the server and convert it to an IP address.

COMMENTS