

In this document I will provide instructions how to connect latest WIZnet’s product – W5100S-EVB-Pico to Azure IoT Cloud.
I will use RP2040-HAT-AZURE-C provided by WIZnet.
1. Environment Preparation
Before starting, it is necessary to setup your environment for W5100S-EVB-Pico. It is same as development environment for Raspberry Pi Pico.
In this guide I used Windows 10, Visual Studio Code and C/C++ based environment. For environment preparation I referred to Getting started with Raspberry Pi Pico guide on Raspberry Pi documentation website.
If you have any troubles following Raspberry Pi guide, then check below link, where author explains every installation step for environment preparation.
Or, refer to my previous post – ‘Let’s use the Raspberry Pico Ethernet Example! – Development environment configuration’
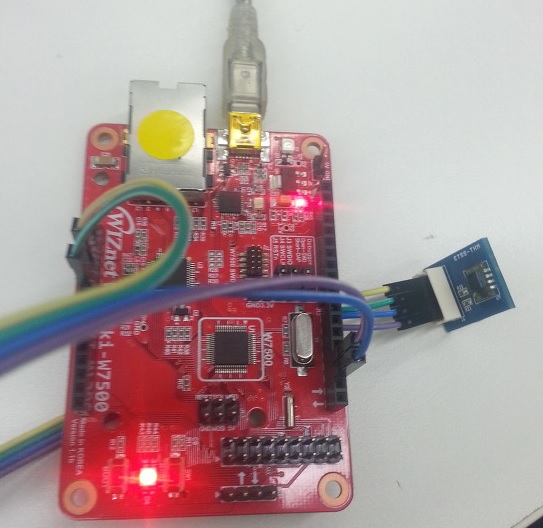
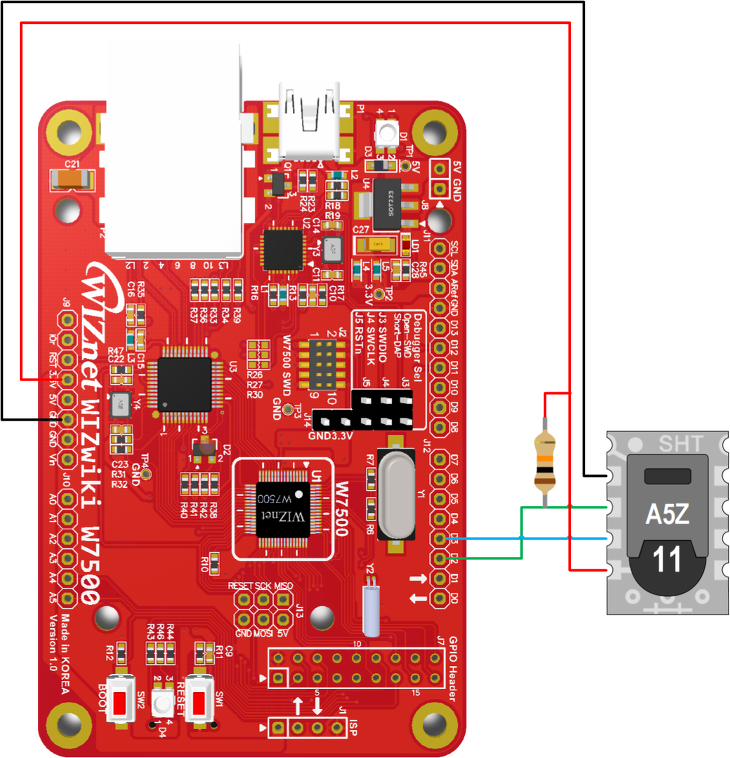
2. H/W Preparation
W5100S-EVB-Pico is a development board that is built on high-performance, low-price MCU RP2040 and WIZnet’ ethernet chip W5100S.
More details can be found at below link:
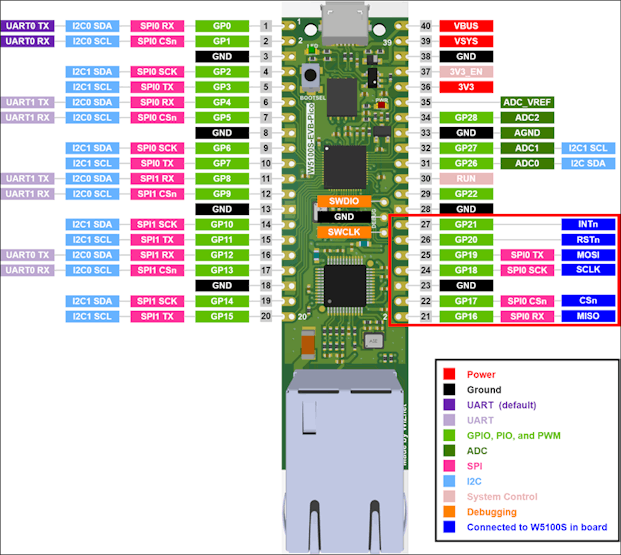
W5100S-EVB-Pico is pin compatible to Raspberry Pi Pico. But keep in mind that pins GPIO16 ~ GPIO21 are used for SPI communication between RP2040 and W5100S.
SPI related settings can be checked and changed in ‘RP2040-HAT-AZURE-C/port/ioLibrary_Driver/w5x00_spi.h‘
3. Preparation of Azure IoT Cloud
Login to Azure Portal.
If you have no account, create one.
Azure IoT Cloud is paid cloud platform, but you can create a free account
WIZnet provides 4 samples applications, based on sample application Azure IoT Cloud settings shall be set accordingly.
// The application you wish to use should be uncommented
//
#define APP_TELEMETRY
//#define APP_C2D
//#define APP_CLI_X509
//#define APP_PROV_X509

(...)

//-----------------------------------------------------------------------------------
// CALL Main Funcion - Azure IoT SDK example funcion
// Select one application.
//-----------------------------------------------------------------------------------
#ifdef APP_TELEMETRY
        iothub_ll_telemetry_sample();
#endif // APP_TELEMETRY
#ifdef APP_C2D
        iothub_ll_c2d_sample();
#endif // APP_C2D
#ifdef APP_CLI_X509
        iothub_ll_client_x509_sample();
#endif // APP_CLI_X509
#ifdef APP_PROV_X509
        prov_dev_client_ll_sample();
#endif  // APP_PROV_X509
//-----------------------------------------------------------------------------------
In this guide, I will proceed with ‘iothub_II_telemetry_sample’ to connect with Azure IoT Cloud.
① Create IoT Hub
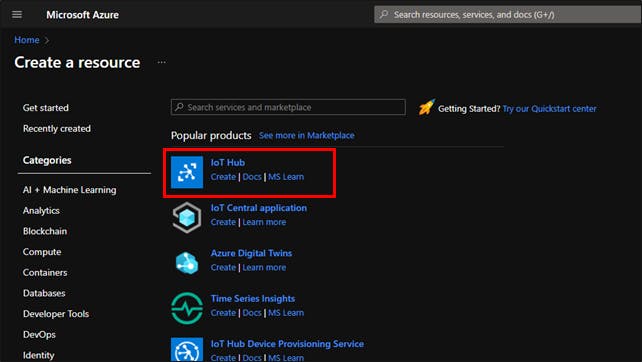
Fill project details and select your subscription on the ‘Basics’ tab.
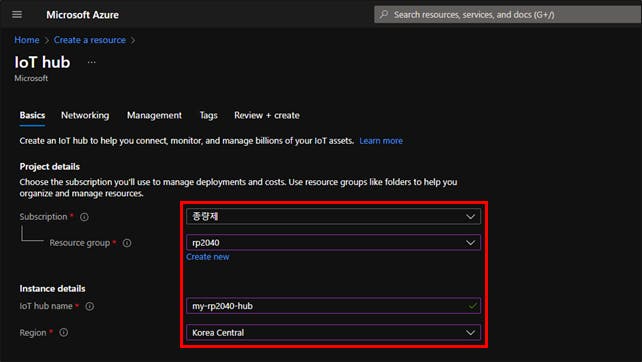
For ‘Networking’, ‘Management’, ‘Tags’ and other items it is OK to leave default settings.
Select ‘Review + Create’ to review your choices. Click ‘Create’ button at the bottom to complete IoT Hub creation.
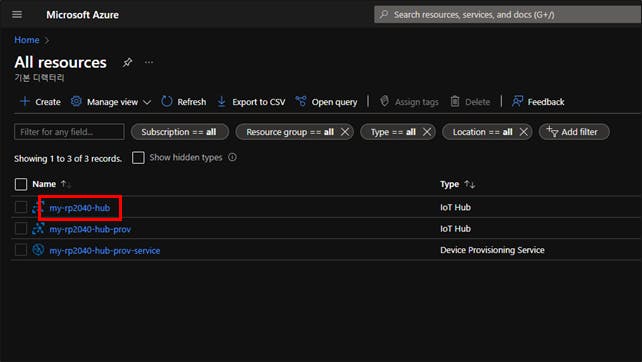
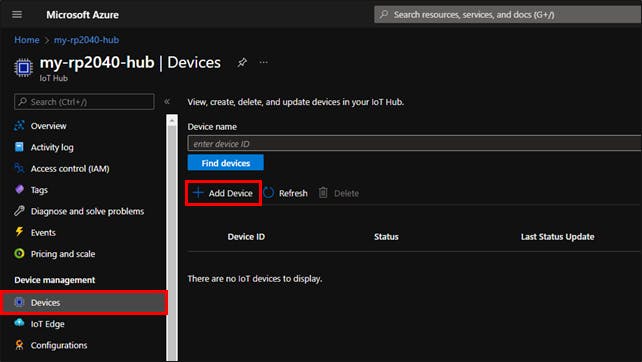
② Add IoT Device
Click ‘Devices’ in menu on the left of created IoT Hub and ‘Add device’
For ‘iothub_II_telemetry_sample’ device settings will be made as shown on below picture. For other sample applications these settings may vary.
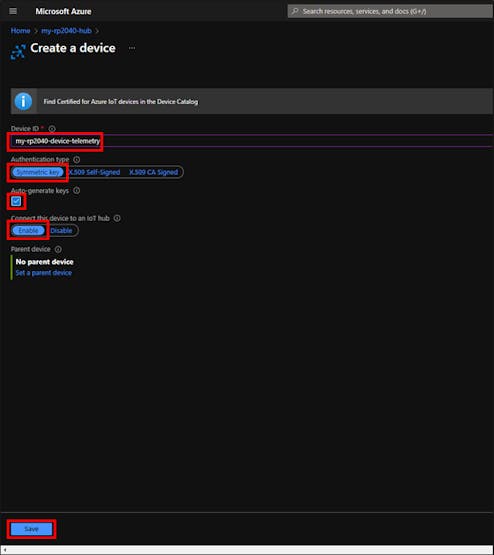
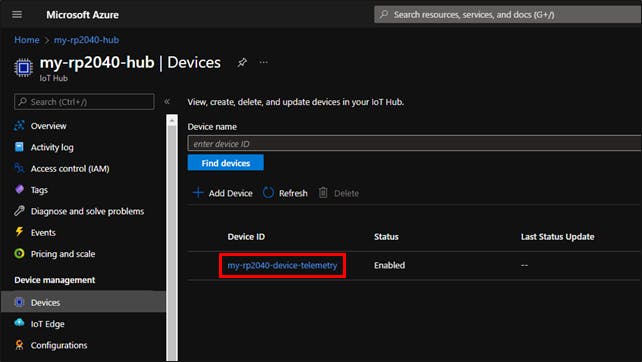
Please refer to guide document in corresponding sample application to find appropriate Azure IoT Cloud.
4. Example Settings
① Select sample application
As I will be connection using ‘iothub_II_telemetry_sample’, I will use application in ‘RP2040-HAT-AZURE-C/examples/main.c‘ as shown below.
// The application you wish to use should be uncommented
//
#define APP_TELEMETRY
//#define APP_C2D
//#define APP_CLI_X509
//#define APP_PROV_X509
② Enter connection string
You can find connection string by clicking on corresponding IoT device.

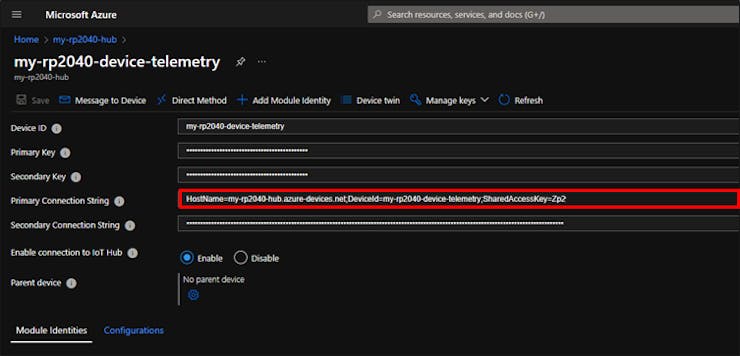
Paste IoT Hub connection string to ‘RP2040-HAT-AZURE-C/examples/sample_certs.c‘.
const char pico_az_connectionString[] = "HostName=my-rp2040-hub.azure-devices.net;DeviceId=my-rp2040-device-telemetry;SharedAccessKey=Zp2...xQ=";5. Example Build & Upload
① Build
After all required changes are done, press F7 or click ‘Build’ button in status bar of Visual Studio Code.
When build is complete, you can find generated ‘main.uf2‘ file in ‘RP2040-HAT-AZURE-C/build/examples/‘
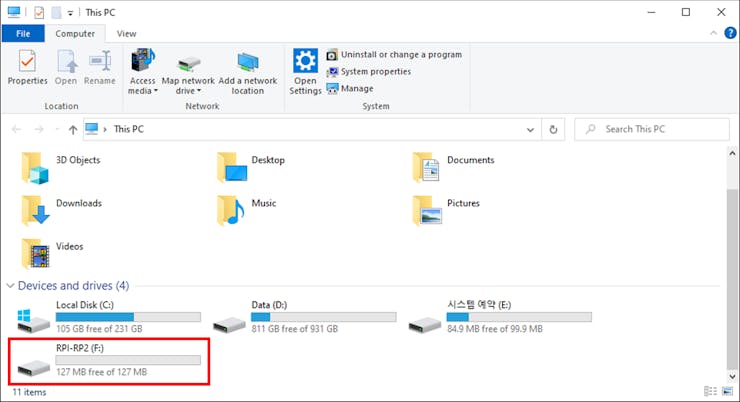
② Upload
Press BOOTSEL button on W5100S-EVB-Pico on power-up, you should see RPI-RP2 drive. Simply drag and drop ‘main.uf2’ file.
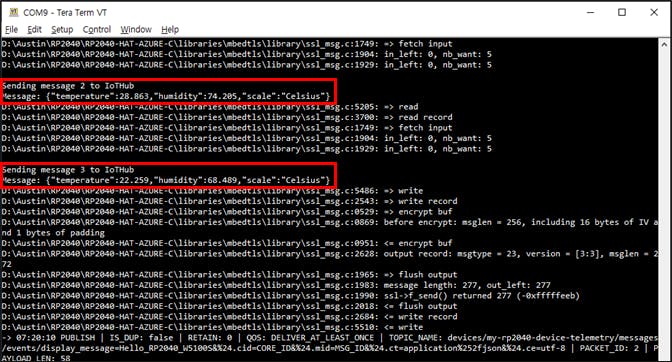
6. Running Example
If example is running normally, in terminal you should be able to see W5100S-EVB-Pico network information, connection steps and transmitted messages.
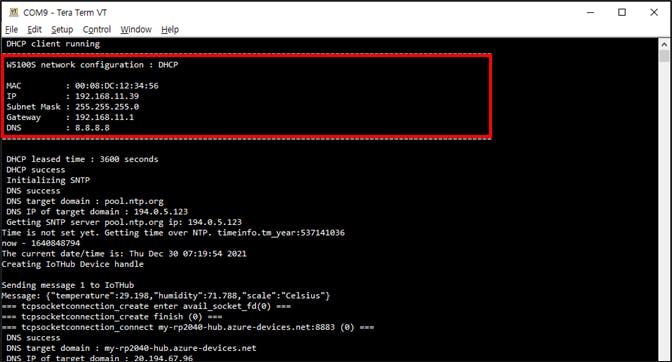
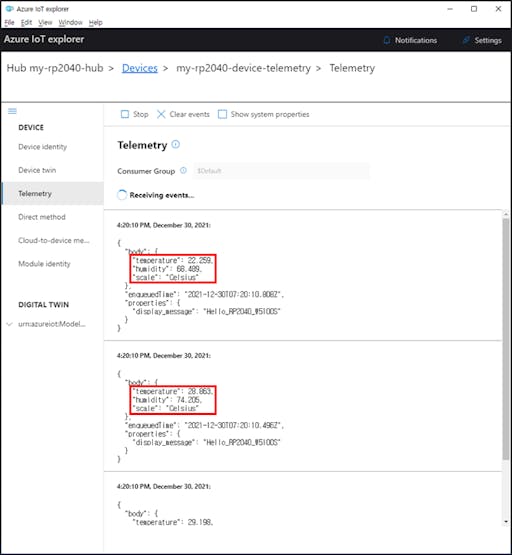
Azure IoT explorer can be used to check transmitted messages.
COMMENTS