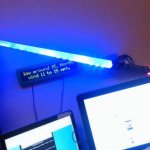
Cheerlights – Lightsaber

Creating a lightbar to cheering up a party using W5100
ORIGINAL POST
By kd8bxp
components
Hardware Components
w5100
X 1
A 30 Neopixel Strip of LEDs
X 1
WS2811
X 1
Arduino MEGA 2560 r3
X 1
details

uccfeb2.jpg

This project uses:

1. A 30 Neopixel Strip of LEDs (1 meter strip)These can be found on eBay for a reasonable price.

Some of the strips use the WS2811 chip and others use the WS2812 – so depending on what you end up with you may need to change the Arduino sketch. (Some of the strips are also GRB vs RGB, another change in the sketch)

2. Arduino MEGA 2560 r3 – other Arduinos may work just as well. (I used the Mega simply because it was sitting on my desk when I may this) The Mega has more memory, and extra hardware serial ports, which I did use for the MP3 player. But the Uno should work with the use of software serial library.

3. I used a generic W5100 ethernet shield. I found this on eBay as well for right around $6.00 dollars

This is like one I used http://r.ebay.com/pWcteT (Please note: I know nothing about this seller, so do your homework before you buy it)

4. A serial MP3 Player – The sketch was written with this specific module, so I’d recommend using it so you don’t need to make major changes to the sketch – but a MP3 is needed for the sound so you can modify the sketch to be used with others.

http://www.ebay.com/itm/-/201436015473?roken=cUgay… (again, you need to do your homework before you buy from a seller on eBay.)

If you google for lightsaber sound effects you’ll find plenty. This MP3 player needs the SD card formated in Fat16, which means no long file names – so rename your MP3s to the older 8×3 “saberon.mp3” “saberoff.mp3” “saberhum.mp3”

This site has good effects (you may need to convert these to mp3 depending on your player)

http://theforce.net/fanfilms/postproduction/soundf…

The MP3 player is a little strange, it doesn’t play by file name, it plays by the number of the file in the directory tree.

as long as there are only 3 mp3s and you name them like above – you shouldn’t need to make changes to the order they are played. (shouldn’t I know it’s a loaded word.)

Each sound effect is 2 seconds or less, seems to work very good that way.

5. Lastly – Probably most importantly you need a light saber – I found one for $5.00 from a Family Dollar store in the toy section. They may call it a “lightsword” – it has a white collapsible tube.. The tube does not go inside the hilt of the sword. It does light up when the button is pushed – and make sounds (The sounds have nothing to do with a light sword – they are just weird.) It also has 6 screws that are pretty easy to remove, with is great.

Step 1: Put It Together and the Sketch.

Put It Together and the Sketch.

Unfortunately I wasn’t thinking about doing an instructable when I made this, so I didn’t take pictures of me building it.

It was pretty simple.

I extended the sword, I decided to cut just the tip of it off – that made it a little easier to get the neopixel strip the whole length. I think I also cut off the bottom of the sword (the part that is held in by the release so the blade doesn’t extent by itself – you’ll see the part when you open up the hilt)

Speaking of – take the batteries out of it, remove the 6 screws, it comes apart pretty easy at that point. You’ll see a switch, a couple of leds, a speaker and a little thing that is the controller/amplifier. Take all that out, save it for another project, you don’t need it for this one.

The bottom of the sword also lights up, you’ll notice that it is made from the same plastic as the blade. I cut a small hole in the bottom of that to feed the power/ground/signal wire out of the sword.

Feed the neopixel strip into the top, being sure that the input wire is going to the bottom of the sword/hilt.

It takes a little bit, you almost need another hand to put it all back together – but put it back together. Pretty much goes back the way it come apart.

That was the hardest part, I think.

The rest is just hooking wires to the Arduino.

Put the ethernet shield on the MEGA.

I am using the 5v off the mega for power to the LEDs, this might be a problem if “WHITE” is selected for a long time.. the “WHITE” LEDs seem to take more power to run.

Neopixel Input line to PIN 3 on the MEGA. MP3 RX to SERIAL1 TX, MP3 TX to SERIAL1 RX – MP3 power from 5v off the MEGA.

Download the sketch,

https://github.com/kd8bxp/Lightsaber-Cheerlights

The sketch does need the Adafruit_NeoPixel library (

https://github.com/adafruit/Adafruit_NeoPixel)

If you use codebender.cc you don’t need to install the library. Here is the codebender sketch.

https://codebender.cc/sketch:206820

Don’t know what Cheerlights is? here is the Cheerlights Info:

http://cheerlights.com

Next will be a video of it working.

documents
Code
Git hub repository

COMMENTS

Please Login to comment
  Subscribe  
Notify of
POSTED BY
Reusable S/W