components
Hardware Components
W5100S-EVB-Pico
X 1
Momentary Switches
X 11
WS2812B 5050 LEDs
X 10
470Ω Resistor
X 1
Printed Circuit Board
X 1
Micro B Extension
X 1
Nylon Standoffs
X 6
Threaded Aluminum Spacers
X 3
#6-32 x 1/2 Screws
X 3
5v Power Supply
X 1
Software Apps and online services
Micropython Project Description
Hardware/Components
- W5100S-EVB-Pico - 1
- Momentary Switches - 11
- WS2812B 5050 LEDs - 10
- 0.1uF Capacitors - 10
- 470Ω Resistor - 1
- Printed Circuit Board - 1
- Micro B Extension - 1
- Nylon Standoffs - 6
- #6-32 x 1/4" Threaded Aluminum Spacers - 3
- #6-32 x 1/2 Screws - 3
- 5v Power Supply - 1
Software
Part 1: The Concept
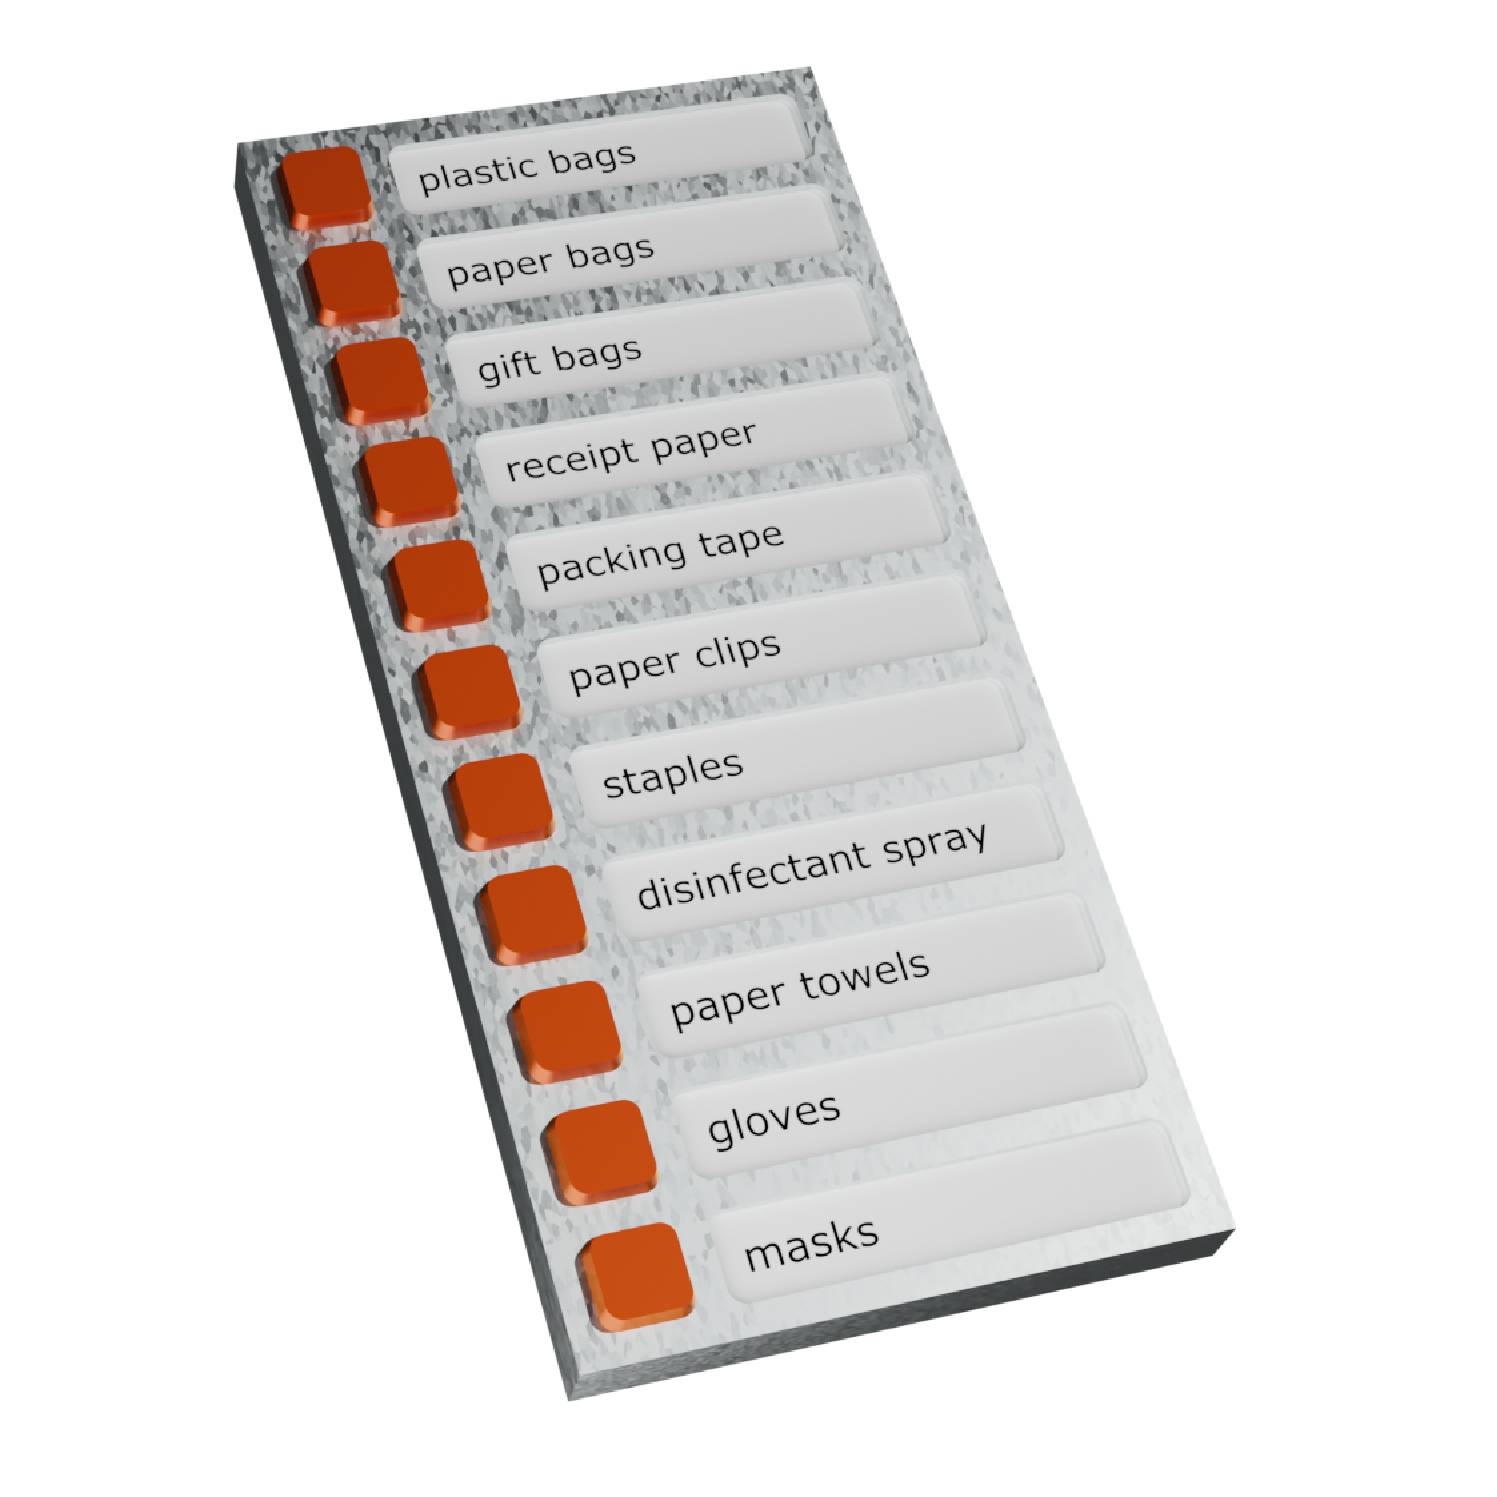
My intent is to create a very simple, convenient to implement button panel for making fast and easy lists. The idea was that someone could just push a button the moment they realized they needed a supply and it would be added to a web accessible list. This would mean that they themselves, their family member, or a work team member could view the list from anywhere at any time. Original concept art: The version shown above is for a retail setting, but today I'm making one meant for my own pantry, so that I can push a button when I use something up, instead of finding paper or getting out my phone to put it on a shopping list. There are many other applications for this kind of button panel.
 - Families with young children can give their kids agency to make sure their favorite snacks are restocked.
- Busy retail cashiers can let management or runners know when they need bags, receipt paper, or other vital supplies.
- Medical workers can make it easy for their supply specialists to keep them stocked on PPE.
- Anywhere that a list of items is required over and over again is a candidate for using a button panel.
Part 2: The Design
So much IOT is built around WiFi, but that can become very complicated very fast, and using a direct ethernet connection offers some valuable simplicity.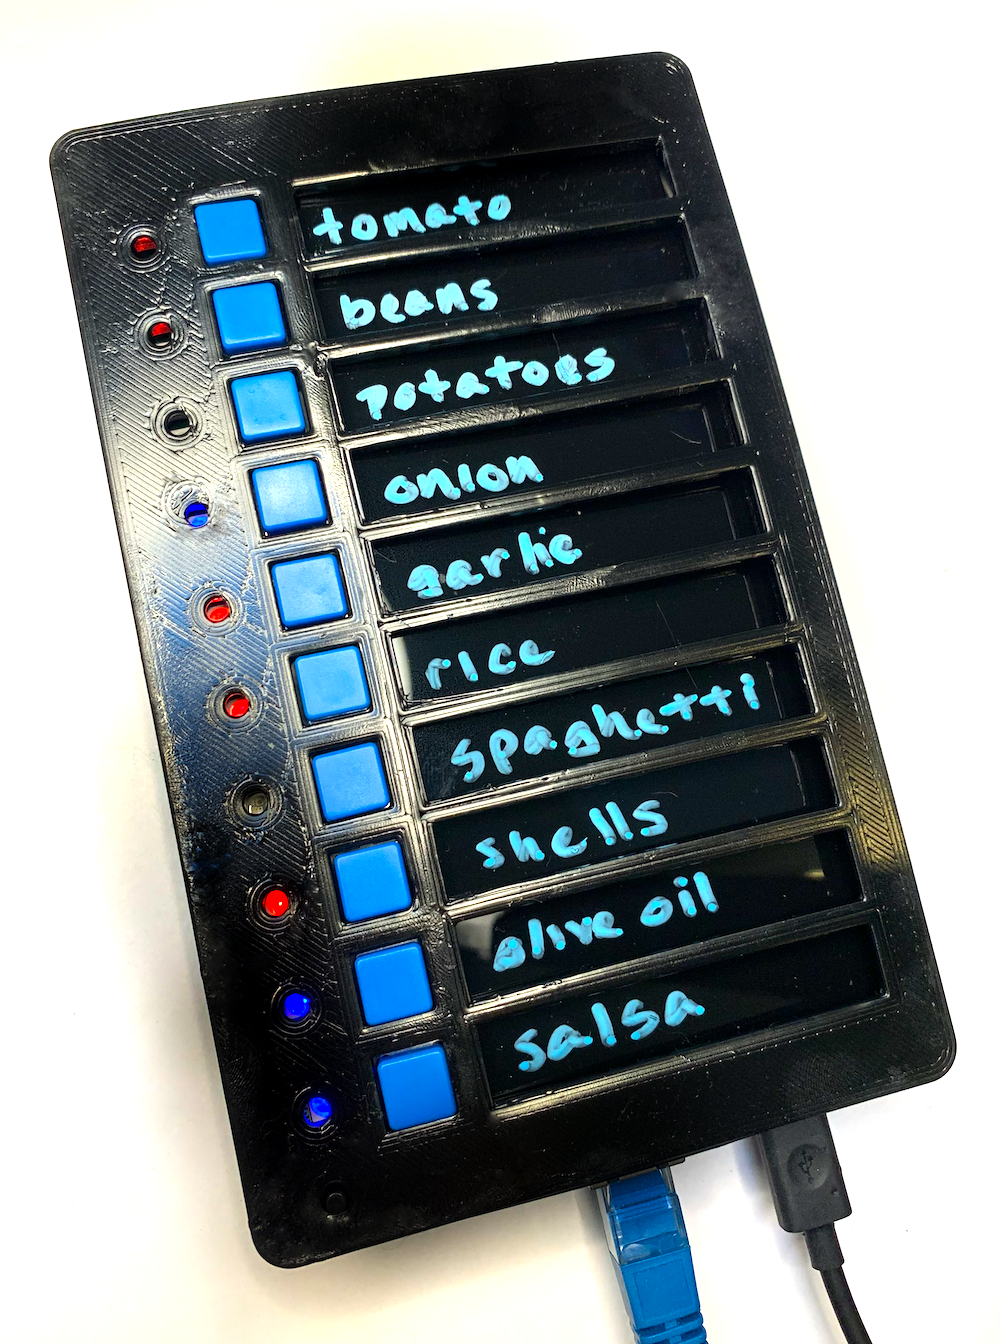 Plugging it in to ethernet puts it online, so there’s no need for displays or full keyboards, which means this device could be manufactured in bulk for a very low price. It's also accessible to people who aren't comfortable with technology. I’ve chosen to manually label each item, so that it can be adjusted as tastes or needs change.
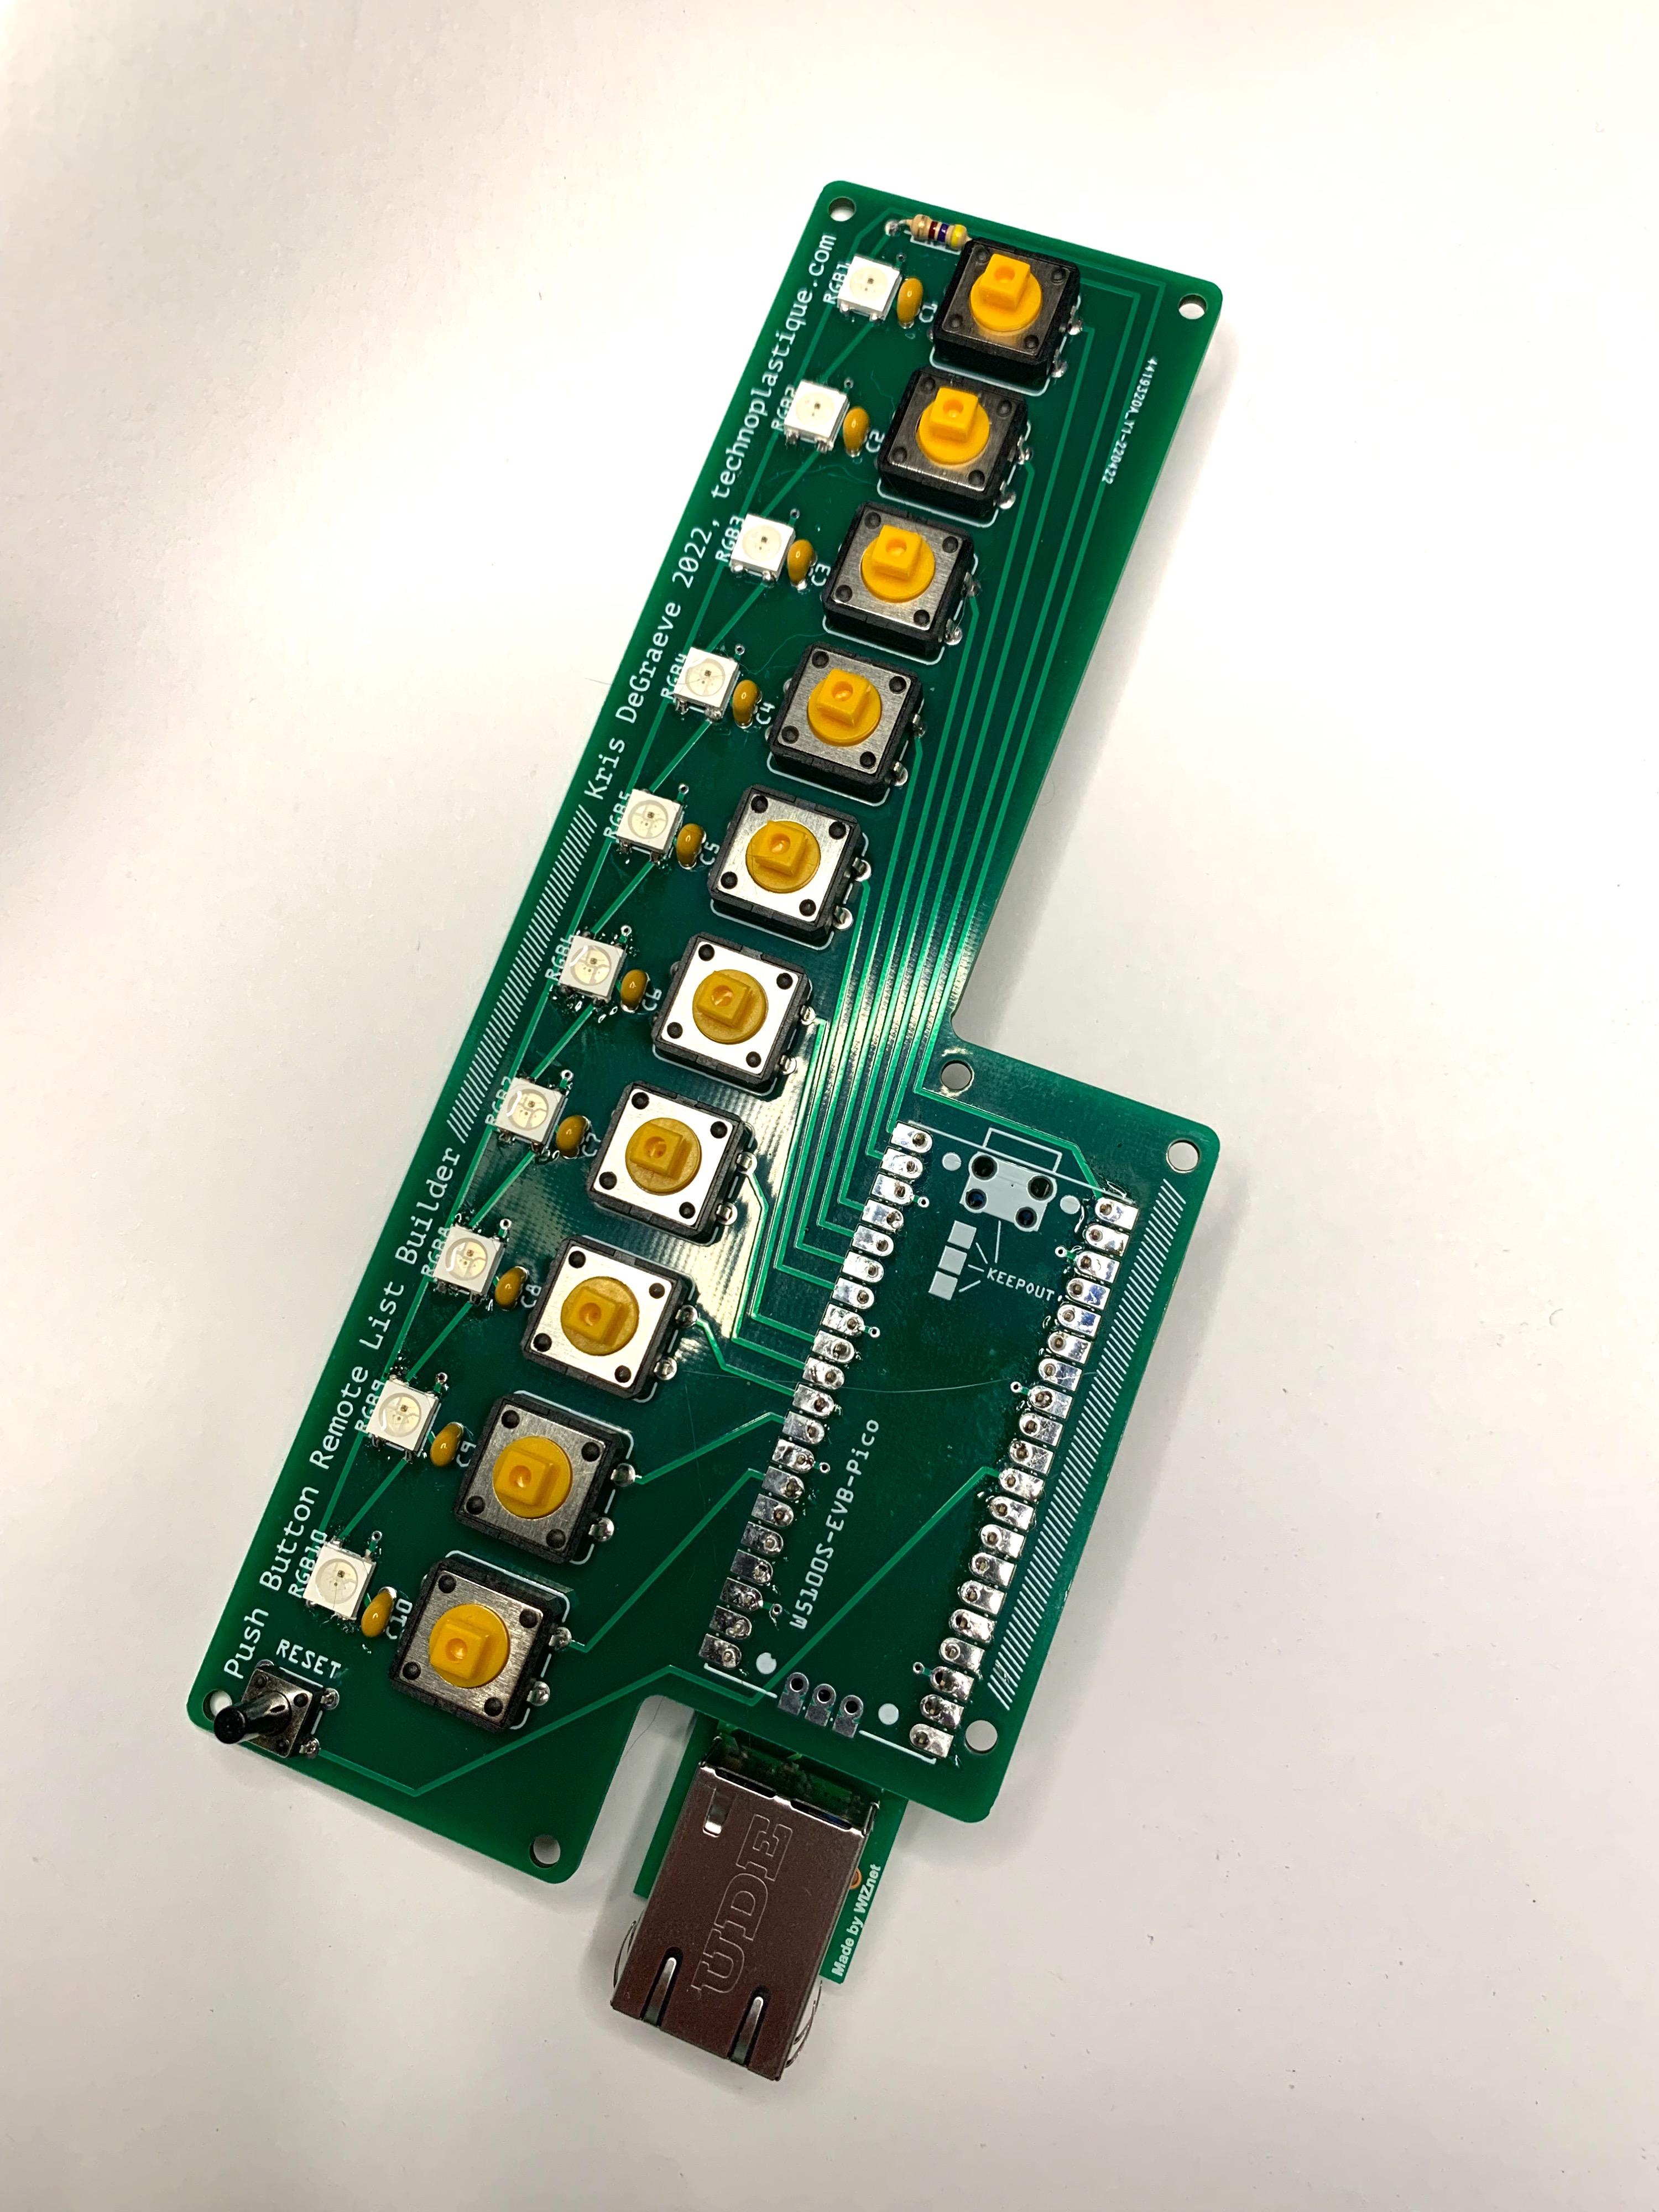 The W5100S-EVB-Pico has an ethernet port mounted on top of it, making the board relatively tall. Because of this I chose to have a shield professionally printed, that I designed so that it attaches directly above the Pico with headers. This means the ethernet mounts comfortably at the middle of the box height, and the buttons/lights are at the top. I designed the layout in Fritzing and had it manufactured by jlcpcb.com, which was easier than I expected. I never could have aligned the buttons so perfectly otherwise.
 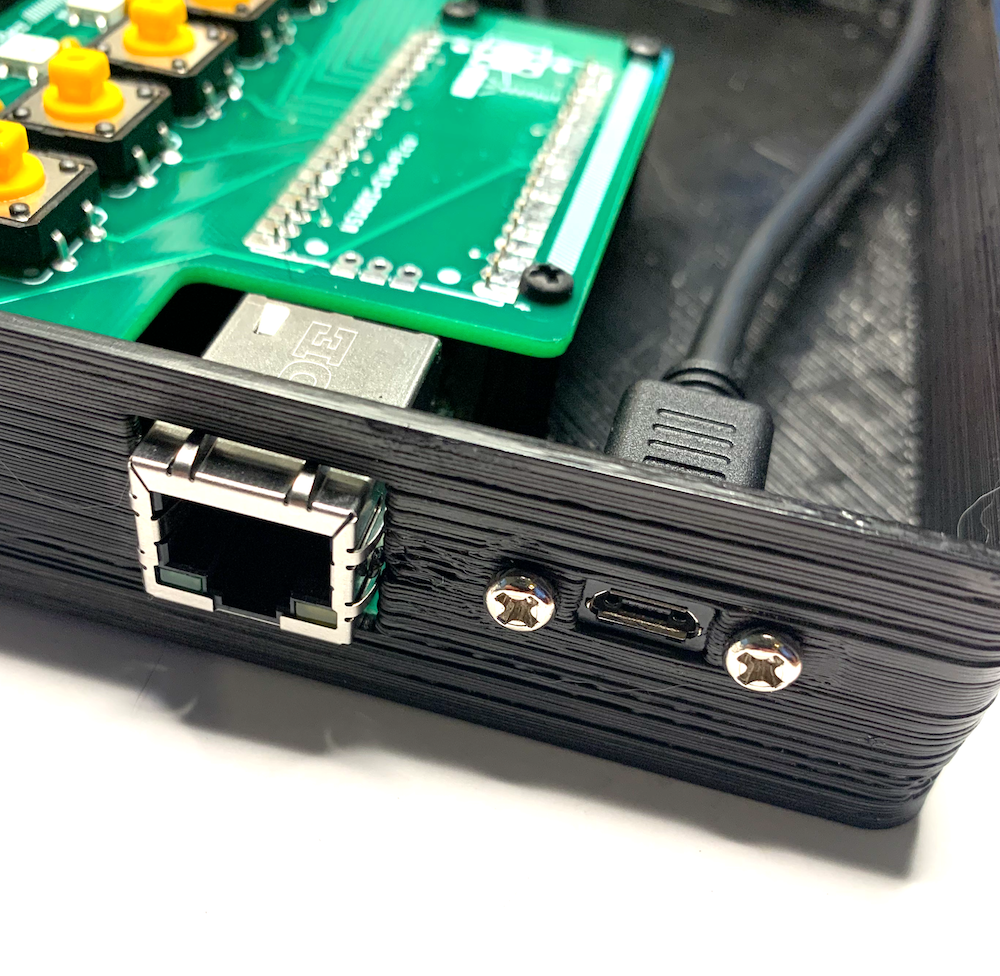 I used a series of momentary buttons for inputs, and each is paired with an RGB led to allow an indication of where an item is at in the sourcing process. Each LED gets it's own decoupling capacitor, which is probably much more than necessary, especially because I'm only using the power built into the board, but I had plenty of space so there they are. There's also a 470Ω resistor in front of the first data pin on an LED because it's recommended for WS2812B, and again, there's plenty of room.
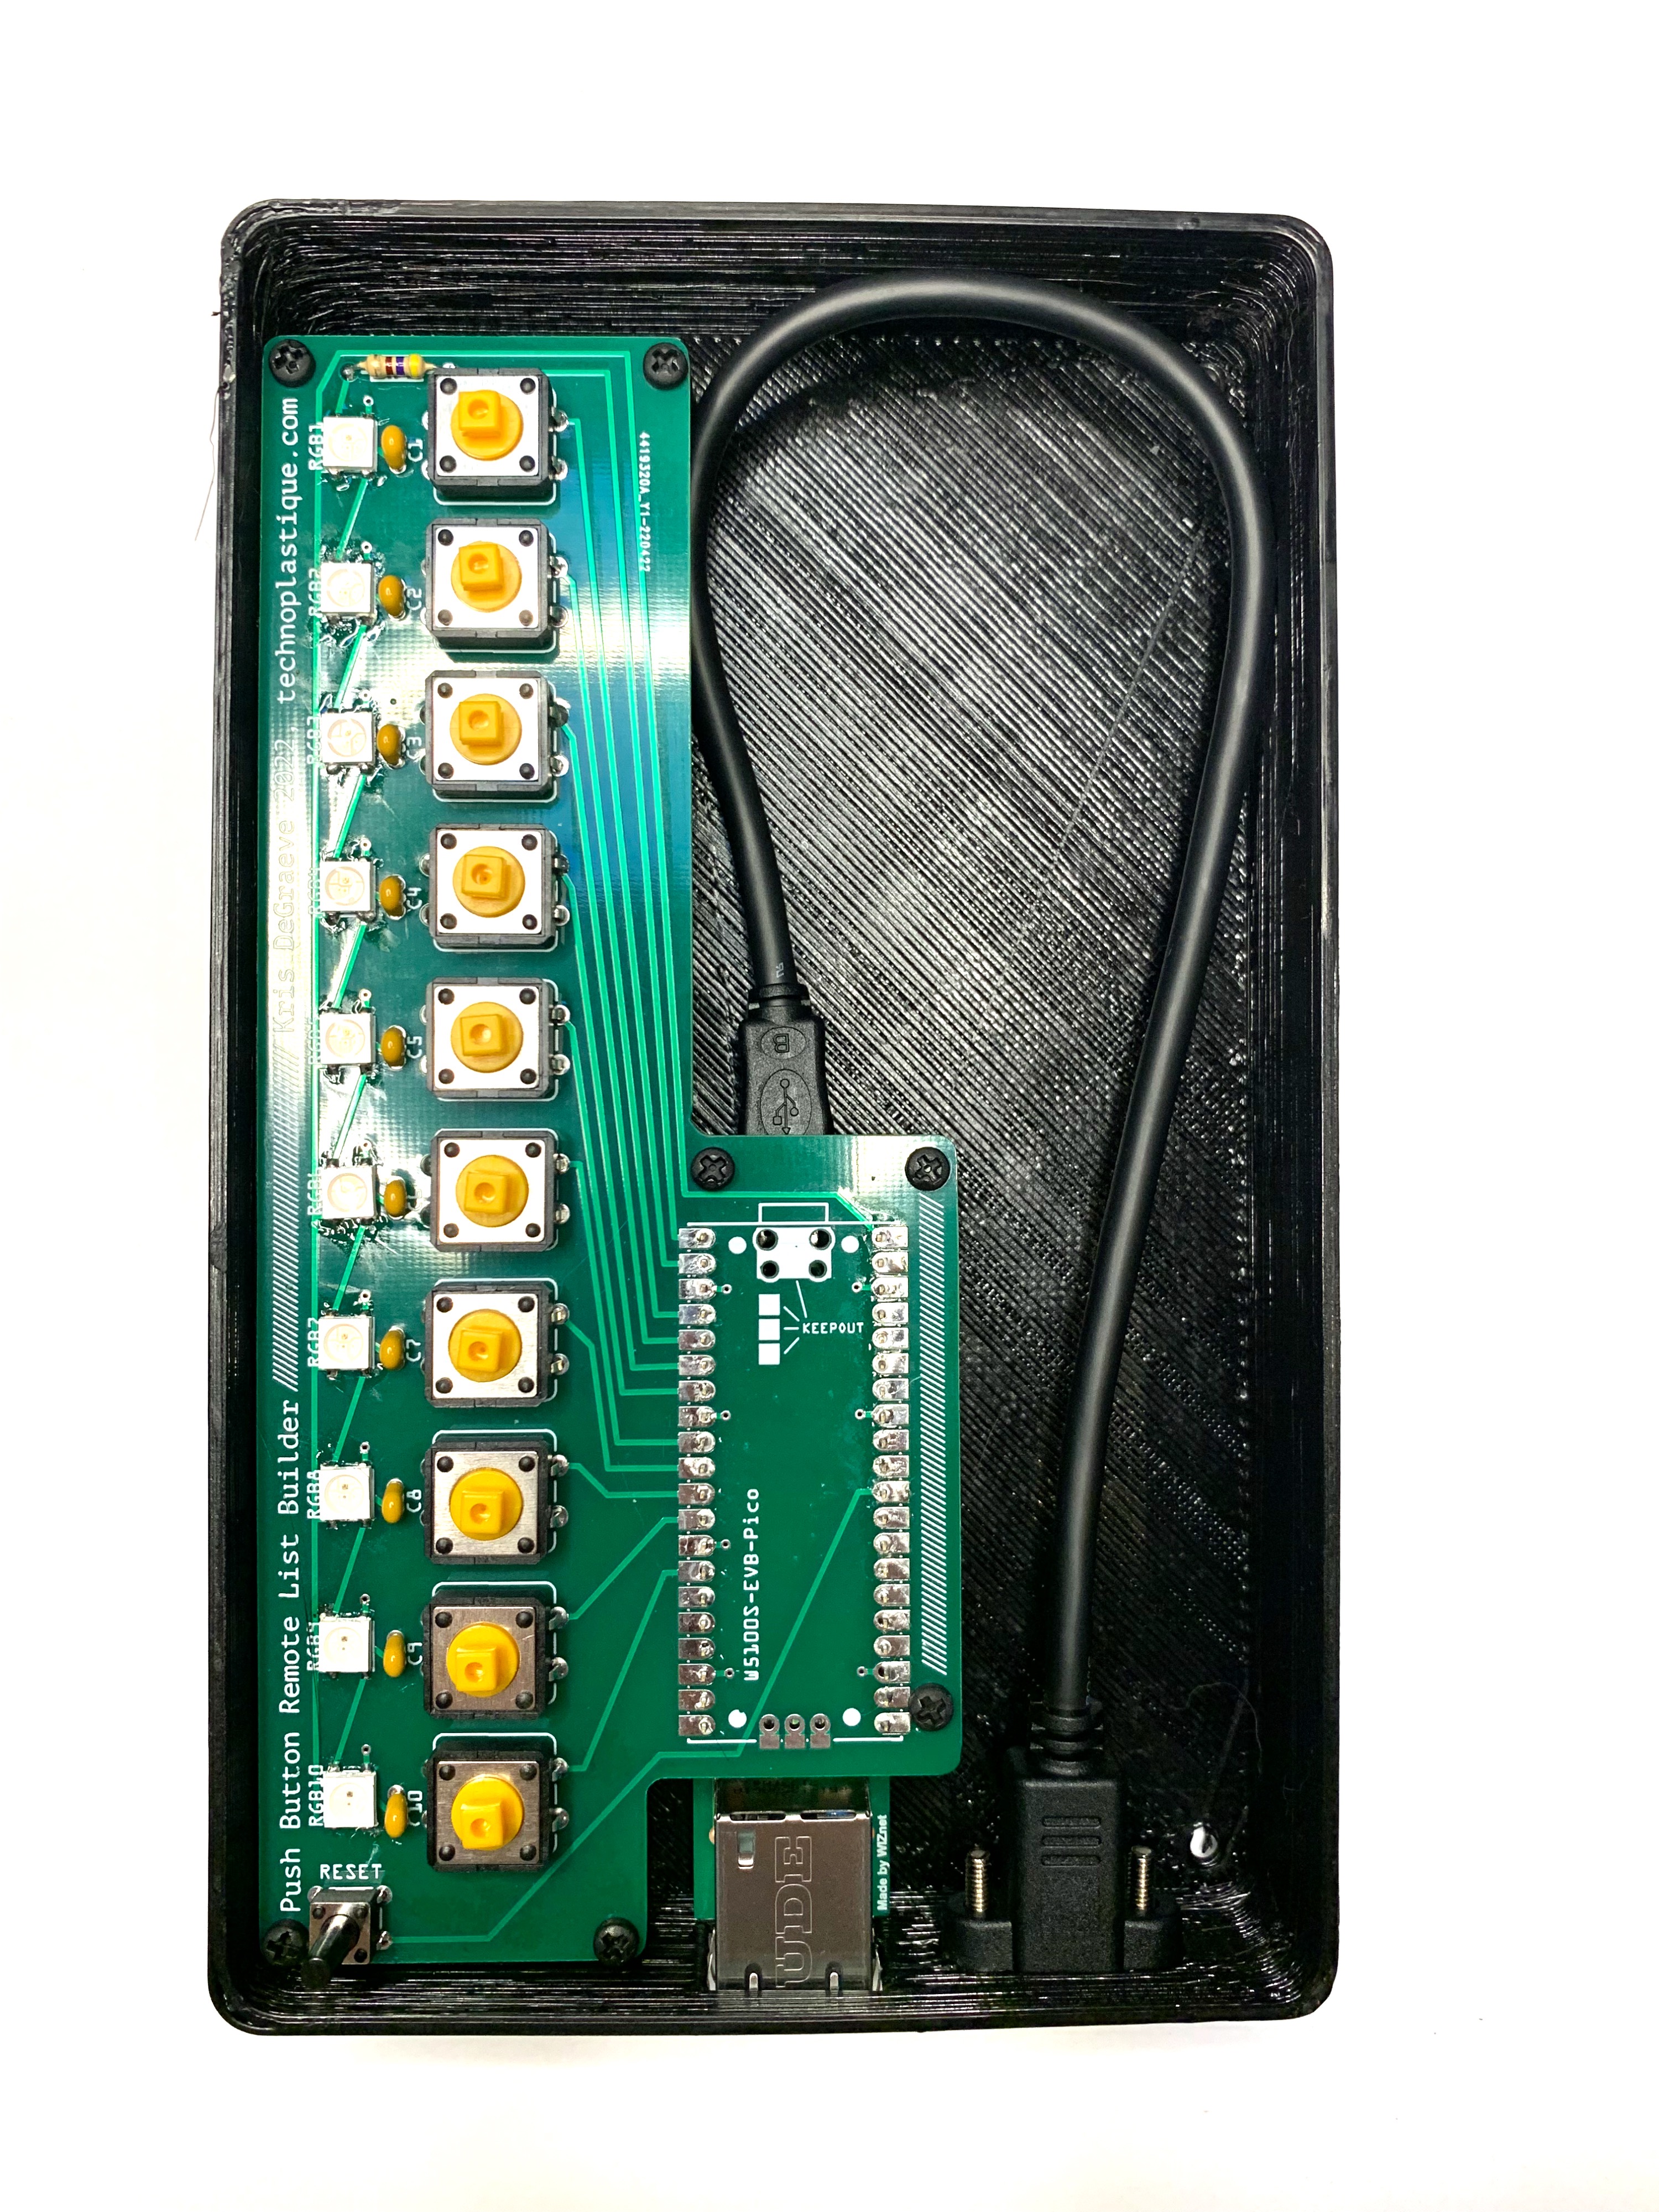 I understand why the ethernet and USB ports point opposite directions, but it was inconvenient for the design of the finished box. I added a USB extension that mounts to the same side of the box as the ethernet to resolve it. This makes the box much easier to use and mount, and reduces the chance of damaging whichever cord went the long way around. For my situation I’ve chosen “Have”, “Need”, and “In Process.” “Have” and “Need” are fairly self explanatory, the “In Process” setting was added for situation where one member of the household has ordered groceries, so the item is not in the house, but no one else needs to shop for it right now. Because the lights can be set to any one of millions of colors, nearly infinite classifications could be added.
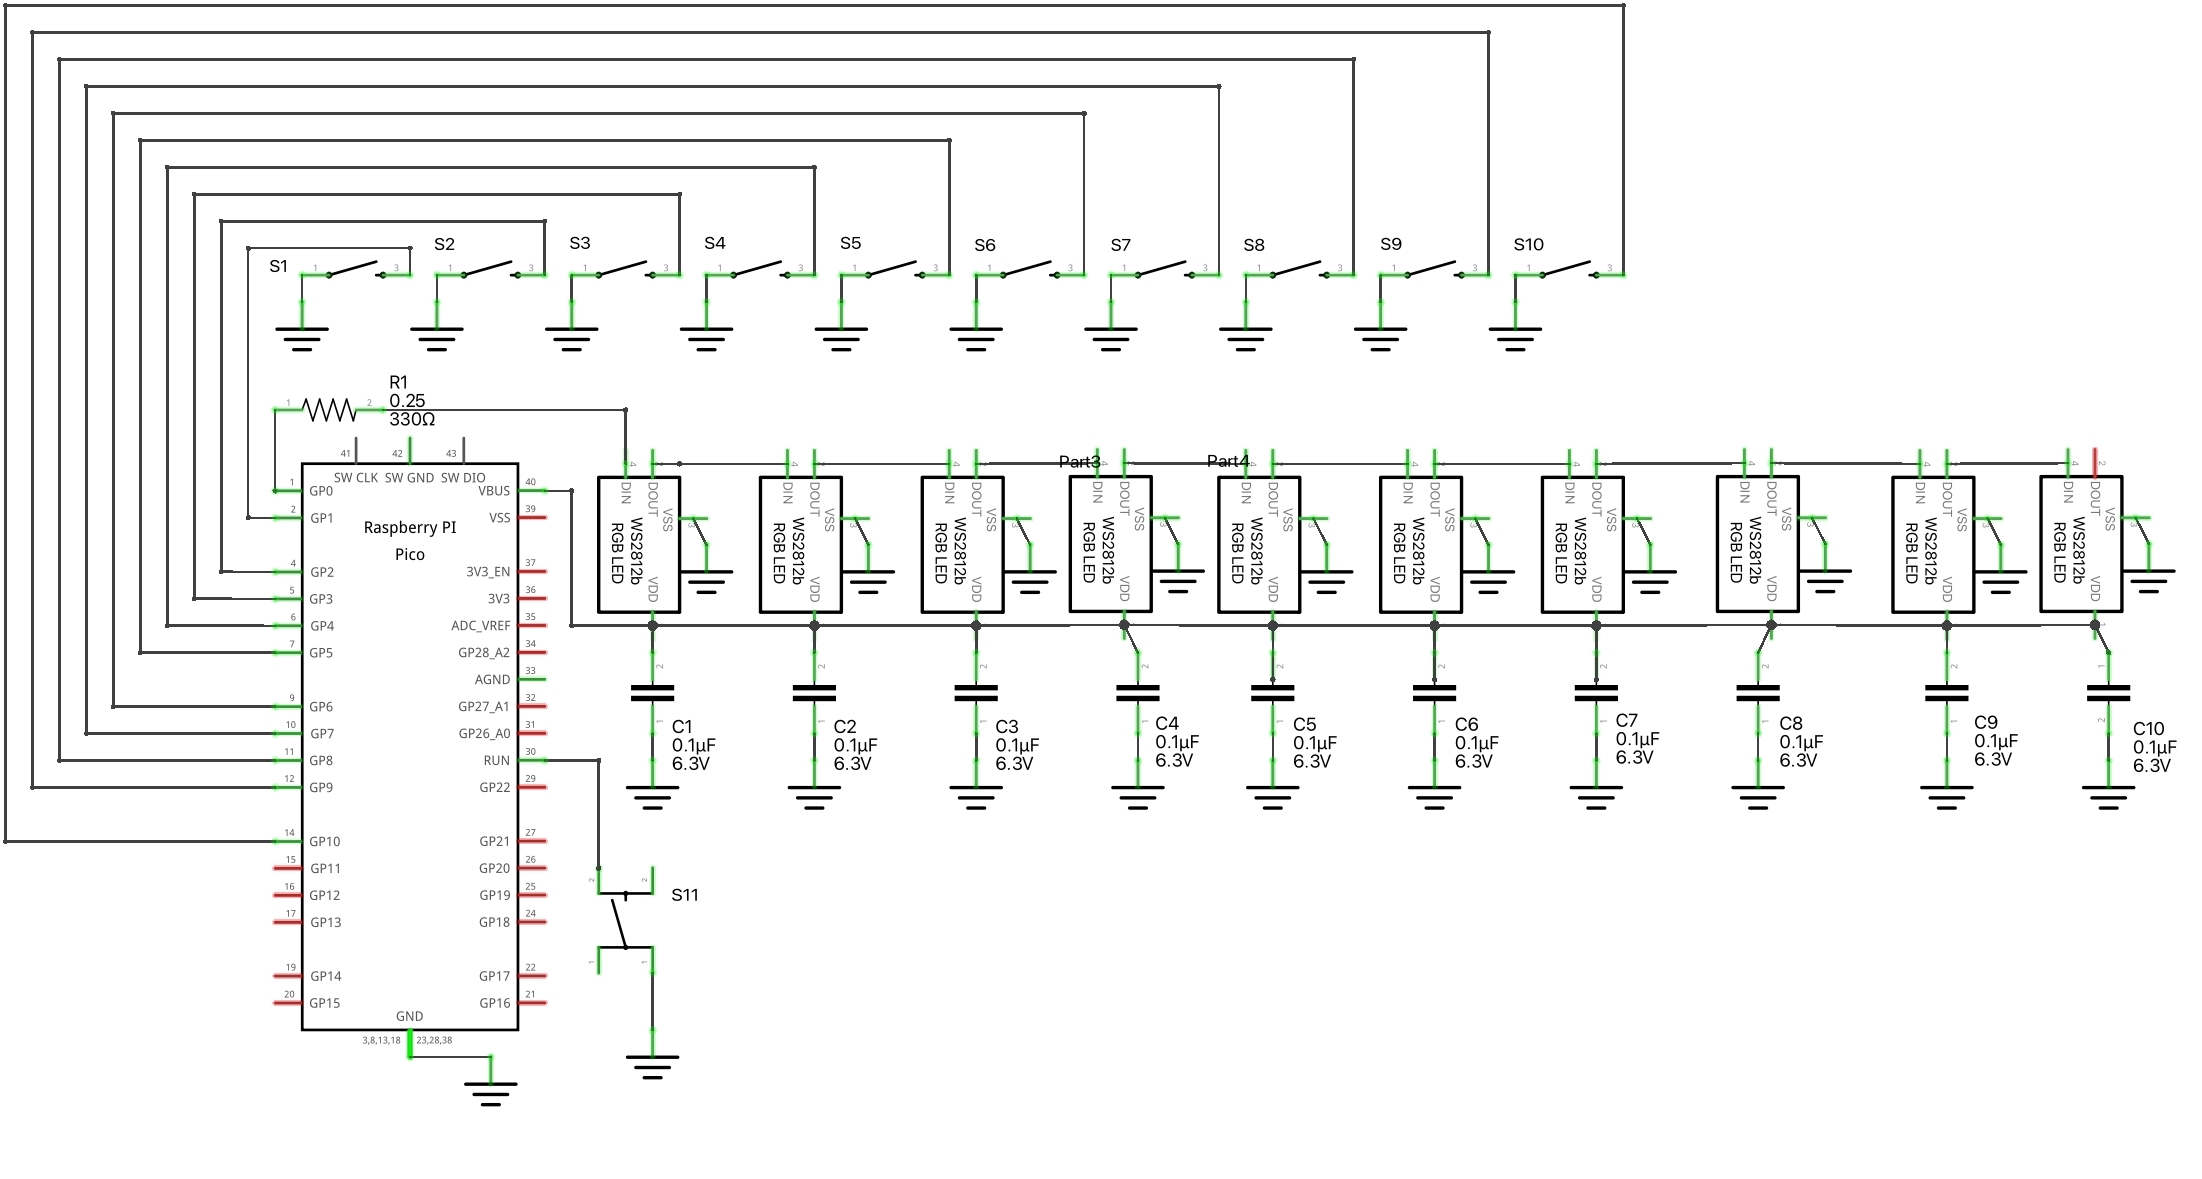 The only other input is a reset button, run from the on-board reset switch, so the board can be rebooted if needed.
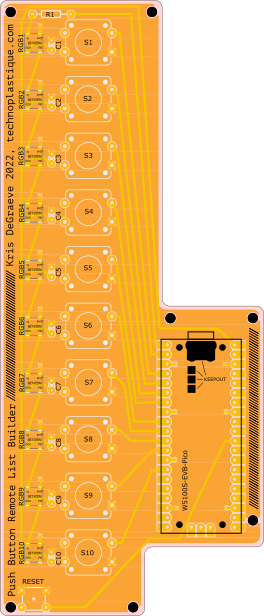
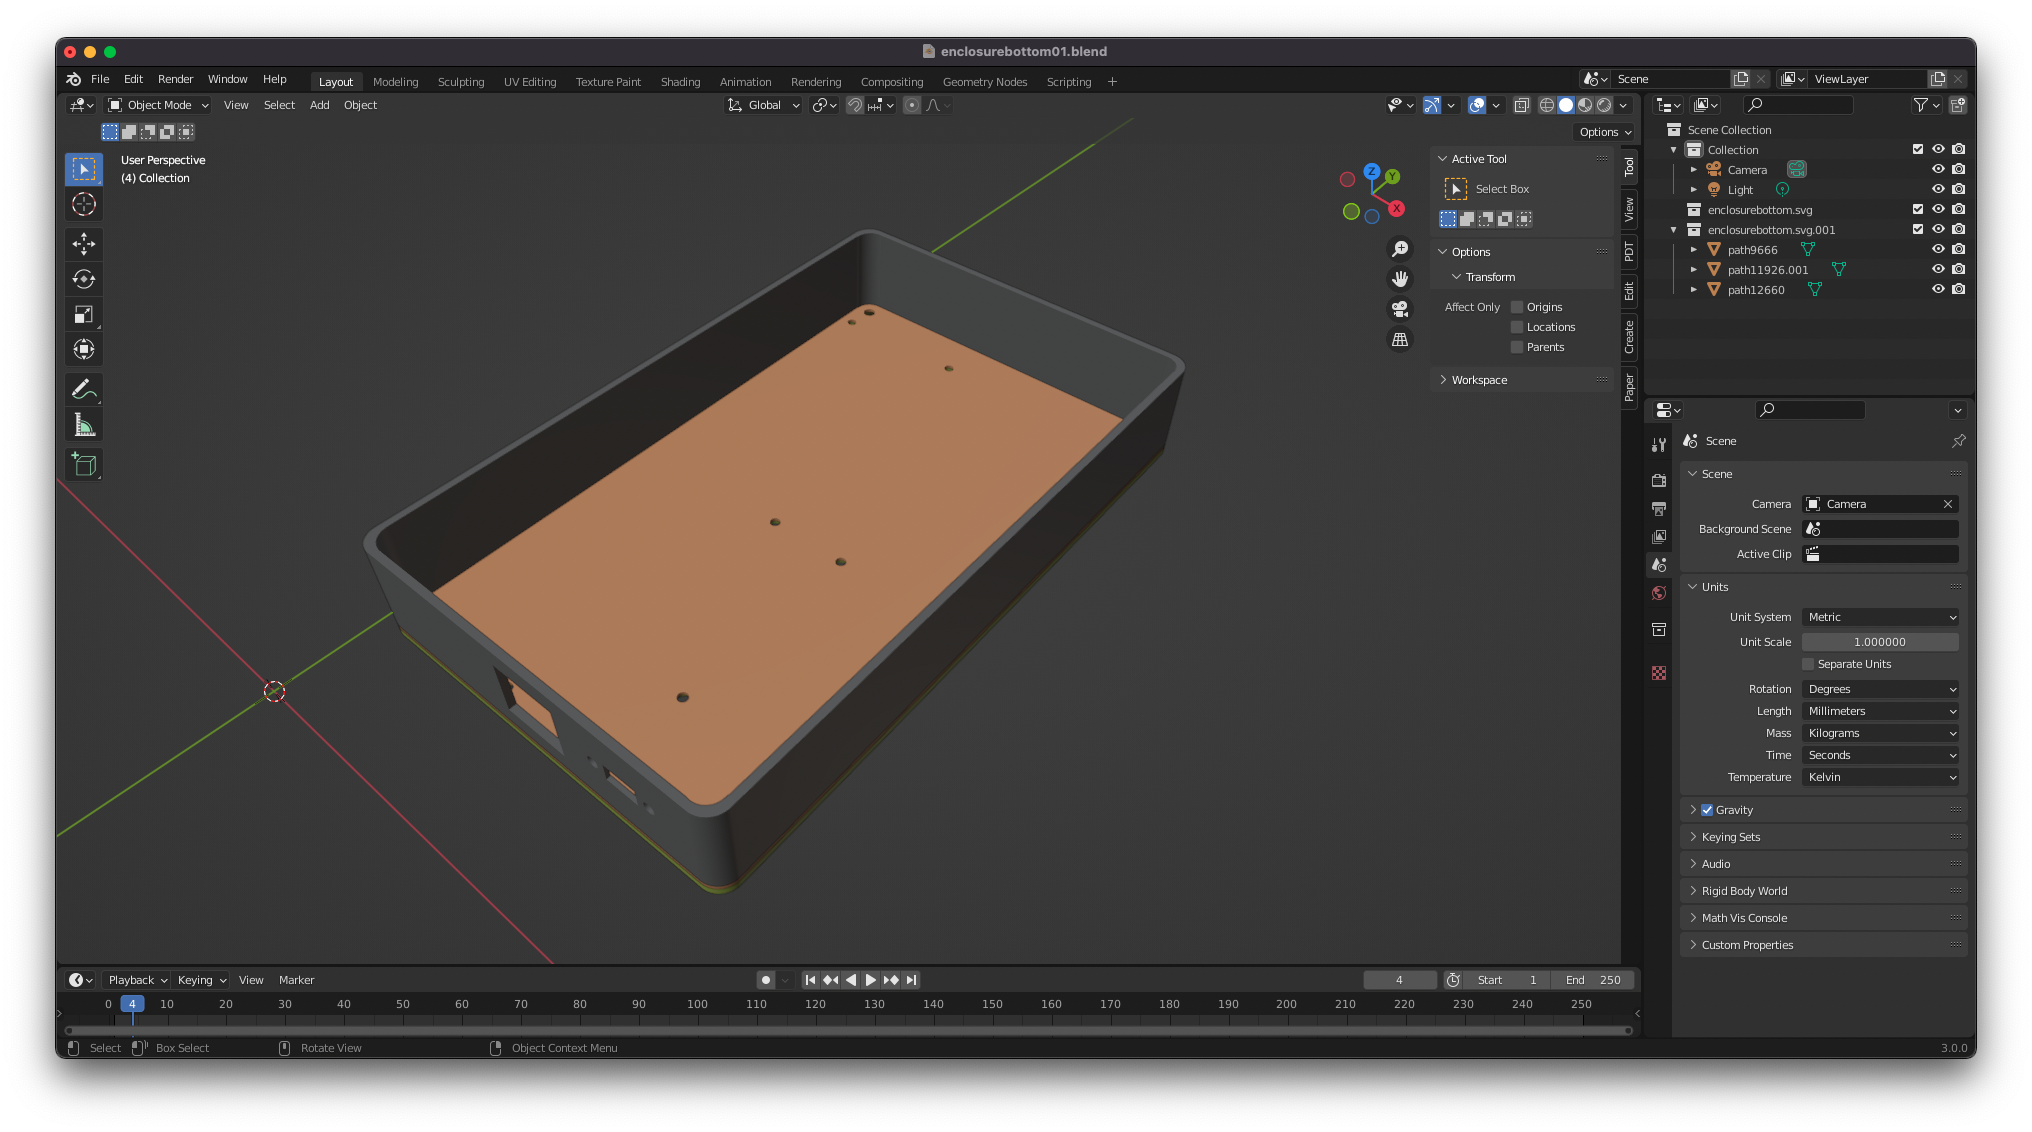 To design the case I used the .svg of the printed circuit board as a starting point, and did a layout for the top and bottom based on it. I exported each separately, and then imported them into blender. Extruding based on line art is a good way to be sure that your case will turn out the way you expect it to.
 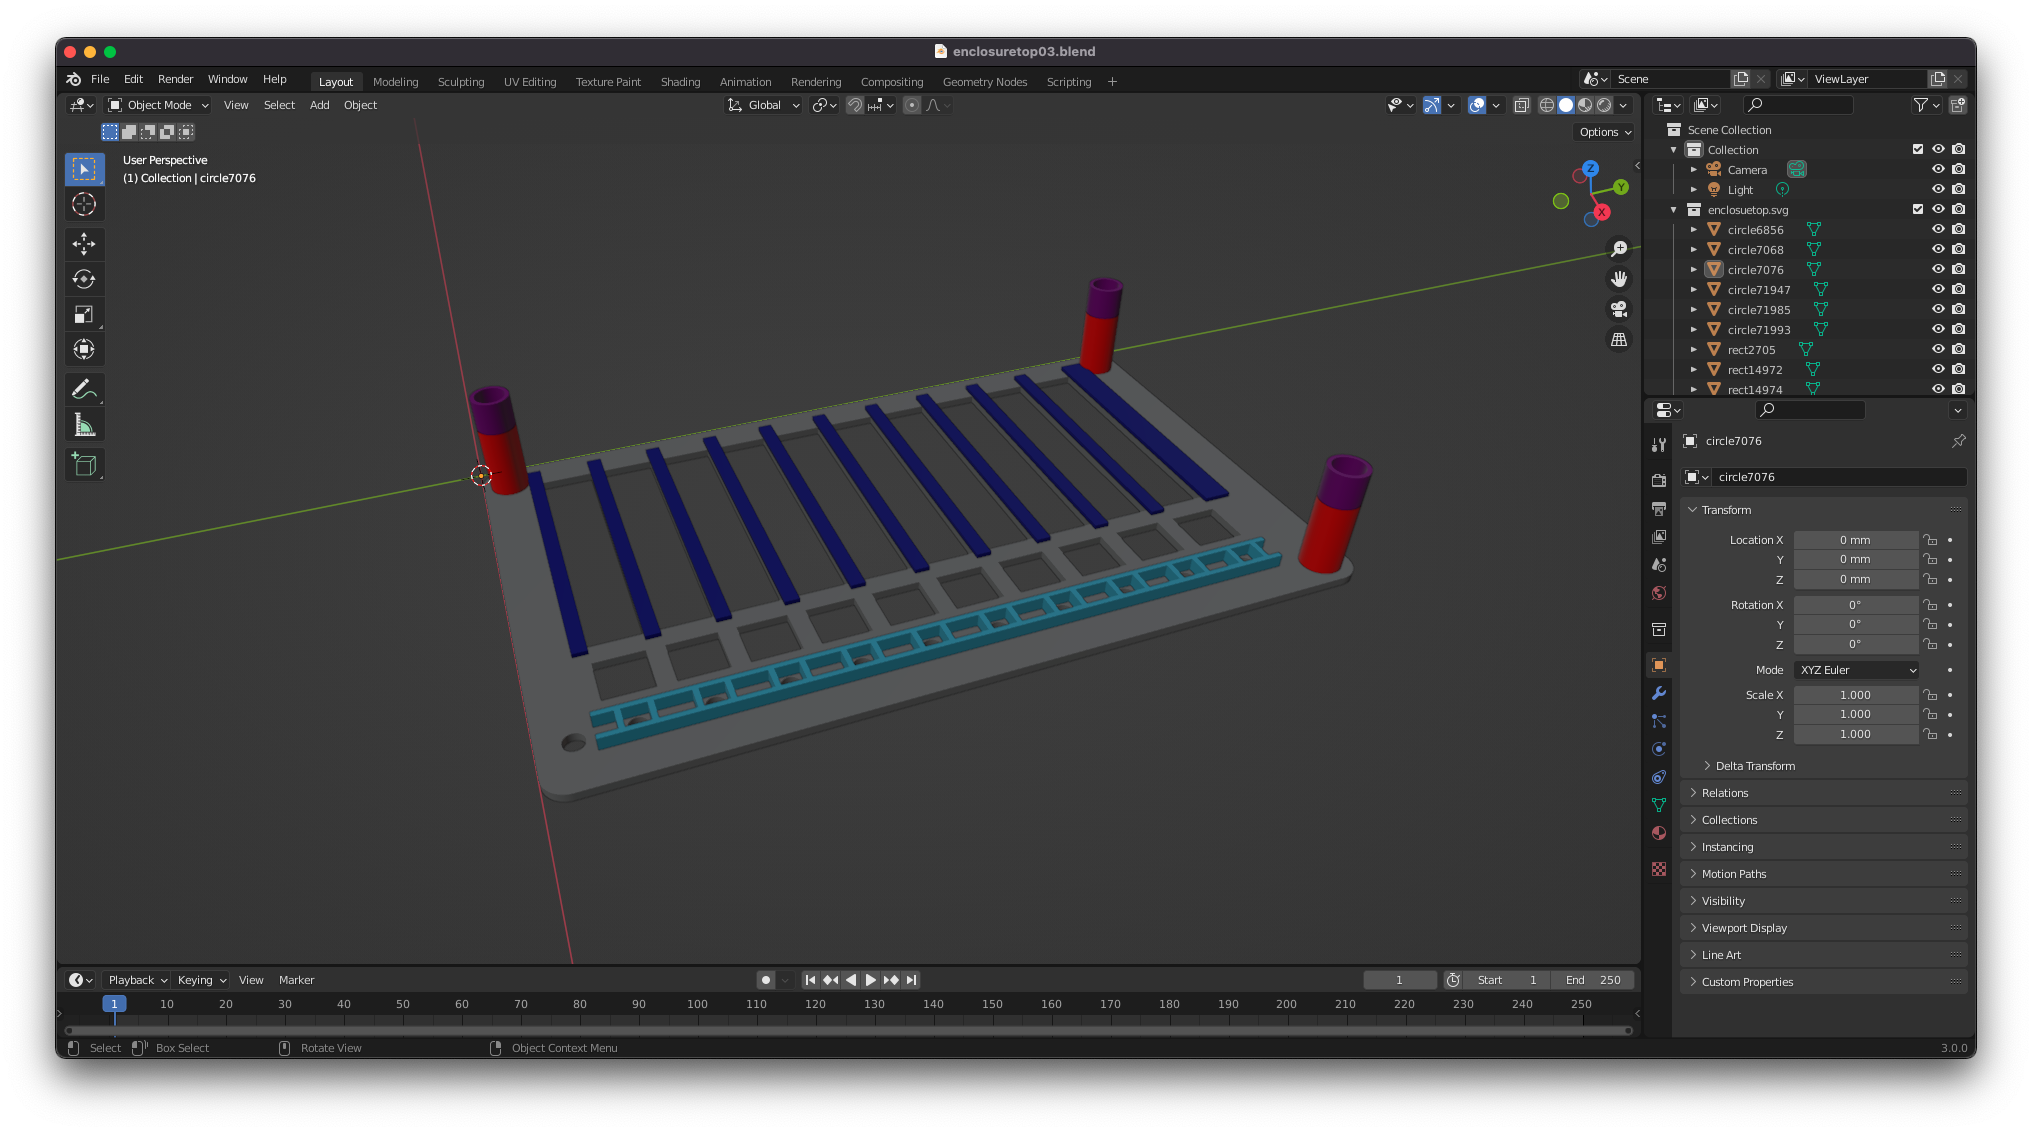 I 3D printed a 2 part case for the boards, with holes for standoffs to attach the board, screws to connect top and bottom, an ethernet port space, and place to mount a micro usb extension to accommodate the connections on the board going opposite directions. The back of the label area is a piece of black acrylic that with edge gaps so paper labels, adhesive labels, or dry erase markers can be used for the list items.
 Part 3: The Code
I’ve tried to keep my code as minimal and easy to read as possible. The example here is a website that connects to the board, with options to add, remove, and “in-process” any of the items. It’s pretty simple in it’s current form, as I plan to build this into a larger home automation project that doesn’t have it’s full website developed yet.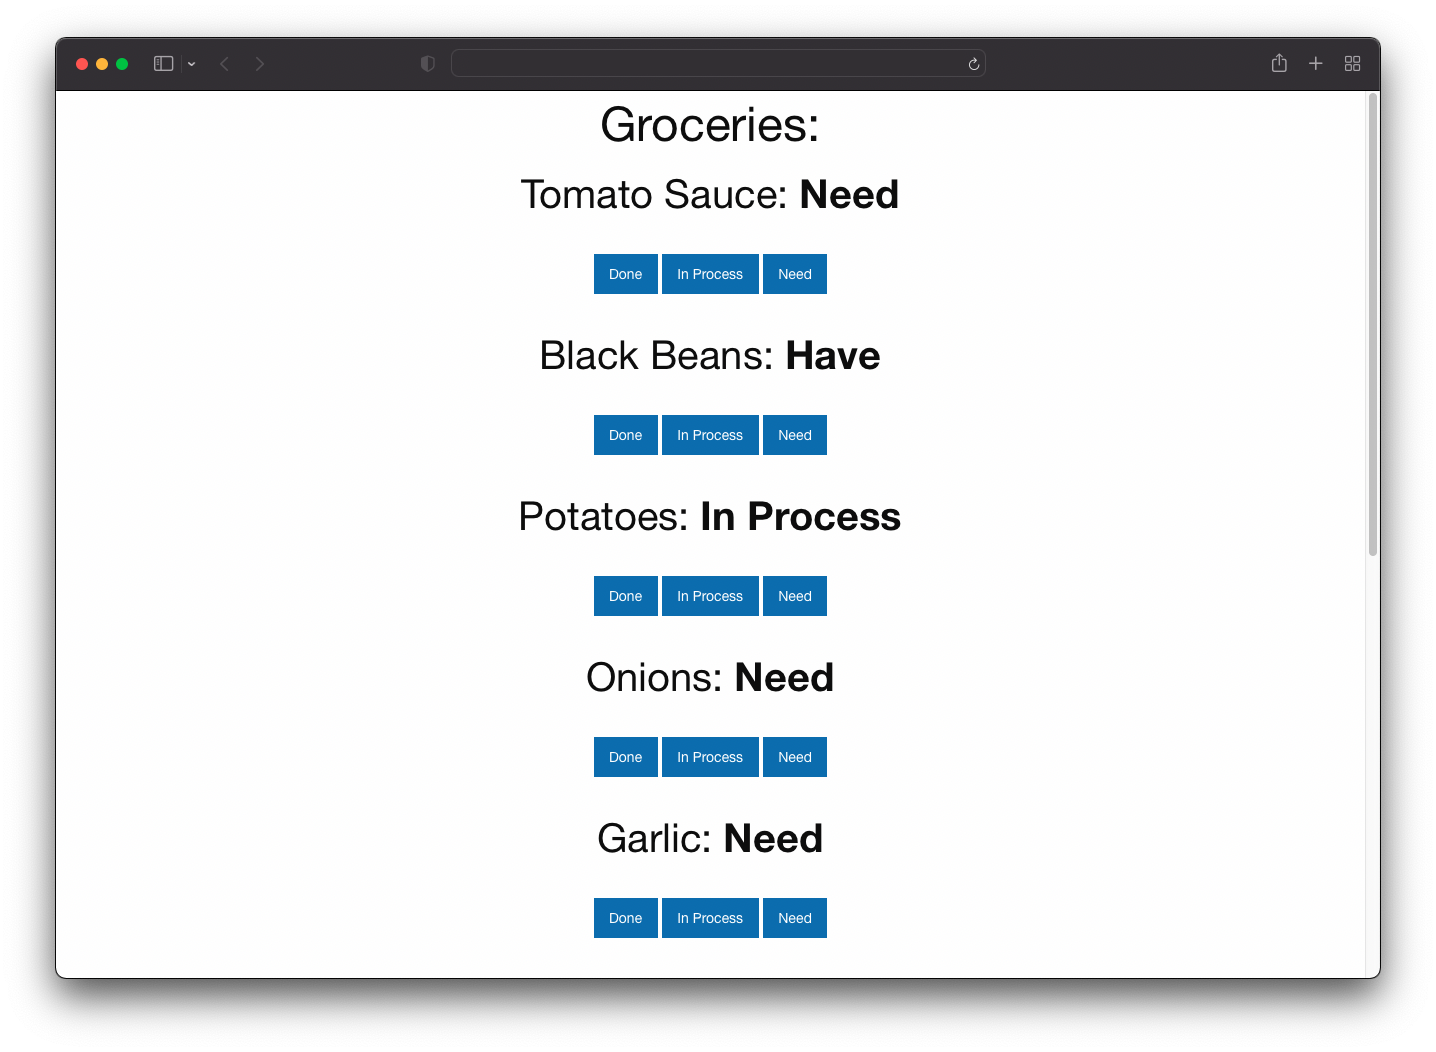 I used MicroPython to code the project, and I used Thonny to actually write/edit the code.
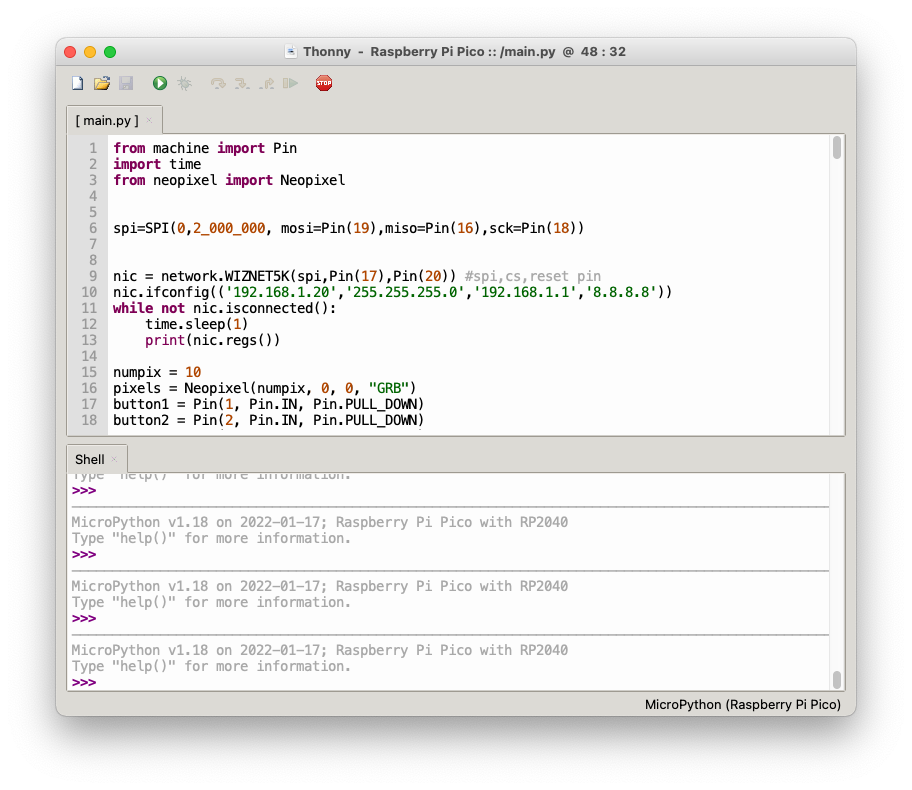 To add MicroPython to the board you need Thonny installed, then hold down the bootsel button while plugging the USB into your computer, and hold it until your Pico shows up as a usb drive. From there, select MicroPython at the bottom right of the Thonny window and it will handle the install. Once the board reboots you’re ready to start writing code.
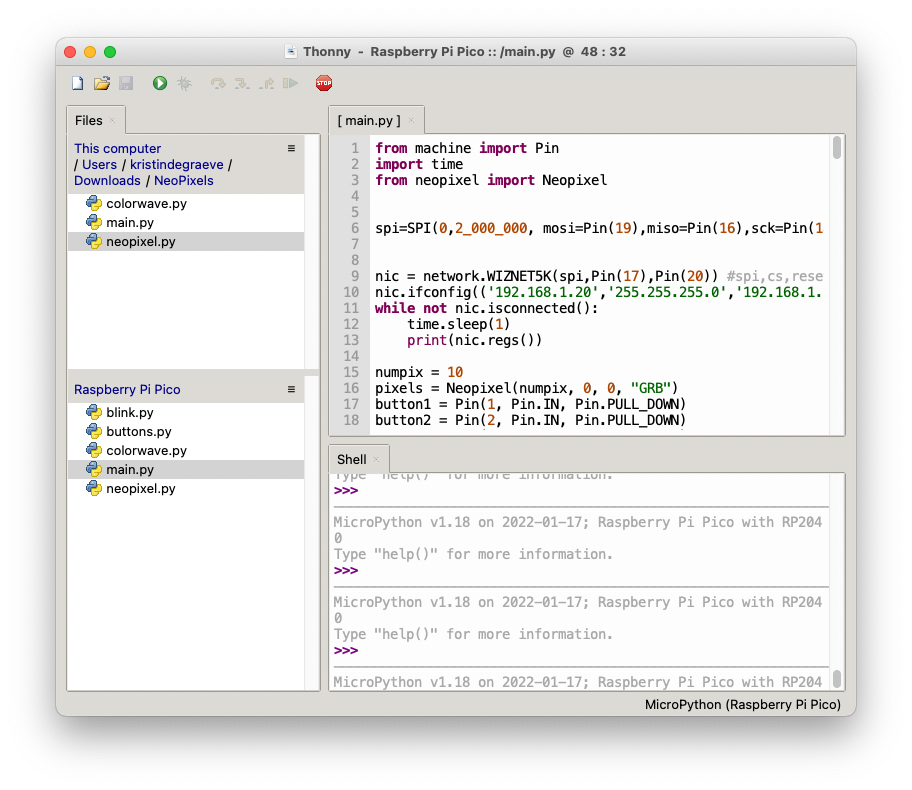 Use View>Files to copy the NeoPixels Library onto your Pico. Name your active file main.py so it runs automatically when your Pico is powered up. My code is linked below, but there’s a lot you could choose to do with 10 buttons, 10 leds, and ethernet. In Thonny if you go to Tools > Options > Interpreter you can check which port your pico is set to. I left mine on 'detect automatically' and it worked, but you may need to specifically set yours, especially if you are using the Wiznet Ethernet Hat on a Raspberry Pi Pico.
In this part the Pins need to be kept the same - those are hardwired into the ethernet port. You can't use them for anything else or your project won't function as intended. The rest of my main.py is just telling the LEDs and buttons how to talk each other and to the website. There are places I could have condensed it, but I left it verbose because I know I'll have to change it eventually and it will be easier for me to remember what I was doing this way. To see your website, enter 192.168.1.20 in the url bar. Interacting with the on screen buttons and device buttons should change both the led lights and the website, after you refresh it.nic = network.WIZNET5K(spi,Pin(17),Pin(20)) #spi,cs,reset pin
Code Example on GithubOnce the code is tested and working the way you want, all that’s left is to label it and install it where you’ll use it!
documents
Code
Push Button List Builder 
Schematics
Button Panel
W5100S Series Library
Hi technoplastique,
I’m Ron from WIZnet HK. Could I post your article to our WIZnet HK instagram account?
BTW, do you have a instagram account that I could tag you?
Best Regards,
Ron