Original : https://www.filipeflop.com/blog/tutorial-ethernet-shield-w5100/

CONFIGURE ETHERNET SHIELD W5100
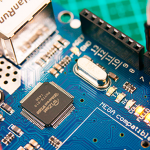
By attaching the Arduino Ethernet Shield W5100 to your Arduino, a simple network cable is enough so that, in a few minutes, you can start monitoring the status of sensors, switches and other devices from your computer or cell phone browser. This shield is based on the Wiznet W5100 ethernet chip ( datasheet ) and provides an IP address compatible with TCP and UDP protocols.
The first step in this tutorial to correctly set up your ethernet shield is to configure it with a valid IP address for your network. We are going to show you how to get the network information in Windows 7, but you can use the same principle for other operating systems.
Programming Arduino:
Change these parameters mentioned above according to your network configuration, save the program and load it on your Arduino. Remembering that the Ultrasonic library can be found at this link .
Sending Information Over the Network:
Attach the Arduino Ethernet Shield W5100 to your Arduino and connect it to a router or hub using a regular network cable. We are going to use the webserver built into the board to send the browser two information about the Arduino ports, one informing about the status (on/off) of a button connected to port 3, and another with information about the Ultrasonic Sensor HC-SR04 , connected to ports 6 (sensor trigger pin) and 7 (sensor echo pin):

To test how it works, open the browser on your computer and type in the address bar the IP you configured in the program. In our case 192.168.1.88 :


COMMENTS