
In this article, we will examine the creation and operation of a simple web server on the shield Nano V3 Ethernet Shield W5500. This example will allow you to understand the principle of operation of web servers on microcontrollers and get acquainted with the circuitry and new motherboards of ** RobotDyn ** company.
Equipment
In this experiment, we will need the following equipment:
Board Nano V3 Ethernet Shield W5500
Microcontroller RobotDyn Nano V3 (or compatible)
Development board (optional)
Micro USB cable
Ethernet cable
The assembly of the stand is very simple: just connect the board “sandwich” Nano V3 Ethernet Shield W5500 and RobotDyn Nano V3. Optionally, this assembly can be installed on a breadboard – this will add stability to the entire structure and make it possible to easily connect various peripherals for conducting experiments in the future.
*** Warning: pay attention to the wiring and the correct connection of the shield and the microcontroller board, otherwise the board and shield may fail. ***
Purpose of the experiment
In this lesson, we will create a simple web server and analyze in detail how it works. The interaction will be as follows: in the address bar of the browser, you enter IP address of your Arduino server, press Enter and on the web page you see the response of your server.
As an answer to the Arduino server, various information can be displayed, in our example we will display the inscription “** Analog port 0 is **” and then the current value of the zero analog port of the controller (A0). The inscription will look something like this:
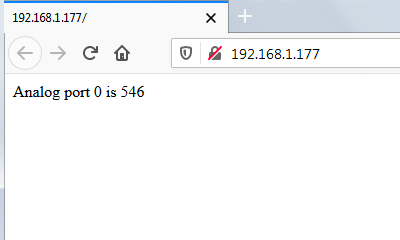
Despite the fact that this is only one line, but understanding the principle of its output, you will be able to create any arbitrarily complex web pages and even entire websites in the future.
Sketch
So, we collected the test bench, connected it to the computer and the local network, now it is time to start creating a web server sketch. First, we give the full text of the sketch, and then we will analyze its work in detail.
/*
Web server example
(based on standard example by David A. Mellis & Tom Igoe)
(c) 2019 RobotDyn
License: GNU GPL 2.1

A simple web server that shows the value of the analog input pin.

Circuit:
* [Nano V3 Ethernet Shield W5500](https://robotdyn.com/nano-v3-ethernet-shield-w5500-v2.html) (use D10, D11, D12, D13 pins)
* [RobotDyn Nano V3](https://robotdyn.com/nano-v3-atmega-328-usb-ttl-ch340g-micro-usb.html)
* Analog input attached to pin A0
*/

// SPI library
#include <SPI.h>

// Ethernet2 library (support WIZnet W5500 chip)
#include <Ethernet2.h>

// MAC address
byte mac [] = {0xDE, 0xAD, 0xBE, 0xEF, 0xFE, 0xED};

// IP address
IPAddress ip (192, 168, 1, 177);

// Ethernet server on 80 port (default for HTTP)
EthernetServer server (80);

const byte analogPort = 0;

// Setup

void setup() {
// Initialize Serial port
Serial.begin(115200);

// Print start message
Serial.println("Start WEB Server example ...");

// Start Ethernet connection
Ethernet.begin(mac, ip);

// Start HTTP server
server.begin();

// Print IP address
Serial.print("Server at:");
Serial.println(Ethernet.localIP());
} // setup ()

// Functions

void responseHeader(EthernetClient cl) {
// send a standard http response header
cl.println("HTTP/1.1 200 OK");
cl.println("Content-Type: text/html");
cl.println("Connection: close"); // connection close after response
cl.println();
}

void sendPage(EthernetClient cl) {
// Get value of analog input pin
int value = analogRead(analogPort);

// Send Web-page
cl.println("<!DOCTYPE HTML>");

cl.println("<html>");

cl.print("Analog port ");
cl.print(analogPort);
cl.print(" is ");
cl.println(value);

cl.println("</html>");
}

// Server Works

void serverWorks() {
// listen for incoming clients
EthernetClient client = server.available();
if (client) {
Serial.println();
Serial.println("New client");

// an http request ends with a blank line
boolean currentLineIsBlank = true;

while (client.connected()) {
if (client.available()) {

// read character from client
char c = client.read();

// and print to Serial
Serial.write(c);

// if you've gotten to the end of the line (received a newline character)
// and the line is blank,
// the http request has ended, so you can send a reply
if (c == 'n' && currentLineIsBlank) {
// Response (send Web-page)
responseHeader(client);
sendPage(client);
break;
}

if(c == 'n') {currentLineIsBlank = true;}// starting a new line
else if (c != 'r') {currentLineIsBlank = false;} // gotten a character on the current line
} // client.available()
} // client.connected()

delay(1); // give browser time to receive data
client.stop(); // close connection
Serial.println("Client disconnected");
} // if (client)
} // serverWorks()

// Loop

void loop() {
serverWorks();
}
Despite of the sketch seeming large and complicated, after further analysis of its work it will become very clear.
COMMENTS