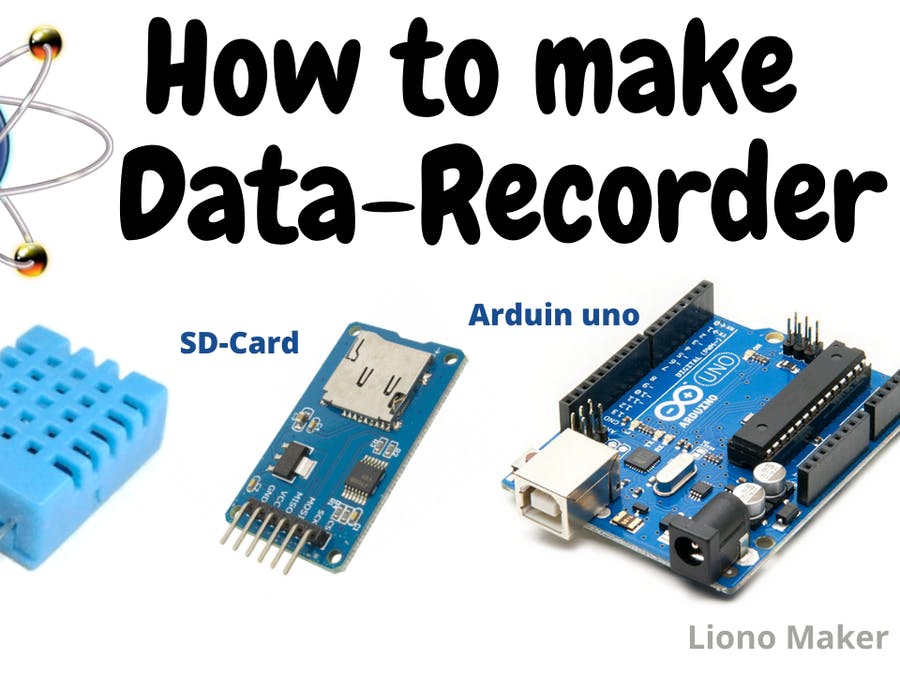
Data-Logger :
A data logger (also data-logger or data recorder) is an electronic device that records data over time with a built in instrument or sensor or via external instruments and sensors. They generally are small, battery powered, portable, and equipped with a microprocessor, internal memory for data storage, and sensors. Some data loggers interface with a personal computer, and use software to activate the data logger and view and analyze the collected data, while others have a local interface device (keypad, LCD) and can be used as a stand-alone device.
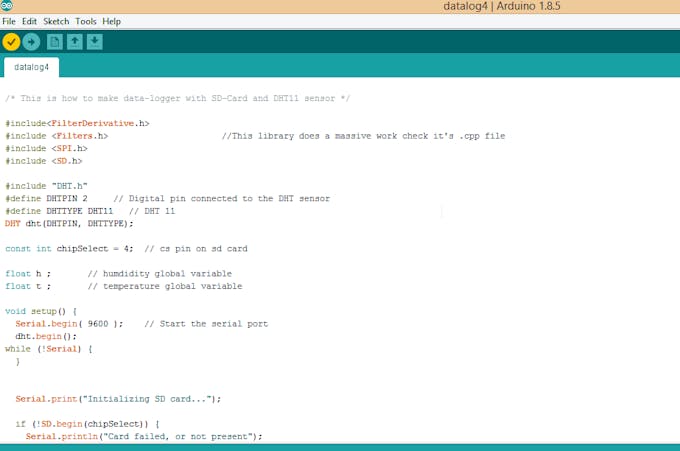
In this project, I’m using data-logger with SD-Card to store data in SD-Card with Arduino.
DHT11 :
DHT11 is a low-cost digital sensor for sensing temperature and humidity. This sensor can be easily interfaced with any micro-controller such as Arduino, Raspberry Pi etc… to measure humidity and temperature instantaneously. DHT11 humidity and temperature sensor is available as a sensor and as a module. The difference between this sensor and module is the pull-up resistor and a power-on LED. DHT11 is a relative humidity sensor. To measure the surrounding air this sensor uses a thermostat and a capacitive humidity sensor.
working of DHT11:
DHT11 sensor consists of a capacitive humidity sensing element and a thermistor for sensing temperature. The humidity sensing capacitor has two electrodes with a moisture holding substrate as a dielectric between them. Change in the capacitance value occurs with the change in humidity levels. The IC measure, process this changed resistance values and change them into digital form.
For measuring temperature this sensor uses a Negative Temperature coefficient thermistor, which causes a decrease in its resistance value with increase in temperature. To get larger resistance value even for the smallest change in temperature, this sensor is usually made up of semiconductor ceramics or polymers.
The temperature range of DHT11 is from 0 to 50 degree Celsius with a 2-degree accuracy. Humidity range of this sensor is from 20 to 80% with 5% accuracy. The sampling rate of this sensor is 1Hz .i.e. it gives one reading for every second. DHT11 is small in size with operating voltage from 3 to 5 volts. The maximum current used while measuring is 2.5mA.
DHT11 sensor has four pins- VCC, GND, Data Pin and a not connected pin. A pull-up resistor of 5k to 10k ohms is provided for communication between sensor and micro-controller.
The module (Micro SD-Card Adapter) is a Micro SD card reader module, through the file system and the SPI interface driver, SCM system to complete the file read and write Micro SD-card. Arduino users can directly use the Arduino IDE comes with an SD-card library card to complete the initialization and read.
Step 1:

Fritzing Software and Schematic:
In this tutorial, we are using fritzing software to make our project. this software is widely used in all over the world by creators.
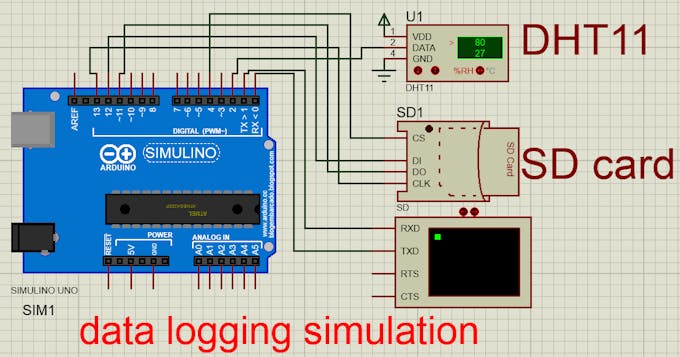
we are using DHT11 and Micro SD-Card Module to make our circuit diagram with Arduino UNO.
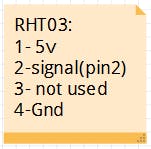
DHT 11 sensor has 4 or three legs which are being used. here is the detail of how to interface temperature and humidity sensor with Arduino UNO.
/*————————————————————————————————————————————
Arduino UNO: DHT11 Sensor:
GND GND
5-Volt 5-Volt
Pin#2 Signal
N/A not used ( 4th pin of the sensor if available)
/*————————————————————————————————————————————*/
weare using Micro SD-Card Module with Arduino UNO and DHT11.
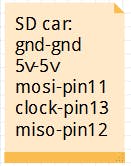
SD Card Module has total 6 pin, here is details of how to interface Micro SD-Card Module With Arduino UNO.
/*——————————————————————————————————————————————-
Arduino UNO: Micro SD-Card Module:
GND GND
5-Volt 5-Volt
pin 13 clock pin
pin 12 MISO
pin 11 MOSI
pin 4 CS (define in Arduino Coding)
———————————————————————————————————————————————*/
Step 2:
Simulation in Proteus:
In this tutorial, we are using Proteus Software to Simulate our project (data-logger).
The Proteus Design Suite is unique in offering the ability to co-simulate both high and low-level micro-controller code in the context of a mixed-mode SPICE circuit simulation. this software is Widely used in various creative projects. for example Proteus is used to make circuit diagram and professional PCB. and many other objectives it has. Proteus Software is also used to simulate circuits e.g. simulations with sensors and microcontrollers, and Arduino family also.
In this tutorial, we are using SD card and DHT11 to make a data logger or data recorder.
how to start Simulations:
Firstly, we have to make our Circuit diagram and then write our Arduino coding(given below) . after writing the Arduino coding we have to make a “hex file ” (given below) which is being used in Arduino UNO in Proteus Simulation.
how to upload hex file on Arduino UNO:
>Firstly, compile your Arduino coding in Arduino IDE. The second step is to make hex file, for this purpose go to “file” in Arduino IDE and select “Preferences” and then go to the “compilation”, select it. Click ok. Again Compile your Arduino Coding and copy the hex file from here as shown in my video.
>In Proteus Circuit diagram, Make a right click on Arduino UNO and then you will see new opening window, then select here “Edit Property”. select the file bar and “paste” here the Arduino Coding HEX file.
how to upload image file in SD-Card in Proteus:
Select your SD-Card in Proteus and right click on it and we will see new opening window, select here “edit property”. then go to the file bar and select 32gb card memory. copy the image file location from your computer paste it in file bar , then write slash and put the name of the file. this is the complete way to write file link here.
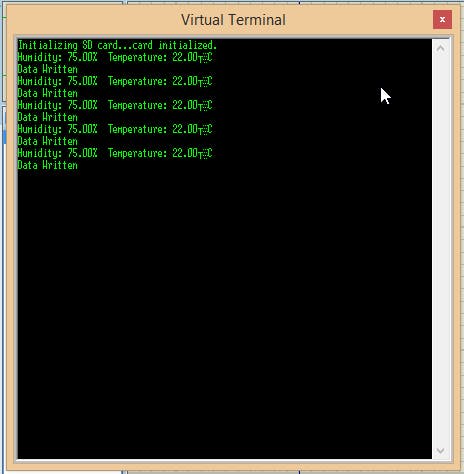
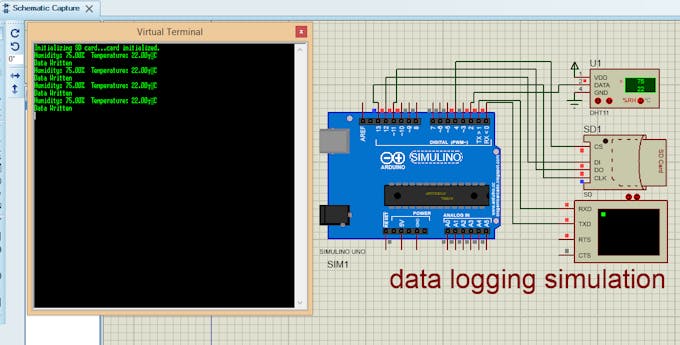
after completing uploading hex file and image file on SD- card, we just to make sure there is no error in our circuit diagram. Click the “play” button in the left bottom on Proteus. your simulation has been started. as shown in the video. And shown in pictures.
Step 3:
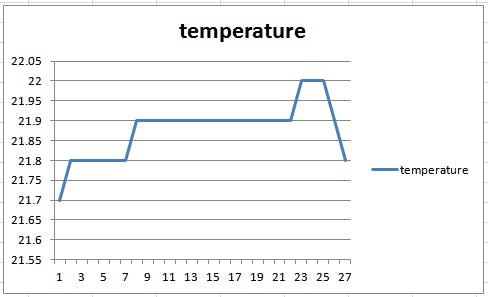
how to upload and make real time data graph in EXCEL:
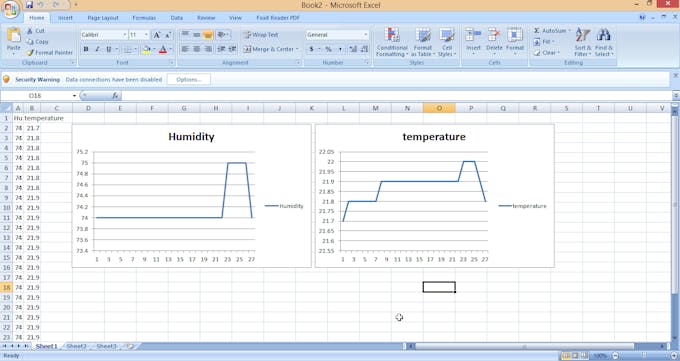
In this project we are using SD card to our data in “.txt” file. plug out your SD card from SD-Card module. and connect it with computer. we will see txt file having temperature and humidity real time data values getting through sensor.
> Open your EXCEL in your computer and then go to the “data”. then go to the “insert TXT”. select txt file in your computer and inject it in excel software.
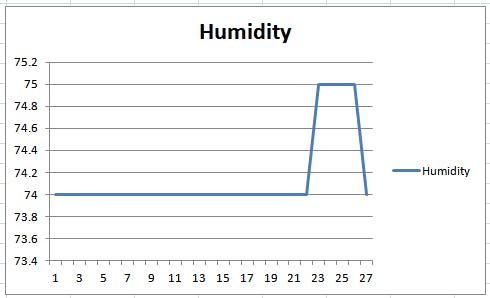
> select “insert” , then go to “line graph”. Make a line graph with excel. here we are making two graphs because we have two columns of humidity and temperature data values.
Step 4:
Download HEX file and image file and Arduino coding from rar:
I’m uploading “GGG.rar” file, which has
1- Txt file
2- Hex file
3- image file for SD-card
COMMENTS