Configuring the Arduino
The Arducam docs are a good place to start to get the Arducam module configured. To use my code, you will need to have the Arducam library installed in the library directory of your Arduino IDE environment. Make sure to uncomment the OV2640_MINI_2MP_PLUS lines in memorysaver.h, as instructed in the documentation. When I downloaded the library, this happened to be configured for my model by default.
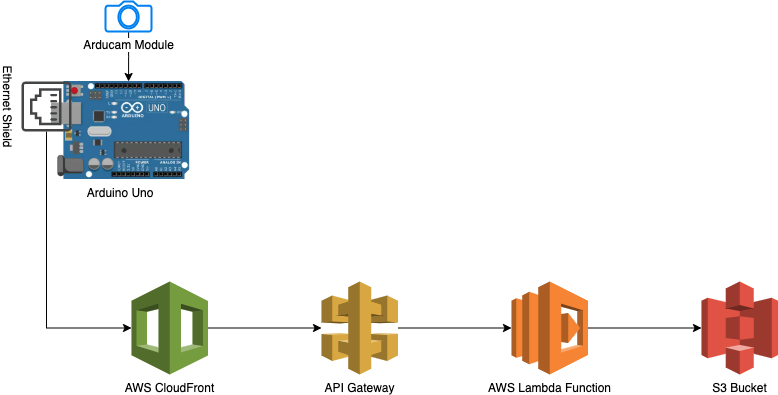
The code found in Arduino/StopMotion.ini configures the Ethernet client to send requests to port 80 of a CloudFront distribution that I set up. If you’ve already set up your own AWS environment, take the domain name of the CloudFront distribution you’ve created and replace the one at the top of my file, the variable char HOST_NAME[]. Once the configuration steps laid out above are followed, running your Arduino script should start sending POST requests to your CloudFront distribution, which will forward to the API Gateway, which will trigger the lambda, which will write the image bytes as a file to the S3 bucket. Set up your camera somewhere sturdy (I used a breadboard to give it a horizontal base), let it run for a bit, and you’ll amass a nice collection of images in the S3 bucket to make a stop motion out of. 

COMMENTS