Original : https://github.com/greenthegarden/RelayduinoMqttController
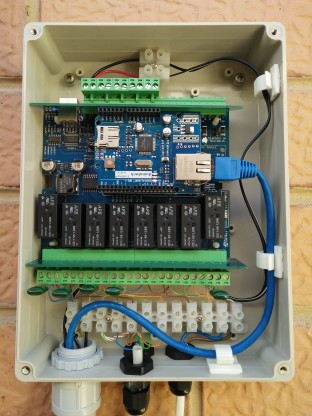
An Ocean Controls KTA-223 Relayduino with an ethernet shield installed.
In addition, an MQTT broker is required to running and accessible from the Arduino.
Example code is included, for openHAB and Python, to generate the required MQTT messages to control the relays and monitor inputs.
Configuration
The MQTT broker address is required to be defined within the source code. Set the address on line 7 of file mqttConfig.h.
Compiling code
The project is structured for use with both PlatformIO and the Arduino IDE.
PlatformIO
If using PlatformIO, the external libraries used in the project will be automatically added.
Arduino IDE
When using the KTA-223 with the Arduino IDE select “Arduino Duemilenove w/ ATmega328” from the “Tools->Board” menu.
In addition, the following libraries are required
Uploading Code
When uploading code to the Relayduino ensure the “AUTO” jumper is installed on the PCB.
Operation
In order to make use of the program, MQTT structured messages must be generated.
To control each relay a messaged is required with the topic
relayduino/control/relay
and payload in the form x,y, where
xis the relay number (1 to 8)yis either0for off or an integer to specify the duration, in minutes, the relay should be on for.
For example to switch relay 2 on for 10 minutes, a message in the following form is used
relayduino/control/relay 2,10
Once the relay control message is received by the Arduino the relevant relay is switched on, and then a timer set to switch it off. The use of a timer, controlled by the Arduino, rather than external source, is used to ensure the relay is switched off even if the connection to the MQTT broker is lost.
On the change of state of a relay, a status message is published by the Arduino, with the topic
relayduino/status/relay
and payload, in the form x,y, where
xis the relay number (1 to 8)yis either0or1to signify whether the relay is off or on, respectively.
Data from the analog and digital KTA-223 inputs are published using the following MQTT topics
relayduino/input/analog
relayduino/input/opto
Other status messages are generated for reliability. See the file mqttConfig.h for details.
COMMENTS