RelayshieldMqttController

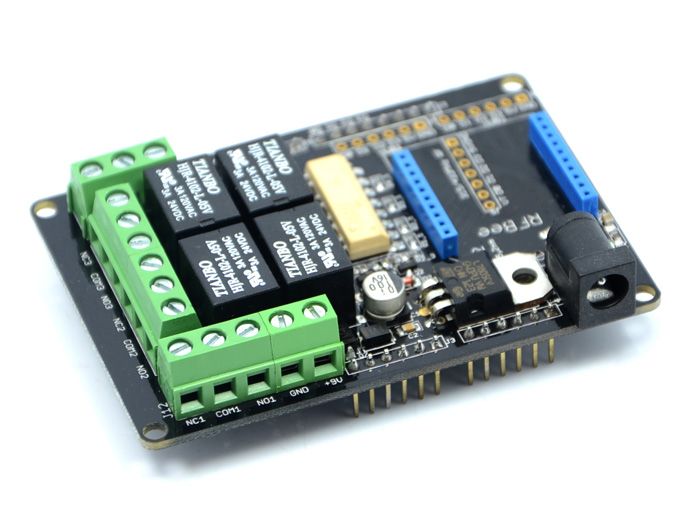
An Arduino project to control a Seeedstudio Relay shield V1.0 via MQTT.
ORIGINAL POST
By Philip Cutler
components
Hardware Components
Relayshield
X 1
Seeed
Arduino Ethernetshield
X 1
Software Apps and online services
NetEEPROM
PubSubClient
MemoryFree
details

httpsstatics3.seeedstudio.comimagesproductrelayshieldb1s.jpg

Original : https://github.com/greenthegarden/RelayshieldMqttController

An Arduino project to control a Seeedstudio Relay shield V1.0 via MQTT.

Requirements

An Arduino UNO compatible board with ethernet, for example a Freetronics EtherTen, or a UNO board along with an ethernet shield, is required to host the code.

In addition, an MQTT broker is required to running and accessible from the Arduino.

Example code is included in extras, for openHAB and Python, to generate the required MQTT messages to control the relays.

Configuration

The code makes use of the NetEEPROM library to configure the MAC address of the Ethernet hardware. See the examples that accompany the library for how to set a MAC address. Utilising the library means the MAC address does not need to be defined in the code, allowing an IP address to be assigned automatically without code changes to multiple boards (assuming a DHCP server is available on network).

The MQTT broker address is required to be defined within the source code. Set the address on line 8 of file mqttConfig.h.

Compiling code

The project is structured for use with PlatformIO. If using PlatformIO, the external libraries used in the project will be automatically added.

To compile the code using the Arduino IDE the following additional libraries are required

Using the program

In order to make use of the program, MQTT structured messages must be generated.

To control each relay a messaged is required with the topic

relayshield/control/relay

and payload x,y, where

  • x is the relay number (1 to 4)
  • y is either 0 or 1 to switch the relay off or on, respectively.

For example to swich relay 2 on, a message in the following form is used

relayshield/control/relay 2,1

On the change of state of a relay, a status message is generated by the Arduino, with the topic

relayshield/status/relay

and payload, in the format x,y, where

  • x is the relay number (1 to 4)
  • y is either 0 or 1 to signifity whether the relay is off or on, respectively.

Other status messages are generated for reliability. See the file mqttConfig.h for details.
documents
Code
RelayshieldMqttController

COMMENTS

Please Login to comment
  Subscribe  
Notify of