![]()
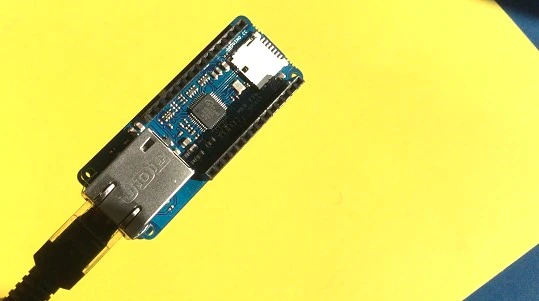
Sketch Differences between WiFi and Wired Ethernet example
There’s not that much to change. Where I used the WiFI Arduino libraries in the previous post, this time I use the Ethernet libraries.
The connection object is different:
But the SSL library accept it just the same as a WiFI connection (hooray for C++).
The biggest change was in the getTime() method in the WiFi example. A reasonable exact time is needed to validate the certificates.
In the WiFi example, the sketch uses the WiFi lib’s getTime() command. But the Ethernet library doesn’t have such a function.
Fortunately for us, there’s an UdpNtpClient example for Ethernet. A sketch that gets the current time from the time.nist.gov NTP server.
I used the core of that example to retrieve the time. I’ve also copied the Ethernet connectivity approach from it.

In the code below, you can see the full sketch, with connection to Amazon Web Services and the time server.
The example posts an MQTT message every 5 seconds (to arduino/outgoing) and also subscribes to a topic (arduino/incoming).
/*
AWS IoT ETH
This sketch securely connects to an AWS IoT using MQTT over Ethernet.
It uses a private key stored in the ATECC508A and a public
certificate for SSL/TLS authetication.
It publishes a message every 5 seconds to arduino/outgoing
topic and subscribes to messages on the arduino/incoming
topic.
*/
#include <ArduinoBearSSL.h>
//#include <ArduinoECCX08.h>
#include <ArduinoMqttClient.h>
#include <SPI.h>
#include <Ethernet.h>
#include <EthernetUdp.h>
#include “arduino_secrets.h”
/////// Enter your sensitive data in arduino_secrets.h
const char broker[] = SECRET_BROKER;
const char* certificate = SECRET_CERTIFICATE;
// Enter a MAC address for your controller below.
// Newer Ethernet shields have a MAC address printed on a sticker on the shield
byte mac[] = { 0xDE, 0xAD, 0xBE, 0xEF, 0xFE, 0xED };
// time service
unsigned int localPort = 8888; // local port to listen for UDP packets
const char timeServer[] = “time.nist.gov”; // time.nist.gov NTP server
const int NTP_PACKET_SIZE = 48; // NTP time stamp is in the first 48 bytes of the message
byte packetBuffer[NTP_PACKET_SIZE]; //buffer to hold incoming and outgoing packets
// A UDP instance to let us send and receive packets over UDP
EthernetUDP Udp;
// Initialize the Ethernet client library
// with the IP address and port of the server
// that you want to connect to (port 80 is default for HTTP):
EthernetClient client;
BearSSLClient sslClient(client); // Used for SSL/TLS connection, integrates with ECC508
MqttClient mqttClient(sslClient);
unsigned long lastMillis = 0;
void setup() {
pinMode(4, OUTPUT);
digitalWrite(4, HIGH);
Ethernet.init(5); // MKR ETH shield
Serial.begin(115200);
while (!Serial);
// start Ethernet and UDP
if (Ethernet.begin(mac) == 0) {
Serial.println(“Failed to configure Ethernet using DHCP”);
// Check for Ethernet hardware present
if (Ethernet.hardwareStatus() == EthernetNoHardware) {
Serial.println(“Ethernet shield was not found. Sorry, can’t run without hardware. :(“);
} else if (Ethernet.linkStatus() == LinkOFF) {
Serial.println(“Ethernet cable is not connected.”);
}
// no point in carrying on, so do nothing forevermore:
while (true) {
delay(1);
}
}
Udp.begin(localPort);
// Set a callback to get the current time
// used to validate the servers certificate
ArduinoBearSSL.onGetTime(getTime);
// Set the ECCX08 slot to use for the private key
// and the accompanying public certificate for it
sslClient.setEccSlot(0, certificate);
// Optional, set the client id used for MQTT,
// each device that is connected to the broker
// must have a unique client id. The MQTTClient will generate
// a client id for you based on the millis() value if not set
//
// mqttClient.setId(“clientId”);
// Set the message callback, this function is
// called when the MQTTClient receives a message
mqttClient.onMessage(onMessageReceived);
}
void loop() {
if (!mqttClient.connected()) {
// MQTT client is disconnected, connect
connectMQTT();
}
// poll for new MQTT messages and send keep alives
mqttClient.poll();
// publish a message roughly every 5 seconds.
if (millis() – lastMillis > 5000) {
lastMillis = millis();
publishMessage();
}
}
unsigned long getTime() {
sendNTPpacket(timeServer); // send an NTP packet to a time server
unsigned long epoch = 0UL;
// wait to see if a reply is available
delay(1000);
if (Udp.parsePacket()) {
// We’ve received a packet, read the data from it
Udp.read(packetBuffer, NTP_PACKET_SIZE); // read the packet into the buffer
// the timestamp starts at byte 40 of the received packet and is four bytes,
// or two words, long. First, extract the two words:
unsigned long highWord = word(packetBuffer[40], packetBuffer[41]);
unsigned long lowWord = word(packetBuffer[42], packetBuffer[43]);
// combine the four bytes (two words) into a long integer
// this is NTP time (seconds since Jan 1 1900):
unsigned long secsSince1900 = highWord << 16 | lowWord;
Serial.print(“Seconds since Jan 1 1900 = “);
Serial.println(secsSince1900);
// now convert NTP time into everyday time:
Serial.print(“Unix time = “);
// Unix time starts on Jan 1 1970. In seconds, that’s 2208988800:
const unsigned long seventyYears = 2208988800UL;
// subtract seventy years:
epoch = secsSince1900 – seventyYears;
Serial.println(epoch);
}
return epoch;
}
// send an NTP request to the time server at the given address
void sendNTPpacket(const char * address) {
// set all bytes in the buffer to 0
memset(packetBuffer, 0, NTP_PACKET_SIZE);
// Initialize values needed to form NTP request
// (see URL above for details on the packets)
packetBuffer[0] = 0b11100011; // LI, Version, Mode
packetBuffer[1] = 0; // Stratum, or type of clock
packetBuffer[2] = 6; // Polling Interval
packetBuffer[3] = 0xEC; // Peer Clock Precision
// 8 bytes of zero for Root Delay & Root Dispersion
packetBuffer[12] = 49;
packetBuffer[13] = 0x4E;
packetBuffer[14] = 49;
packetBuffer[15] = 52;
// all NTP fields have been given values, now
// you can send a packet requesting a timestamp:
Udp.beginPacket(address, 123); // NTP requests are to port 123
Udp.write(packetBuffer, NTP_PACKET_SIZE);
Udp.endPacket();
}
void connectMQTT() {
Serial.print(“Attempting to MQTT broker: “);
Serial.print(broker);
Serial.println(” “);
while (!mqttClient.connect(broker, 8883)) {
// failed, retry
Serial.print(“.”);
delay(5000);
}
Serial.println();
Serial.println(“You’re connected to the MQTT broker”);
Serial.println();
// subscribe to a topic
mqttClient.subscribe(“arduino/incoming”);
}
void publishMessage() {
Serial.println(“Publishing message”);
// send message, the Print interface can be used to set the message contents
mqttClient.beginMessage(“arduino/outgoing”);
mqttClient.print(“{n”message”: “hello”,n”testdata”: “);
mqttClient.print(millis());
mqttClient.print(“n}”);
mqttClient.endMessage();
}
void onMessageReceived(int messageSize) {
// we received a message, print out the topic and contents
Serial.print(“Received a message with topic ‘”);
Serial.print(mqttClient.messageTopic());
Serial.print(“‘, length “);
Serial.print(messageSize);
Serial.println(” bytes:”);
// use the Stream interface to print the contents
while (mqttClient.available()) {
Serial.print((char)mqttClient.read());
}
Serial.println();
Serial.println();
}
Watch your AWS budget. The example sends a message every 5 seconds. It’s advised to not leave it running for long time, or to lower the frequency of messages to AWS significantly.

You can use the same content for the arduino_secrets.h file as in the previous blog.
Delete the WiFi settings. They are not needed in a wired setup.
Good luck!
COMMENTS