
Next step: we take the fork and connect PC/ plug in via Ethernet or WiFi.
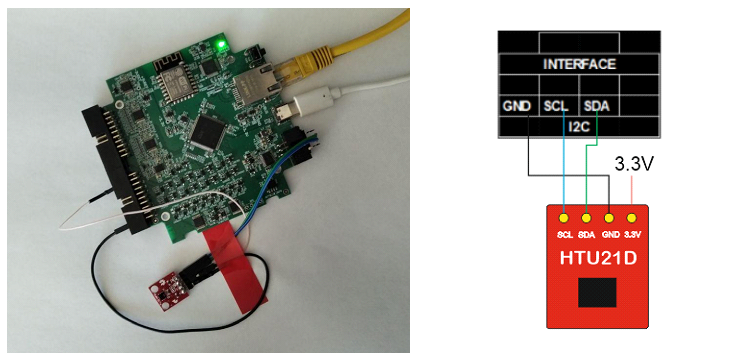
Connect the sensor as shown in the Figure.
• Address I2C 0x40
• Temperature read command 0xE3
• Moisture read command 0xE5
1. Start with I2C
Provide the I_MODE command value I2C
http://192.168.0.205/control?I_MODE=I2C2. Read the temperature in ASCII_HEX format. For this purpose we will use two commands.
The first G_REQ_RES_FORM is to specify the format of the query and the response in value ascii_hex.
The second I_I2C_WRITE_READ command is to generate a sequence I2C to the restart.
Value – consists of a few bytes.

Here ‘s the request we got
http://192.168.0.205/control?g_req_res_form=ascii_hex&i_i2c_write_read=40010003E33. Let’s read humidity data. Specified the format of the data and created a sequence for using the I2C. As with temperature data, but only the command for the sensor has changed.
http://192.168.0.205/control?g_req_res_form=ascii_hex&i_i2c_write_read=40010003E5Now we need to single out the temperature and humidity data we need. For temperature and humidity, the package is arranged in the same way and does not depend on the data bytes.
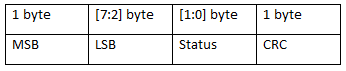
For temperature
Stemp – sensor data, n – number of bits of readings
For humidity
Overall as a result we received the following sensor readings
Temperature: 25.89 ℃
Relative humidity: 78%
We turn on the I2C on the interface output by hitting “init I2C” button. And we use “read temperature and RH” button to send a command so we can immediately get temperature and humidity readings.
We can also upload a page to Fork and ask directly from there. To do this, you will need to change one line in the code.
var url_path 'http://192.168.0.205/
to
var url_path '/';http://192.168.0.205/file_managerhttp://192.168.0.205/user_example_i2c.htmlFirst, we connect/plug in the fork module and create the target’s device
from forkapi.fork import Fork
dev1 = Fork('192.168.0.205')dev1.I2CEnable()addr = 0x4
data = b'\xE3
res = dev1.I2CWriteRead(addr,3,data)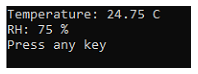
COMMENTS