
In today’s world where connected devices have become ubiquitous, the term Internet of Things (IoT) has become the de facto description for “widget that is connected to the internet.” While this glorified, camel case, acronym is beautiful in it’s own right there’s so much more to “internet connected devices” than what people realize. In this article I’d like to dive deeper into one of the most prevalent protocols used in IoT devices: the MQ Telemetry Transport (MQTT) protocol. We’ll briefly cover what it is, how it works, and what’s novel about it versus other technologies used out there. We’ll also walk through a comprehensive example using an Arduino device.
The What and Why of MQTT
In a typical client-server setup we have a provider (i.e. the devices themselves) that post sensor data to the server and a consumer that requests to view that sensor data from the server. MQTT is no different. It is a lightweight protocol used to communicate between devices. Devices will typically “publish” (i.e. send) data to an MQTT “broker” (or server) which is then kept to be served to other devices or web applications. Another device or web application will “subscribe” to that data set (i.e. request the data) from the MQTT broker and then the MQTT broker delivers that data to them. Think of this really as just a glorified web server with two major exceptions:
- The data packets are very lightweight (which improves speed, efficiency, and cost)
- MQTT can use other communication modes other than just the internet (e.g. Bluetooth)
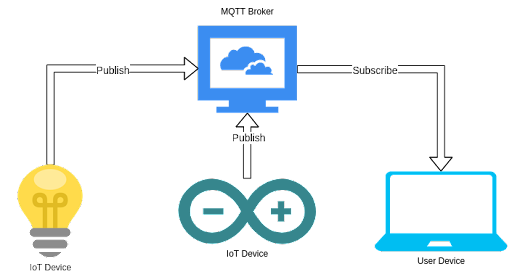 Figure 1: MQTT Broker with Devices
For the two above mentioned reasons MQTT has become a very popular protocol with IoT devices. Historically people would use HTTP POST/GET requests to achieve this form of device-server communication but it inhibited their ability to use other communication devices such as Bluetooth or ZigBee. Since MQTT is agnostic in that respect we can now have message passing capabilities within a mesh based network using MQTT without ever connecting to the internet
Getting Started with MQTT
There are many ways to get started with MQTT including designing a full, end-to-end solution. To make things simple we’ll be utilizing a free MQTT broker service provided by Adafruit in this example. This will enable us to focus on just the client side of the development process. To get started you’ll need the following:
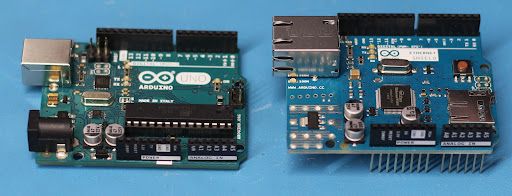
- Arduino Device (This example uses the Arduino Uno)
- Arduino shield supporting internet connectivity (i.e. Arduino Ethernet shield) or a Wifi based Arduino compatible device such as the ESP8266.
- Arduino IDE Software
- Account with Adafruit IO.
There are a few things we need to do first in order to set up our environment. Let’s first set up our hardware. I’m going to use an Arduino Uno and Arduino Ethernet Shield hooked up to my local network.
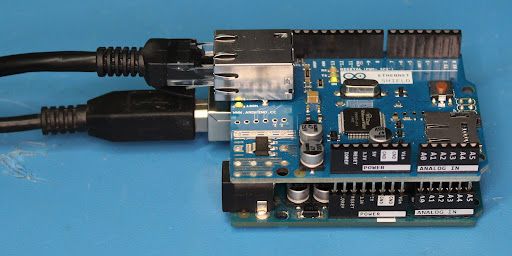
We’ll need to stack the Ethernet Shield on top of the Arduino and plug it into the network like so:
Once we’ve got our hardware configured let’s open the Arduino IDE and install the necessary libraries. Open up the Arduino IDE and navigate to Tools > Manage Libraries…

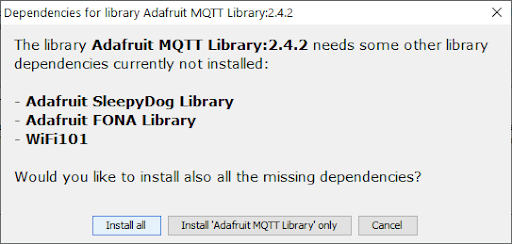
Search for the Adafruit MQTT Library and click install:
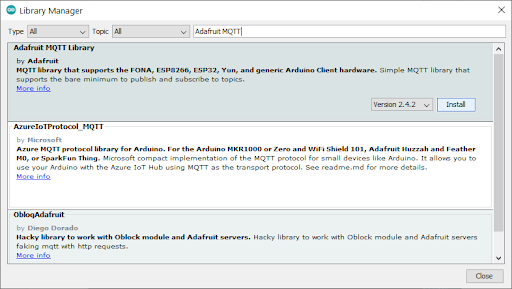
You will be prompted to install library dependencies as well. Go ahead and click on “Install all.”
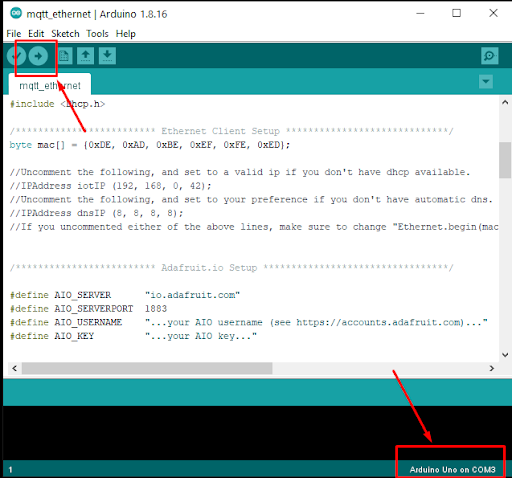
Once you’ve installed the support libraries you can open up an example by navigating to File > Examples > Adafruit MQTT Library > mqtt_ethernet.

At this point we need to take a pause and grab our credentials from our Adafruit IO account. Log into Adafruit IO and click on “My Key” at the top:

Now come back to your Arduino mqtt_ethernet sketch example and fill in the AIO_USERNAME and AIO_KEY fields with the “Username” and “Active Key” fields located in your Adafruit IO account. Ensure your device is connected and then click on Upload:
To view the status of the device (and to ensure it is connected to the MQTT broker) navigate to Tools > Serial Monitor. You should see an output that looks like this:

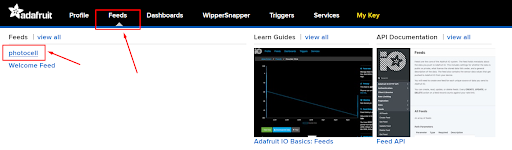
At this point we have confirmed that the data is successfully being sent to the MQTT broker. To have a look at the actual data on the server let’s go back to our Adafruit IO account and click of “Feeds” then click on “photocell”
We now get a live capture of the data that our Arduino is sending to the MQTT broker. We can also download historical data as well.
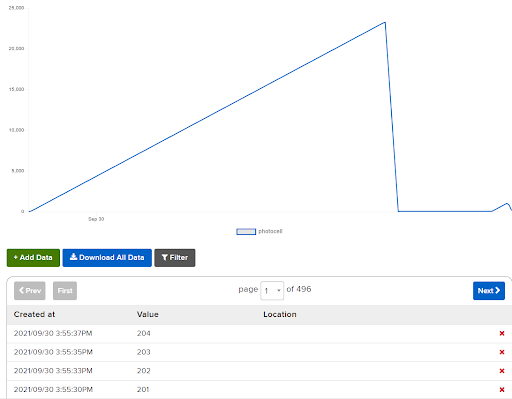
Congratulations! You have now set up an MQTT enabled device and published your data to an MQTT broker. Now take the next step by building your own custom sensors and publishing the data to your MQTT broker.
Conclusion
In this article we learned what MQTT is, why it’s used, and how to implement it on a microcontroller. We also demonstrated how to get started with a free MQTT broker service and view the data on their server. You should now be comfortable with starting your own Arduino sketch based on the example we used to publish your own sensor data to the MQTT broker and view it on the cloud.
COMMENTS