Hello Team!
Basically this post is a description what we showed on #NavTechDays in last demo(Link).
The idea was to get values from analog meter to cloud Business Central and use this values for some scenario. We used MQ3 gas analyzer as alcohol detector, Arduino Uno controller with Ethernet shield and bottle of wine as measurement material. Scenario was that drunk user can’t post sales orders (in other scenario user must be drunk 🙂 to post them).
Demo created just for fun. The core idea is to show you how to integrate your Business Central solution with hardware devices and get some metrics from them.
Needed hardware parts:
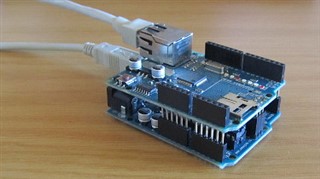
1. Arduino Uno controller with USB cable (you can use analog, price is ~5-7$)

2. Ethernet shield for Arduino Uno and ethernet cable (also 5-7$)

3. MQ3 meter with connection wires (3-5$)

4. Any alcohol for tests (price depends)

5. Connect Arduino Uno with ethernet shield next way:

6. Connect MQ3 pins to ethernet shield next way (MQ3 DOUT pin not used):
| MQ3 pin | Shield pin |
| +5V | 5V |
| AOUT | A0 |
| GND | GND |
7. Download and install Arduino IDE.
8. Connect Arduino USB and ethernet cables to your laptop.
9. Now, the hardest part 🙂 Open Windows Control panel – Network and Internet – Network connections

10. Open your network connection (WiFi) to internet and let your ethernet connection access

11. Open properties of Ethernet connection, IPv4 configuration and fill next data (ip could be different, this used for my demo):

12. Now, create Data table and page in Business Central:
table 50105 "Mq3 data"
{
    DataClassification = ToBeClassified;

    fields
    {
        field(1; EntryNo; Integer)
        {
            DataClassification = ToBeClassified;
        }
        field(2; "MQ3 value"; Integer)
        {
            DataClassification = ToBeClassified;
        }
        field(3; "Creation date"; Date)
        {
            DataClassification = ToBeClassified;
        }
        field(4; "Creation time"; Time)
        {
            DataClassification = ToBeClassified;
        }
    }

    keys
    {
        key(PK; EntryNo)
        {
            Clustered = true;
        }
    }

    trigger OnInsert()
    var
        Mq3: Record "Mq3 data";
    begin
        If Mq3.findlast() then
            EntryNo := Mq3.EntryNo + 1
        else
            EntryNo := 1;

        "Creation date" := DT2Date(CurrentDateTime());
        "Creation time" := DT2Time(CurrentDateTime());
    end;
}
page 50105 "MQ3 values"
{
PageType = List;
ApplicationArea = All;
UsageCategory = Lists;
SourceTable = "Mq3 data";
SourceTableView = order(descending);
layout
{
area(Content)
{
repeater(Group)
{
field(EntryNo; EntryNo)
{
ApplicationArea = All;
}
field("MQ3 value"; "MQ3 value")
{
ApplicationArea = All;
}
field("Creation date"; "Creation Date")
{
ApplicationArea = All;
}
field("Creation time"; "Creation Time")
{
ApplicationArea = All;
}
}
}
}
}13. Create API page:
page 50106 "MQ3"
{
    PageType = API;
    Caption = 'MQvalues';
    APIPublisher = 'ntd18';
    APIGroup = 'MQValues';
    APIVersion = 'beta';
    EntityName = 'MQValue';
    EntitySetName = 'MQValues';
    SourceTable = "Mq3 data";
    DelayedInsert = true;
    ODataKeyFields = EntryNo;

    layout
    {
        area(Content)
        {
            repeater(GroupName)
            {
                field("MQvalue"; "MQ3 value")
                {
                    Caption = 'mq';
                    ApplicationArea = All;
                }
            }
        }
    }
}
14. Create Setup table and page. Limit value used to detect drunk condition. Normally MQ3 shows from 30 to 60 units, but when it detects alcohol – it shows about 300-500 units. I used limit value = 100. Condition option sets should be user drunk or not to post sales orders.
table 50106 "MQ3 setup"
{
    DataClassification = ToBeClassified;

    fields
    {
        field(1; Entry; Integer)
        {
            DataClassification = ToBeClassified;
        }
        field(2; "Limit Value"; integer)
        {
            DataClassification = ToBeClassified;
        }
        field(3; Condition; Option)
        {
            OptionMembers = notdrunk,drunk;
            OptionCaption = 'Not drunk, Drunk';
        }
    }

    keys
    {
        key(PK; Entry)
        {
            Clustered = true;
        }
    }
}
page 50107 "Mq3 setup"
{
PageType = Card;
ApplicationArea = All;
UsageCategory = Administration;
Caption = 'MQ3 Setup';
SourceTable = "MQ3 setup";
layout
{
area(Content)
{
group(GroupName)
{
field(Condition; Condition)
{
ApplicationArea = All;
}
field(Name; "Limit Value")
{
ApplicationArea = All;
}
}
}
}
}15. And finally – event codeunit, which checks is user drunk (Last 5 entries should be upper or lower than Limit value in setup):
codeunit 50105 "MQ3 management"
{
    trigger OnRun()
    begin

    end;

    [EventSubscriber(ObjectType::Codeunit, Codeunit::"Sales-Post (Yes/No)", 'OnBeforeConfirmSalesPost', '', false, false)]
    local procedure MyProcedure()
    var
        MQ3Values: Record "Mq3 data";
        MQ3Setup: Record "MQ3 setup";
        LastEntryNo: Integer;
    begin
        MQ3Setup.get();
        If MQ3Values.FindLast() then
            LastEntryNo := MQ3Values.EntryNo;

        MQ3Values.SetRange(EntryNo, LastEntryNo - 5, LastEntryNo);

        case MQ3Setup.Condition of
            MQ3Setup.Condition::notdrunk:
                begin
                    MQ3Values.Setfilter("MQ3 value", '>%1', MQ3Setup."Limit Value");
                    If MQ3Values.FindFirst() then
                        Error(Error001);
                end;
            MQ3Setup.Condition::drunk:
                begin
                    MQ3Values.Setfilter("MQ3 value", '<=%1', MQ3Setup."Limit Value");
                    If MQ3Values.FindFirst() then
                        Error(Error002);
                end;
        end;

    end;

    var
        Error001: Label 'You are drunk, orders posting prohibited!';
        Error002: Label 'You are not drunk, orders posting prohibited!';

}
16. Compile and publish your App. Here you can download my AL project.
17. Second part of integration. Azure function. We need it to get values from Arduino and pass them to Business Central API. I couldn’t pass values directly from Arduion to BC by lots of reasons, maybe you’ll try to do it. Open Azure portal, create new function APP. Create new C# HTTP Trigger function with next code:

#r "Newtonsoft.Json"

using System.Net;
using System.Text;
using Microsoft.AspNetCore.Mvc;
using System.Net.Http;
using System.Net.Http.Headers;
using System.Text;
using Newtonsoft.Json;


public static async Task Run(HttpRequest req, ILogger log)
{
    string mq3 = req.Query["mq3"];
    var results = await SendArduinoMessage(mq3);

    return mq3 != null
        ? (ActionResult)new OkObjectResult($"Result is: {mq3}")
        : new BadRequestObjectResult("Please pass a mq-3 value on the query string");
}

public static async Task SendArduinoMessage(string mq3)
{
    using (var client = new HttpClient())
    {
        client.DefaultRequestHeaders.Add("Authorization", "Basic USER-WEB-SERVICE-KEY");
        Dictionary<string, string=""> dictionary = new Dictionary<string, string="">();
        dictionary.Add("MQvalue", mq3);

        string json = JsonConvert.SerializeObject(dictionary);
        var requestData = new StringContent(json, Encoding.UTF8, "application/json");

        var url = "https://api.businesscentral.dynamics.com/v1.0/YOUR-environment-ID/sandbox/api/ntd18/MQValues/beta/companies(your-company-GUID)/MQValues";
        var response = await client.PostAsync(url, requestData);
        var result = await response.Content.ReadAsStringAsync();

        return result;
    }
}</string,></string,>
API address used for cloud BC. For on-premise or NAV2018 it will be a little bit different. How to get API addresses and other API values you can read here.
Also you need to open your user card in BC and create Web Service key for your user.
18. Now environment is ready and we just need to upload program (Sketch) to Arduino. Open Arduino environment, press Tools and select your Arduino port.
19. Use this code for your sketch:
#include

int mq3_analogPin = A0;

byte mac[] = { 0x00, 0xAA, 0xBB, 0xCC, 0xDE, 0x02 }; //any values
byte ip[] = { 192, 168, 137, 171 }; //+1 to Ethernet IP
byte sdns[] = { 8, 8, 8, 8 };
byte gw[] = { 192, 168, 137, 170 }; //IP which used in p.11
byte subnet[] = { 255, 255, 255, 0 };


char server[] = "ntd18.azurewebsites.net"; //your AZ function app address
EthernetClient client;

int failedcounter = 0;
boolean lastconnected = false;

void setup()
{
  Serial.begin(9600);
  StartEthernet();
  delay(1000);
}

void loop()
{
  int mq3_value = analogRead(mq3_analogPin);
  //Serial.println(mq3_value);

  delay(5000); //Slow down the output.

  SendData(String(mq3_value));

  String c = client.readStringUntil('>');
  Serial.print(c);

  if (!client.connected() && lastconnected)
  {
    Serial.println("...Disconnected");
    Serial.println();
    client.stop();
  }
  if (failedcounter > 3)
  {
    StartEthernet();
    failedcounter = 0;
  }
  lastconnected = client.connected();
}

void StartEthernet()
{
  client.stop();

  Serial.println("Connecting Arduino to network...");
  Serial.println();
  delay(1000);  //Keeps the connection from freezing

  Ethernet.begin(mac, ip, sdns, gw, subnet);
  Serial.println(Ethernet.localIP());

  delay(1000);
}

void SendData(String data)
{
  if (client.connect(server, 80))
  {
    client.print("GET /api/Arduino?mq3="); //your AZ function name + mq3 parameter
    client.print(data);
    client.println(" HTTP/1.1");
    client.println("Host: ntd18.azurewebsites.net"); // your AZ function app name
    client.println();

    if (client.connected())
    {
      Serial.println("Connected");
      Serial.println();
      failedcounter = 0;
    }
    else
    {
      failedcounter++;
      Serial.println("Connection unsuccesful");
      Serial.println();
    }
  }
  else
  {
    failedcounter++;
    Serial.println("Connection unsuccesful");
    Serial.println();
  }
}
20. Upload sketch, run Tools – Monitor port. You’ll see next picture:

21. Put MQ3 meter near the alcohol – and you’ll see how values are changing:

22. Now open MQ3 Setup page and select Not drunk condition with Limit value = 100

23. Open Sales orders list and try to post any order (MQ3 meter should be near alcohol to imitate drunk user (obviously, you can just simply drink and breathe on it 🙂 )

24. Now remove meter from alcohol (stop breathe on it) , change Condition value and check that values in MQ3 values table are lower than Limit value


25. Now try to post the order:

🙂
26. You are really a hero if you read this, post a quite long. I think it’s a weirdest ever demo for Business Central, but it worth it. Hope you understood how to use Arduino’s http client to send data and you’ll use it in your projects.
COMMENTS