A0 ~ A5 can also be used as a digital port , serial port can also be used as soft . A4 and A5 for the IIC bus , A4 is SCL, A5 is SDA.
Steps:
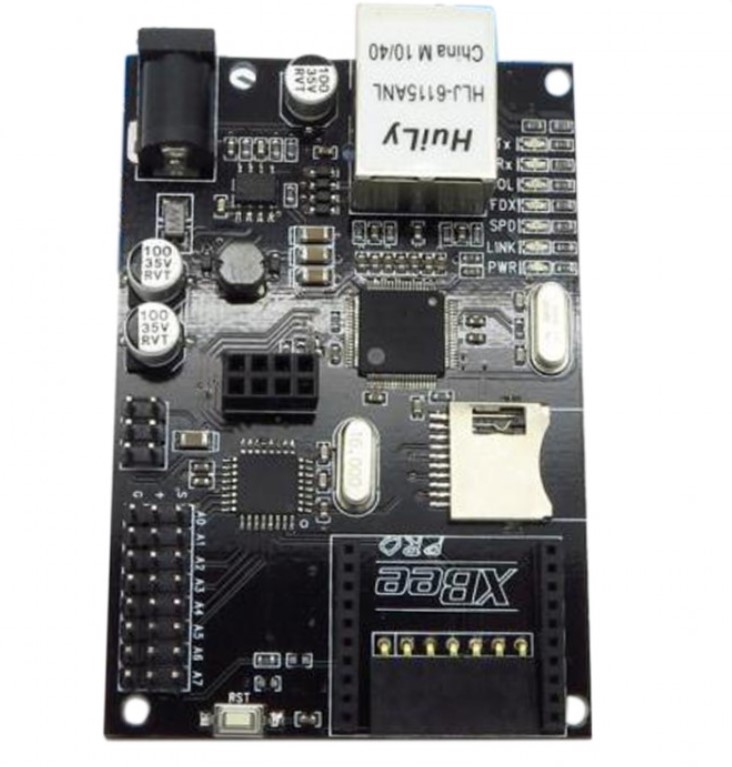
– For DIY, we will use these: IBoard main boars, nRF24L01+module, FOCA to seriel plate
– Other accessories : Mini USB cable X1,9V ~ 12V / 1A power adapter X1, networked cable X 1
– Step One: The nRF24L01 + module into a dedicated interface IBOARD MPU
– Step two: turn a string FOCA board into IBOARD the programming port side of the switch to 3.3v
PS: This FOCA turn itself comes reset pin serial board , firmware programming without manual operation. Can also be used as a base xbee serial communications
– Step four : Install the drivers for the hardware
1. Click ” My Computer” or “Computer “, open the “Administration”
2. Enter the ” Device Manager” , will appear in the port com “USB Serial Port”
3. Click on “USB Serial Port”, select “Update Driver Software”
4. Click the ” Browse my computer for driver software ”
5. Select your arduino IDE drivers directory under where , for example, my path is:D: arduino-1.0.4drivers
6. Click OK or Next to completeDriver Installation
– Step Five: IBOARD programming for firmware ( available free to modify the source code to implement the functions you want )
Libraries and demo Download:pan.baidu.com/s/1jGj09nS( Copied to the browser to download )
1. Unzip the downloaded library files to libraries directory of your arduino IDE folder inside
2. Open the arduino software , select Tools-> Serial Port-> COMX
3. COMX is in COM digital computer equipment manager FOCA ‘s
4. Select Tools-> Board->Arduino Duemilanove w / ATmega328
5. The gateway file ( available in Notepad to open ) inside the source code copied to the arduino program interface
6. In the code you will see APIKEY displayed as “xxxxxxxxxx”, this modification into your apikey ( in m.znck007.com registered account , enter the ” gateway ” to see )
7. Click on the left button on the first compilation , if the program is successfully compiled a second click on the download button to start downloading the program.
At this point, the gateway hardware and procedures have been completed .
Then , networking test:
1. Open the page using a mobile phone or pc intelligent control invasive passenger side m.znck007.com, and log in to your account
2. Click on ” home environment” and then click on the ” gateway status ” , if the current status is displayed Gateway is running , even to your account up .
You can also use a wireless module 433/315, xbee, zigbee , etc.
COMMENTS